• Skip to primary navigation
  • Skip to main content
  • Skip to primary sidebar
  • Skip to footer
Creativity to the Core

Creativity to the Core

Learning Makes Us Who We Are

  • Home
  • About
  • PD
  • Resources
    • Freebies
    • Recommendations
  • Blog
  • Book Now/Contact
  • Shop
  • TPT
  • Instagram
  • Facebook
  • Pinterest

Blog

Sound Wall Reminders

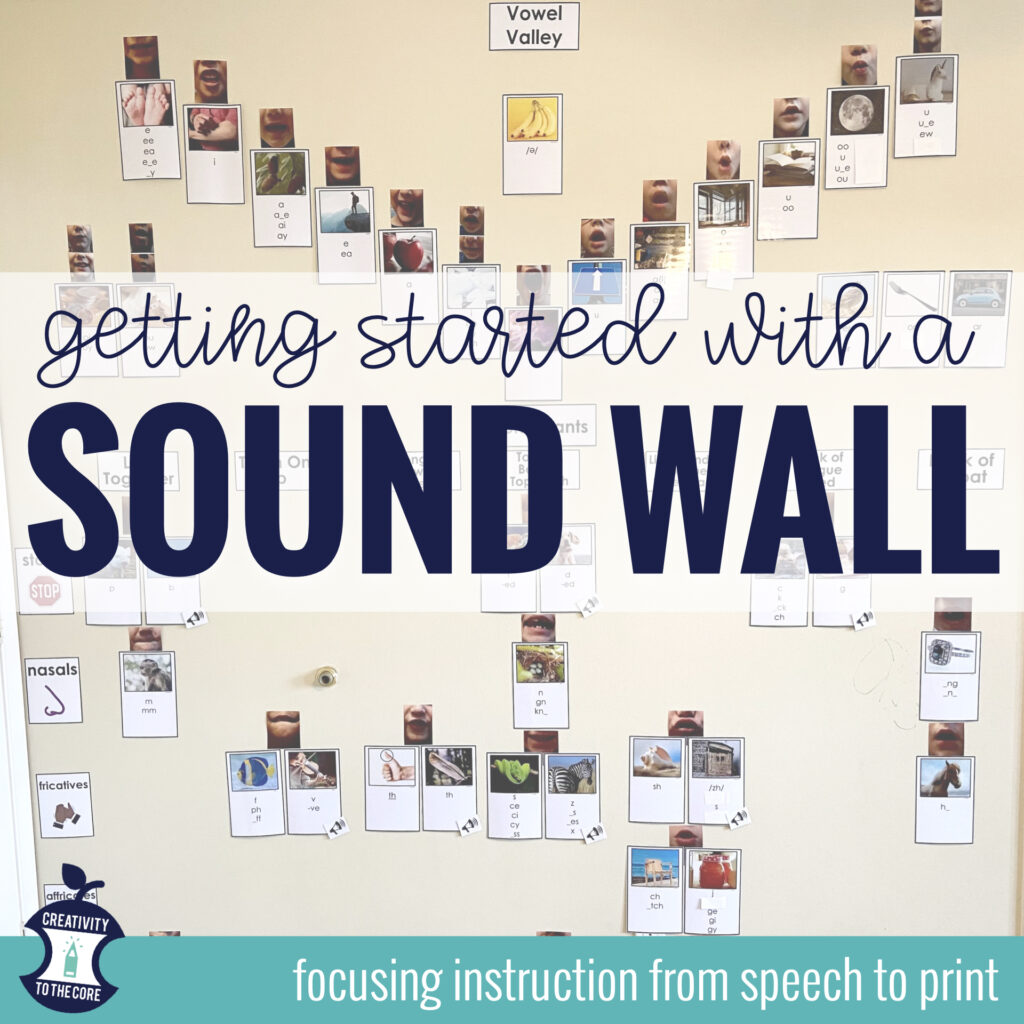
Sound Walls are growing increasingly popular with teachers around the globe. We hear the hype! Now, let’s get down to the specifics!


  1. Sound walls are NOT the Science of Reading. The Science of Reading is NOT sound walls.

Sound walls are one (of many!) possible ways to focus your instruction toward things that have been found to be most effective in research. Sound walls are a tool. Putting a sound wall up in your classroom does not guarantee you are “aligned with the science of reading”. Also, having a “science of reading aligned” classroom does not require a sound wall.

“The Science of Reading is a vast, interdisciplinary body of scientifically-based research about reading and issues related to reading and writing. This research has been conducted over the last five decades across the world, and it is derived from thousands of studies conducted in multiple languages. The science of reading has culminated in a preponderance of evidence to inform how proficient reading and writing develop; why some have difficulty; and how we can most effectively assess and teach and, therefore, improve student outcomes through prevention of and intervention for reading difficulties.” (https://www.whatisthescienceofreading.org)


  1. There is no formal research on the efficacy of sound walls in the classroom. There IS research to support components which lead us to use a sound wall. There are multiple studies that look into these components. I have linked just a few below. There is research on: 

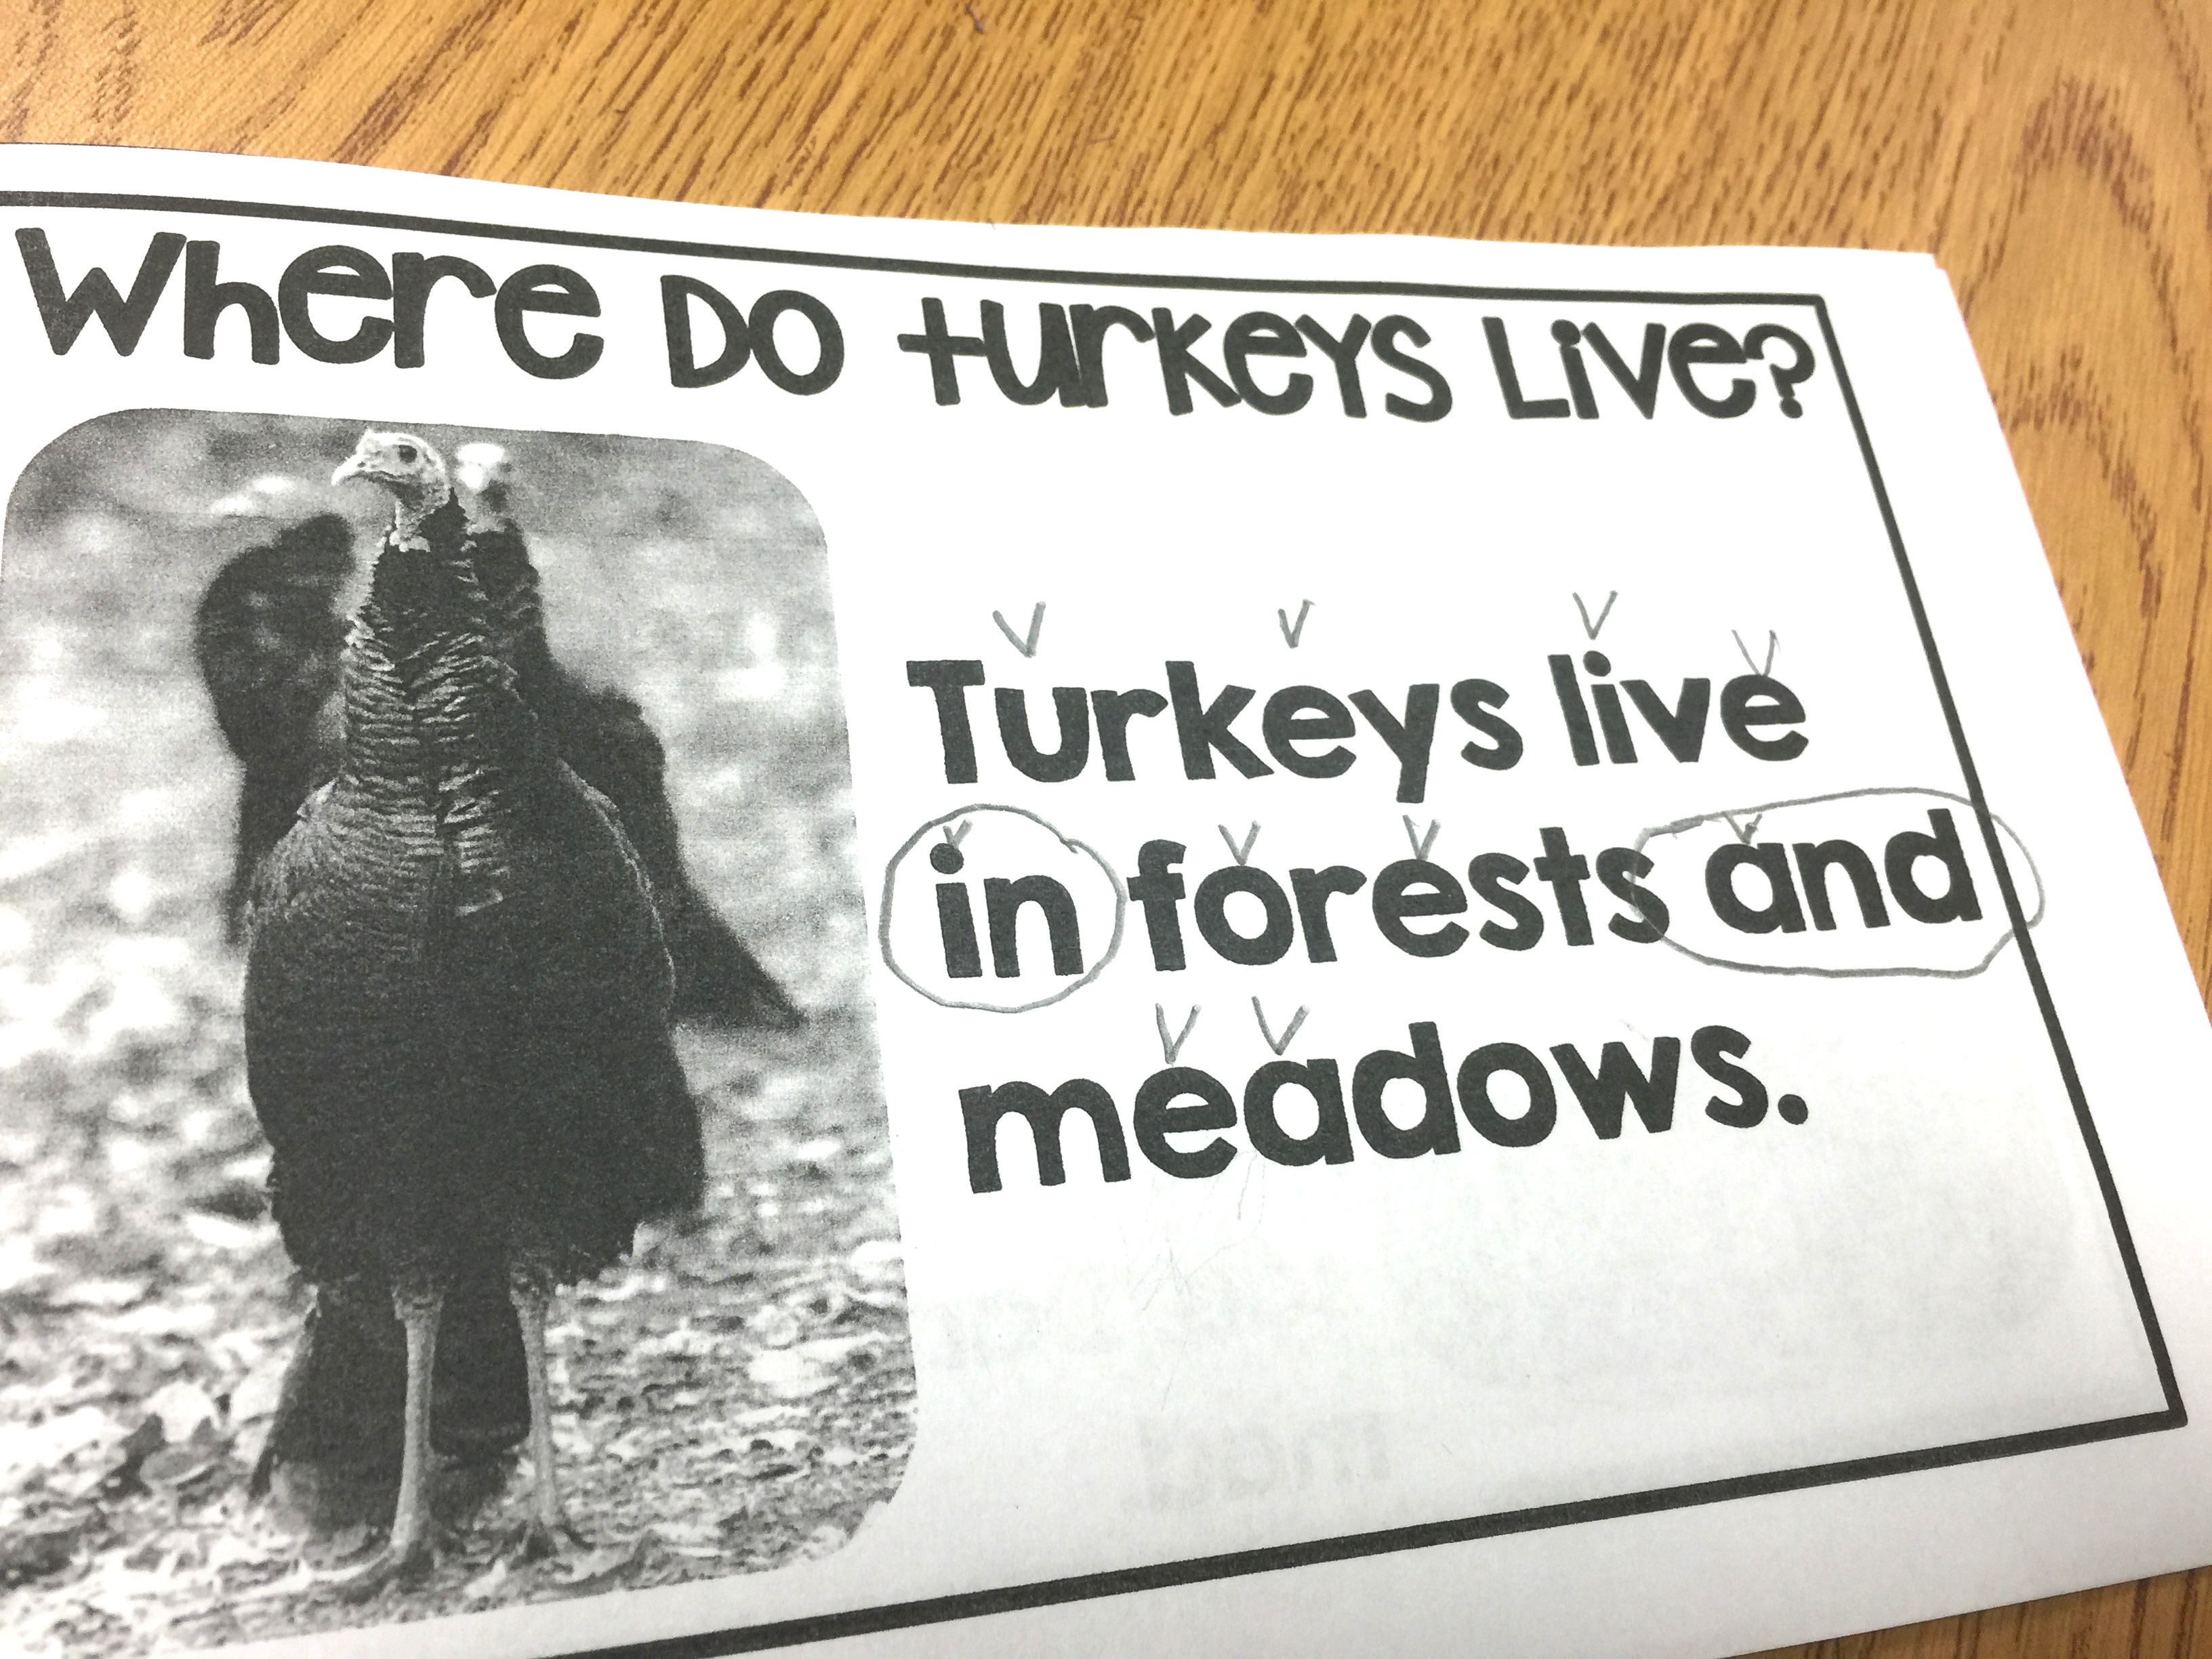
focusing on the phoneme level for blending and segmenting

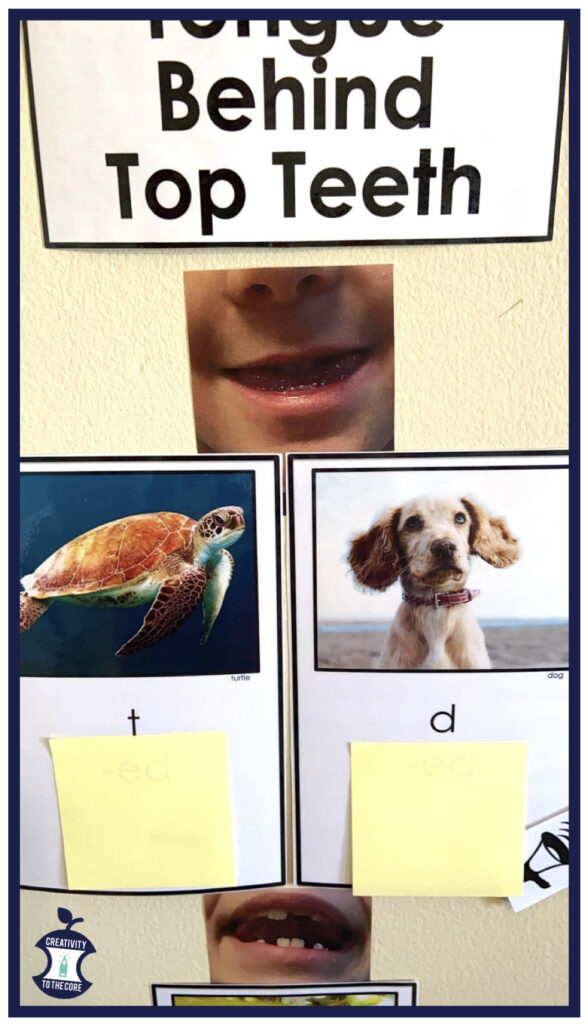
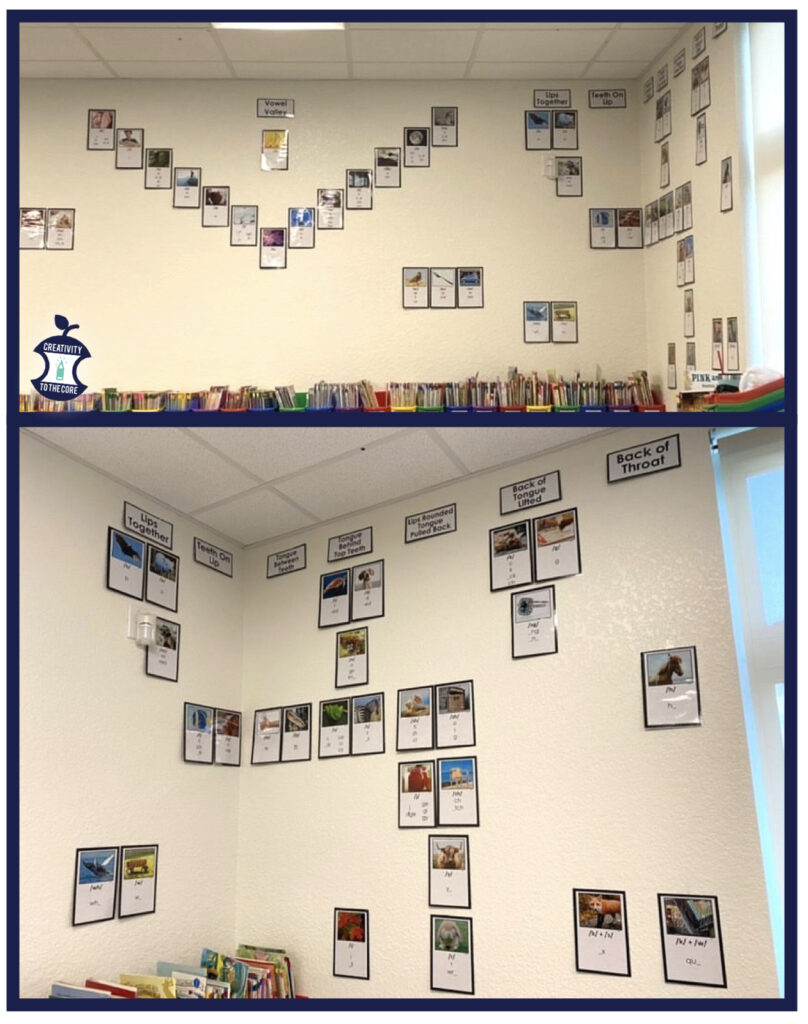
focusing on articulatory features to teach reading and spelling

focusing on a code-emphasis reading instruction that is systematic and explicit. 

If we know from research that it is effective to focus on these in the classroom, then it makes sense to use a sound wall. A sound wall will help you to spend intentional time and energy on components that build independent readers and writers.


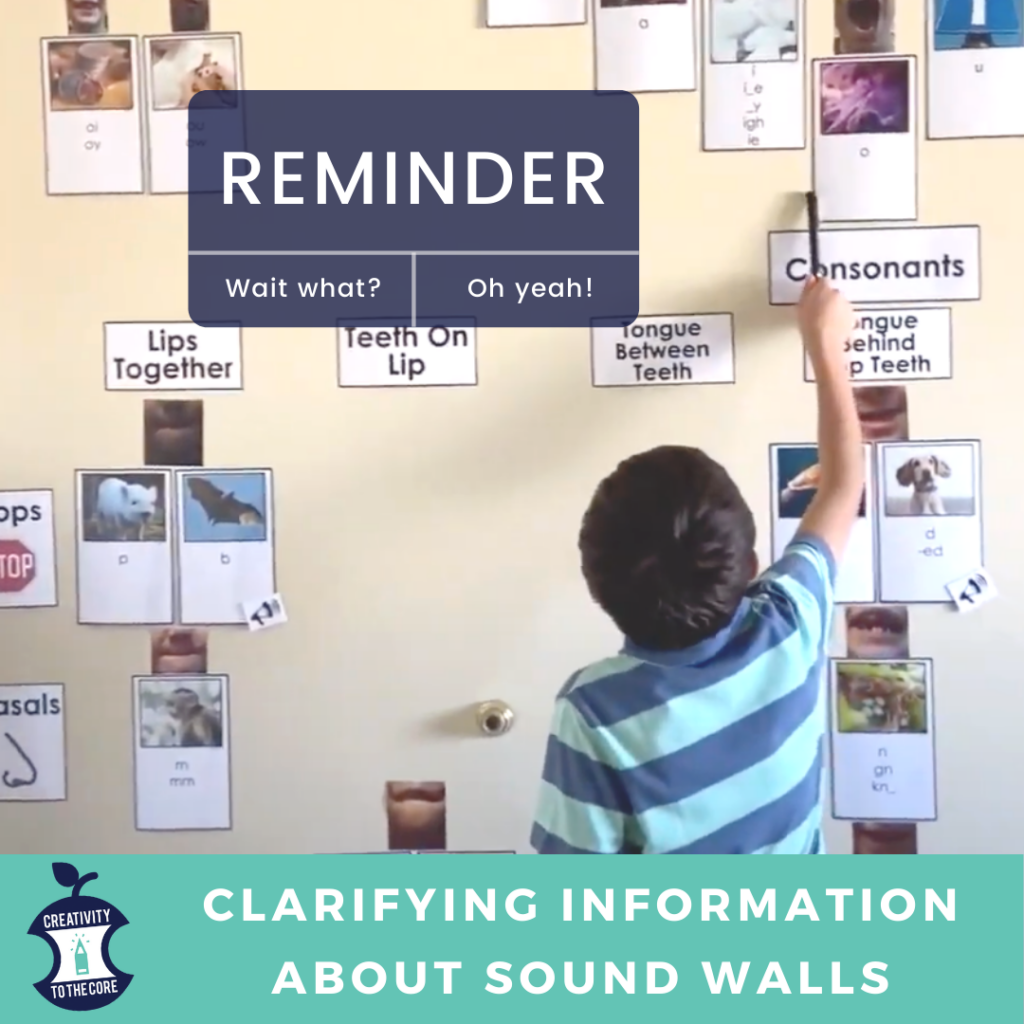
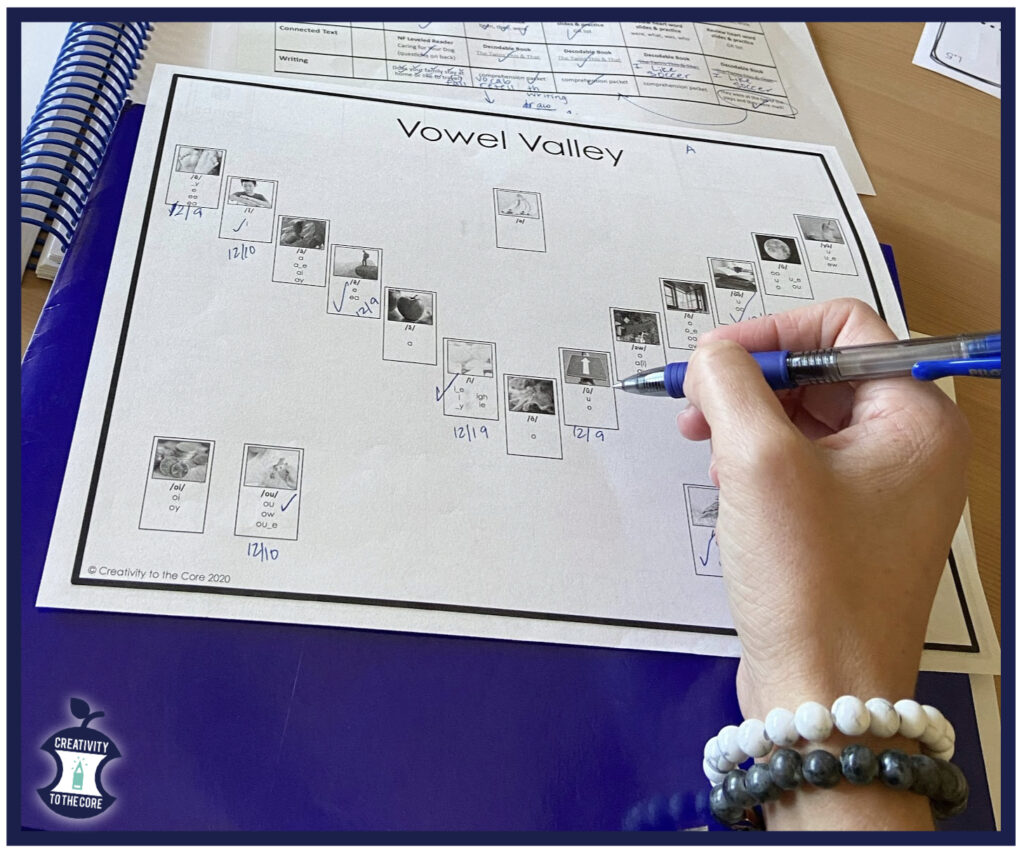
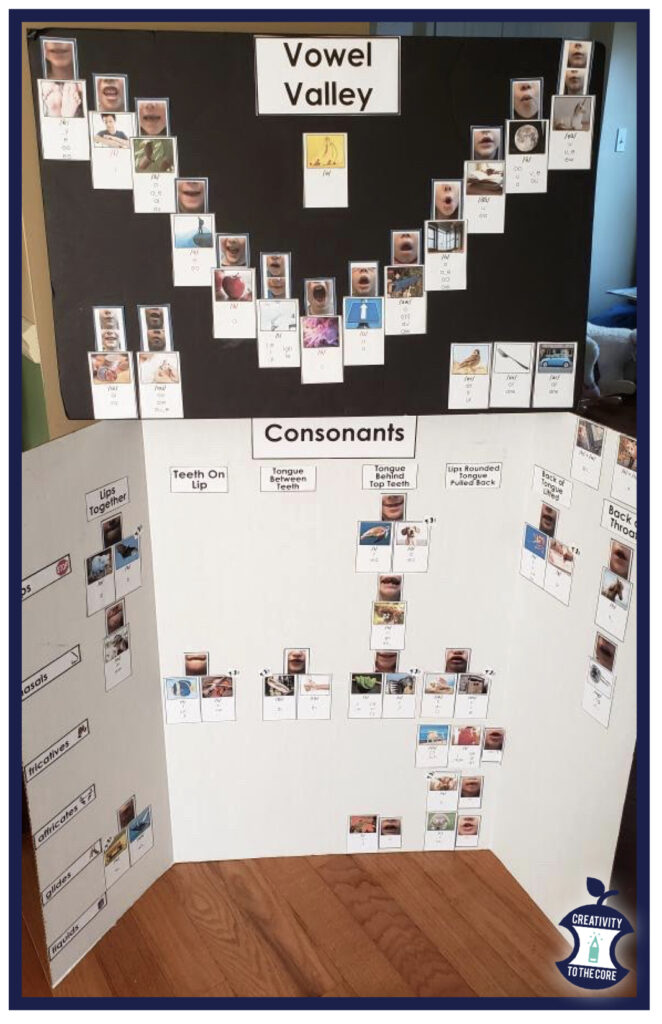
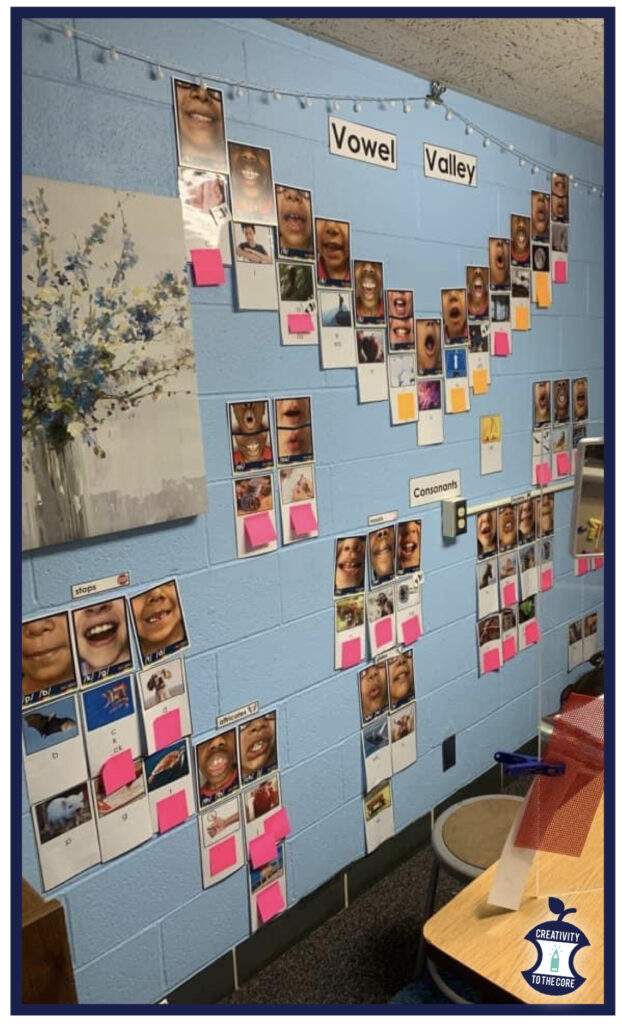
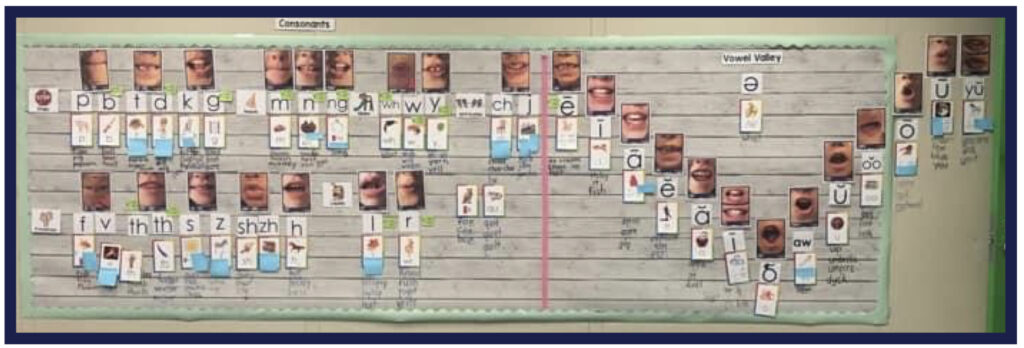
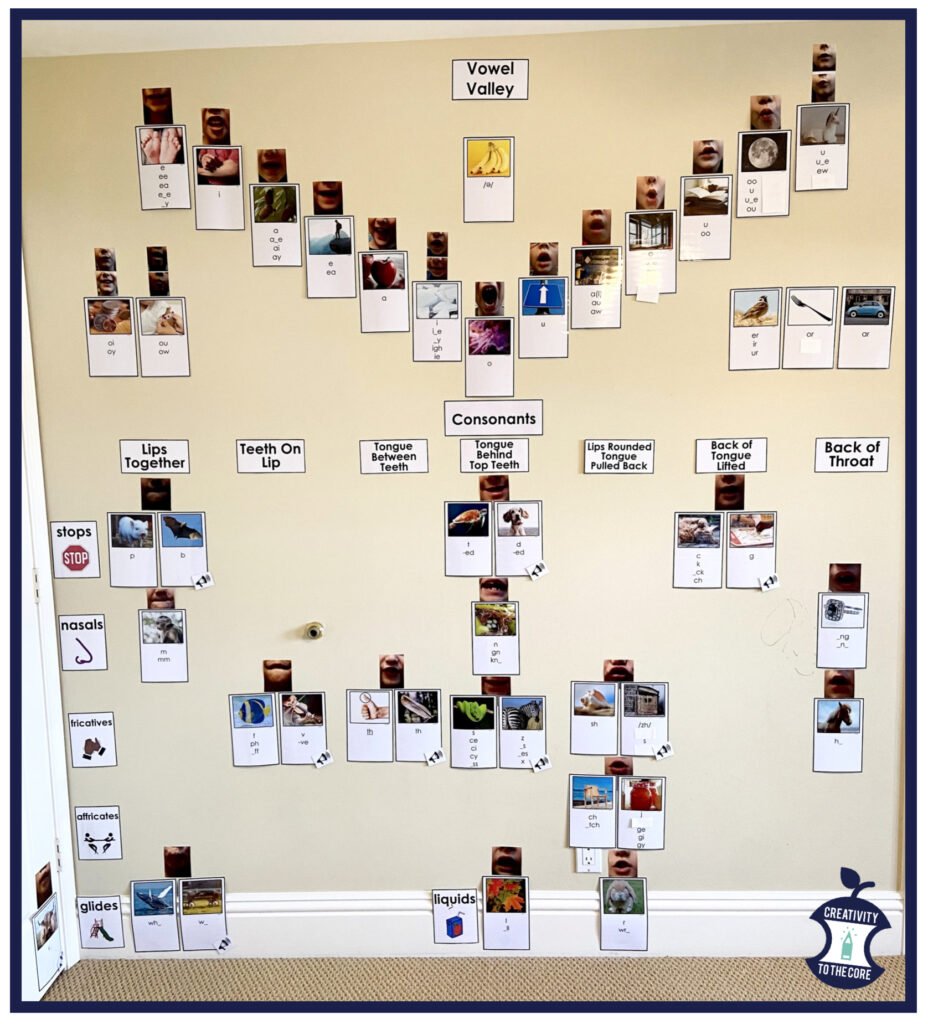
  1. Sound walls are an interactive instructional tool. 

Sound walls will only be as effective as YOU make them. Sound walls should be combined with your explicit systematic instruction of phonemic awareness, phonics, and writing. Explicit phonics instruction helps students to know when and where to use each spelling pattern. The more the teacher models the use of the sound wall, the more the students will as well. Student interaction with the wall is important. It will not be effective if left on the wall as wallpaper.

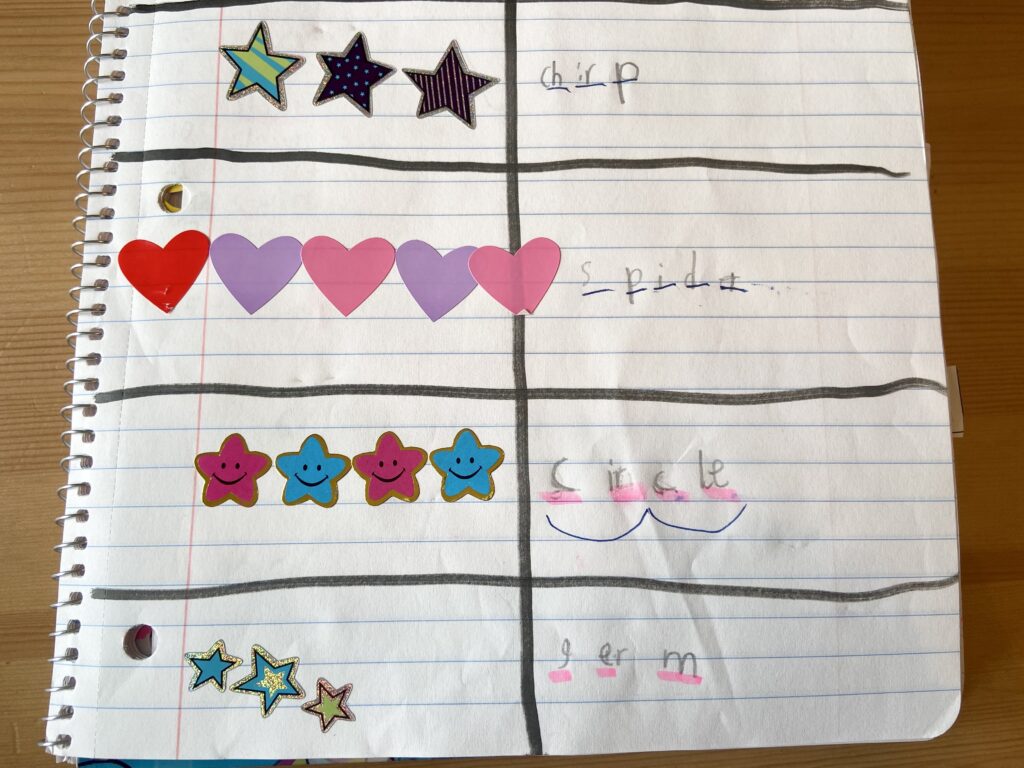
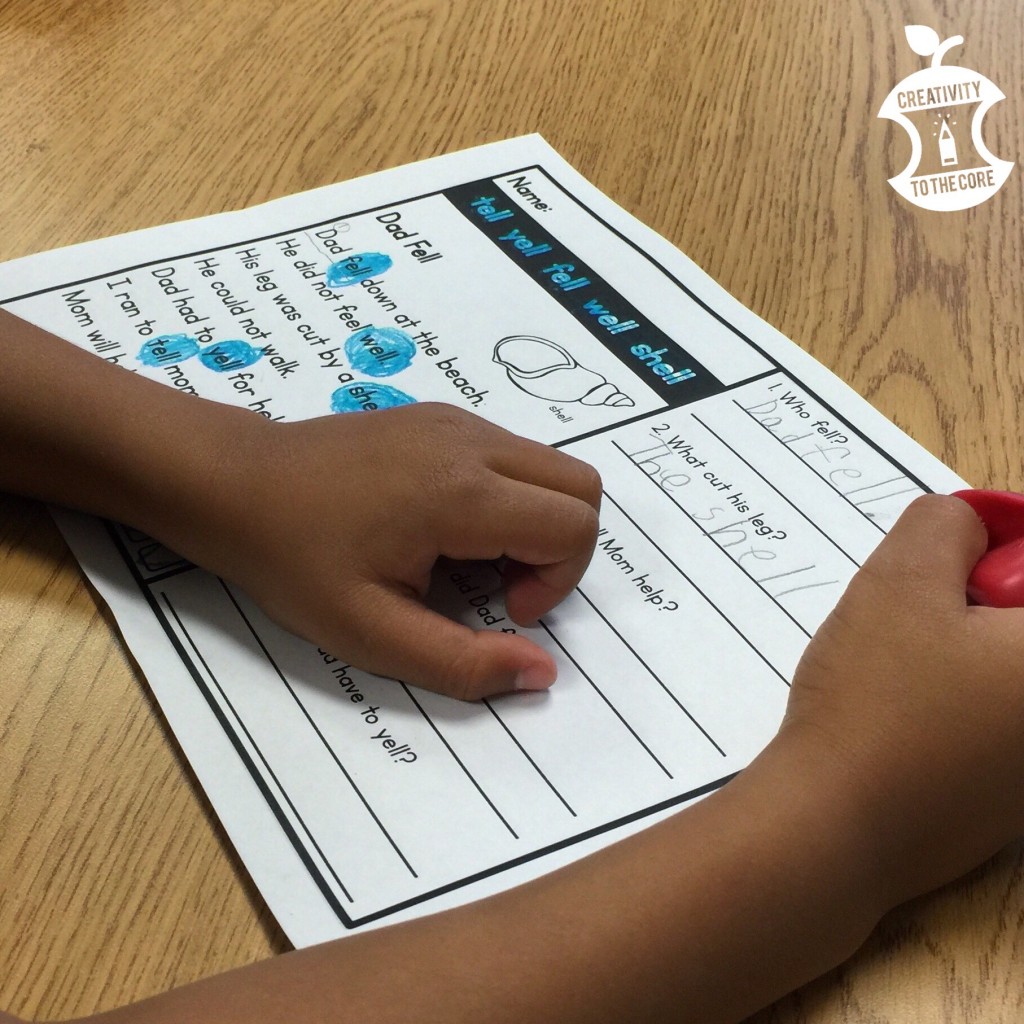
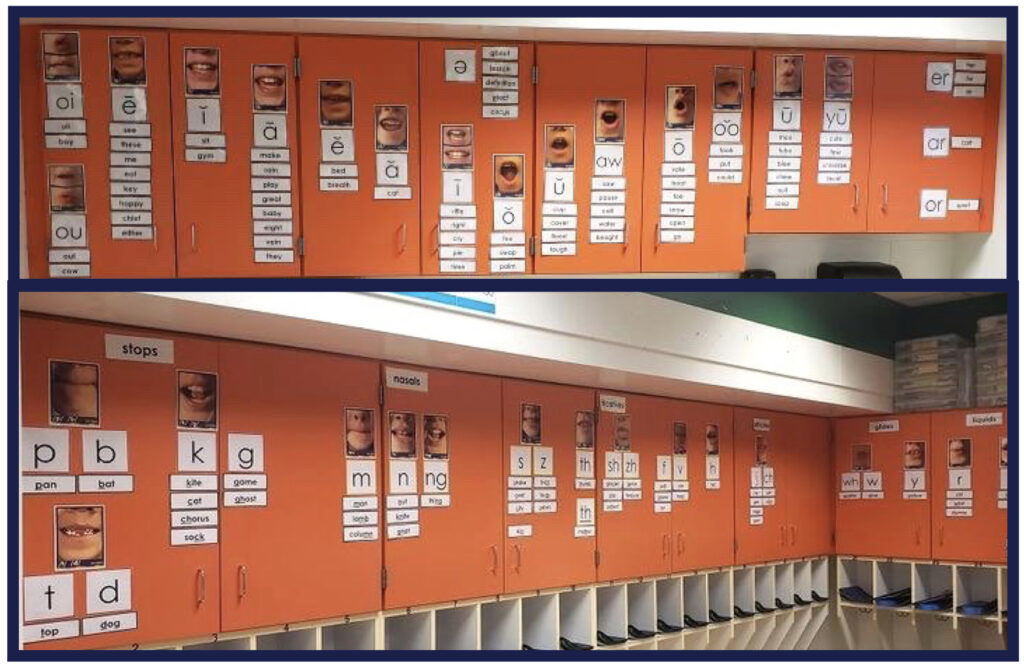
When modeling how to spell or write a word, teachers should draw student attention to the individual sounds. As students count the sounds, use counters or draw lines for each sound. The teacher can then model how to attach a grapheme to each phoneme using the sound wall as a tool. Each phoneme line students draw represents ONE phoneme card on the sound wall. 


  1. Teacher knowledge is the starting point. 

A sound wall seems like an inviting and doable first step into the science of reading for many teachers. However, teacher knowledge should be the starting point. Knowledge of phonology and phonics is key. (Your campus or district SLP can be an invaluable resource for you!) If you decide to use a sound wall because it’s recommended, but you are not building your understanding of it, it won’t be as effective as it could be. For students to understand it, teachers must first understand it. Give yourself grace. Allow yourself time to build your knowledge. Sound walls are just one tool for students. Don’t feel that you have to rush into it because it is a current trend in classrooms.

Here are some helpful resources to get you started:

Pronunciation of all 44 Phonemes

Blendable Sounds

Phoneme Articulation

Uncovering the Logic of English

The ABCs and All Their Tricks

Speech to Print

Six Steps to Start with Sound Walls


Read more about Sound Walls:

Getting Started with a Sound Wall

Sound Walls Throughout the School

Tips for Looking Closely at Your Sound Wall

Filed Under: Literacy, Sound Walls Tagged With: literacy, Sound Walls

Tips for Looking Closely at Your Sound Wall

Sound walls are popping up all over the internet and on Teachers Pay Teachers. There are multiple “sound walls” posted each week. Sadly, many of them are not accurate. As the Science of Reading is becoming more popular on social media, certain things are becoming buzz words. One of those is SOUND WALLS. 

Disclaimer: These comments are not directed toward any specific online sellers. These are general observations that have been noticed and discussed among colleagues in the last few months. It is my hope that these suggestions will help teachers learn and understand more so that they can be conscious consumers if they choose to purchase a sound wall online.


Before you purchase a sound wall, you need to be aware of some common misconceptions. 

  1. Sound wall cards should NOT move from PRINT to SPEECH.

Sound-spelling cards on a sound wall move from speech to print. Think about the name “sound-spelling” cards…sound first, then spelling. To check for this, look at the cards you are about to buy. What is at the top of the card? If the card starts with speech, there will be a mouth picture or a keyword picture (apple for short a) first. You may also have both a mouth and keyword picture first. There will not be any print (letters, graphemes, letters within virgules /sh/) first. If the card moves from print to speech, it will look like a typical phonics poster rather than a sound-spelling card. (ex: A print to speech card may have A listed at the top, and then a picture of an apple below).

Why is this important? Most sounds have more than one spelling. If students are looking at a sound wall card that’s labeled with a letter or letters at the top, they will assume that that is the way to spell that sound. Rather, that was the teacher trying to label the sound. We want students attending to the sounds they know from their oral language first. During phonics instruction, teachers will gradually introduce each spelling for that sound and when to use it.


  1. Sound walls should NOT just be a vowel valley.

Some sound walls online only include the vowels. However, English words include vowels AND consonants (Other than words like a or I). The purpose of the sound wall is to help students recognize individual sounds, segment sounds in words, and represent those sounds in order to spell words. They will need vowels AND consonants to do this.

Sound walls should include all 44 speech sounds of our language. This includes the consonants and vowels. Students are already using these 44 speech sounds when speaking, so they should have access to them on the sound wall. In all grades, even in kindergarten, teachers should start the year introducing and reviewing all of the speech sounds (not the spellings, just the sounds). This introduction should include producing the sound and focusing on what is happening in the mouths (lips, tongue, teeth, vocal cords, airflow) when they make each sound.


3. Sound Walls should NOT be hung or presented in alphabetical order.

Sound walls are organized by manner of articulation (how the sound is produced) and place of articulation (where the sound is produced). Sound walls are NOT organized or placed on the wall in alphabetical order. When cards are placed in alphabetical order, they become like a word wall. There are 44 speech sounds included on a sound wall. When cards are placed in alphabetical order, there are typically 26 letters included (sometimes with the extra sound cards off to the side).

As teachers using a sound wall as a tool, we want students focusing on where in the mouth the sounds are produced (front, middle, back of mouth) and how they are produced (voiced or unvoiced, continuous or stop). We explain the organization of the wall that way so that students can find the sounds quickly. We pair cognate (voiced and unvoiced pair) sounds like /f/ and /v/ together because these sounds have the same mouth placement and are often confused in student writing. We place vowels in a V formation because it mimics the position of the mouth/chin drop and tongue for those specific sounds. We focus on the airflow of sounds (continuous vs. stop) because this helps students to produce sounds accurately and represent each individual sound accurately when spelling.

A sound wall may seem overwhelming to teachers, but there is a reason for the organization. The organization is purposeful and allows students access to the sounds that they already have in their oral language. The more we understand it, the simpler it is, and the more connections we make as educators. Students pick up on it quickly when you introduce each part individually. If we change the organization of a sound wall, students will not be able to make the same connections in their decoding and encoding.


4. Sound walls should NOT include keyword pictures that represent altered sounds.

Choosing appropriate keyword pictures is so important. On the creator’s end, deep knowledge of phonology is essential. Keywords should include the most clear version of that individual sound. Sound walls sold on TeachersPayTeachers often (not always, this is not a blanket statement) have inaccurate or unclear example pictures for each sound card.

Many sounds, especially vowels, are altered by the sounds that are around them in a word. This makes it difficult for students to hear, segment, and represent the individual sound. When nasal sounds (/m/, /n/, /mg/) or liquid sounds (/l/, /r/) are after a vowel, the vowel sound is altered – ex: elephant and umbrella. Some initial vowel sounds are also altered based on dialect or accent – ex: igloo and egg. These are poor choices for keyword pictures.

For example: Elephant is a poor choice as a keyword for short e. When you say elephant aloud, you will hear the letter name L at the beginning of the word. You do not naturally say or hear /e/. A better keyword choice for this sound is echo or edge. With these, you can clearly pull the short e sound off of the rest of the word.


5. Sound walls should NOT have spellings listed in random orders.

True sound wall sound-spelling cards will include the keyword picture and the most common spellings of that sound (not just one spelling). These spellings should be listed in order of frequency. Many sound walls on the market list the spellings randomly OR list the spellings based on the order in which they are typically taught. This is not as helpful for students.

Why is the order of frequency important? The purpose of a sound wall is to increase student independence when spelling and/or writing. When using an accurately made sound-spelling card, the spellings of the sound are in order of frequency. This means that the most common spelling for that specific sound is listed at the top…then the next most common…and the next…etc. 

Students who have learned many graphemes will look at the card and know to try the spelling at the top first. They will add their phonics knowledge of where certain patterns are allowed in a word. If the sound wall cards do NOT have spellings listed in order, students will not have guidance as to which spellings to use most often.


6. Sound wall cards should NOT always include every single possible spelling for every single sound in English.

Sound-spellings cards will include the most frequent spellings. They are not required to show every. single. possible spelling. Many well-made sound walls will include all spellings that are used around 4-5% of the time and greater. It is more effective to have a few common spellings rather than a TON of spellings (including rare spellings).

For example: Many times eigh (as in neighbor) is not included on sound wall cards for the sound of long A. This is because eigh is used for the sound /A/ less than 3% of the time that you hear long /A/. It is not a common spelling. Students will not interact with it as often as others. 


As teachers, we need to be aware of phonics posters that are labeled as “sound walls” either unintentionally from lack of a creator’s knowledge OR intentionally to increase sales with popular keywords.

There is a difference between phonics posters and a sound wall.

Phonics posters are not bad. Sound walls are not better.

They are both TOOLS to help students approach spelling.

Choose the tool that best fits your needs and the needs of the students in your classroom.


Read more about sound walls:

Getting Started with a Sound Wall

Sound Walls Throughout the School

Filed Under: Literacy, Sound Walls Tagged With: literacy, Sound Walls

Sound Walls throughout the School

Sound walls are versatile instructional tools that can be used in a variety of settings and in a variety of ways. At the core of each of these uses, is the focus of instruction from speech to print. 

Read more about getting started with a sound wall. This will give you the why and what of sound walls.

The following explains how sound walls can work at various levels. Much of this knowledge comes from a combination of researching, reading, and listening to literacy experts on the topics of phonology, phonics, and sound walls. Recommended resources are listed at the end of the post. These are my personal recommendations based on personal experience using sound walls with various grade levels in the classroom and in a tutoring setting. Photographs have been graciously shared by others in the field.


phoneme – sound

grapheme – spelling


Sound Walls in Small Group Environments (Intervention, Tier 3, Tutoring)

If a teacher sees multiple grades, groups, individuals per day, it may be hard to have a traditional sound wall placed on the wall. Different students are at different stages in learning the phonemes and their corresponding graphemes. It would be just crazy to have one large one and then have to cover and uncover certain cards each time a group changed! Here are a few recommendations:

  • Individual file folder sound walls – Each child or each group keeps a file folder size sound wall. You may choose to cover sounds that have not been taught. It may be easier to simply highlight the sounds as they have been taught. If individual sound walls are laminated for students, teachers can use a black permanent marker to draw lines over the graphemes that have not been taught. Then, when it is time to learn that grapheme, use a black expo marker on top of the black permanent marker. The permanent marker will disappear!
  • Individual sound wall to track auditory drill – Print a copy back to back. Use as a progress monitoring tool during your auditory drill. Date under each phoneme as students respond. Track mastery and difficulty. An auditory drill is when the teacher says the sound, and the students write all the possible graphemes that they have learned to represent that sound.
tracking student knowledge of graphemes during an auditory drill
  • Tri-fold Board Sound Walls – These boards work well when teachers see certain groups of students who are around the same ability level. This also works well in homes for families who want to integrate sound walls, but do not want to place it on the wall. Use tri-fold boards (the free standing poster boards used for science experiments) to display the sound wall. I suggest you put the vowel valley on one board and the consonant wall on another. Specialists and interventionists may choose to create multiple different sound wall boards for each grade level. When a group enters, just pull out the specific boards needed for the specific group. These are also light enough to move from classroom to classroom.
Photo curtesy of Sara, homeschool parent of 3 elementary age children

Sound Walls to Assist English Language Learners (ELLs)

Sound walls will assist ELLs of all ages in a positive way. The organization and visuals provided will give students a concrete example of fleeting speech sounds. You are giving learners the knowledge of how to produce the sound with the mouth first. Then, it will be easier for them to anchor the sound to the mouth movement, and then the letter or letters to the sound. Focusing on articulation is especially helpful when students are not familiar with the speech sounds in a new language. Often times, ELLs will discover that phonemes overlap, but spelling changes (ex: Spanish and English have the sound /E/, however it is spelled differently in each language). Sound walls are a great help for students when they are having to decipher between the sounds and graphemes in two or more languages. Sound walls can also be helpful in middle and high school classrooms with a high English learner population. When a teacher shows learners that there is an organization and reason for different sounds and spellings, students will have greater buy-in and understanding. Sound walls can help expedite this process.


Here are some practice ideas at various grade levels PreK-5. Many ideas will overlap, but there are also slight differences throughout. These are not sound wall rules. These are ideas to help you begin to imagine using a sound wall with students in your specific classroom.

Ideas for PreK
Display pictures of kids’ faces showing the correct placement of the lips, tongue, and teeth.
Spend a considerable amount of time discussing how and where the sounds are made.
Add sound wall review to typical morning meeting or calendar time.
Use mirrors to allow students to see their own mouth placement.
Draw attention to voiced and unvoiced sounds.
Choose sound wall cards with accurate key word pictures as the focus.
Cover all graphemes.
Flip over or do not post phoneme cards if the sound has not been taught yet.

Heavy focus on articulation picture and key word pictures, limited graphemes shown

Ideas for K
Display pictures of kids’ faces showing the correct placement of the lips, tongue, and teeth.
Spend a considerable amount of time discussing how and where the sounds are made.
Add a quick sound wall review to typical morning meeting or calendar time.
Use mirrors to allow students to see their own mouth placement.
Draw attention to voiced and unvoiced sounds.
Choose sound wall cards with accurate key word pictures.
Flip over or do not post phoneme cards if the sound has not been taught.
Follow your curriculum scope and sequence as you introduce sounds.
Reveal cards as you explicitly teach the sounds.
Cover graphemes that have not been taught yet.
Reveal graphemes as you explicitly teach each one individually.

Photo courtesy of Tiffany, Interventionist serving K and 2nd
(Sticky notes covering untaught graphemes)
Photo courtesy of Amy, Kindergarten Classroom
(Sticky notes covering untaught graphemes)

Ideas for Grades 1-2
Display pictures of kids’ faces showing the correct placement of the lips, tongue, and teeth.
Spend time discussing how and where the sounds are made, especially new sounds.
Add a quick sound wall review to typical morning meeting or calendar time.
Use mirrors to allow students to see their own mouth placement.
Choose sound wall cards with accurate key word pictures.
Flip over or do not post phoneme cards if the sound has not been taught.
Follow your curriculum scope and sequence as you introduce sounds.
Reveal cards as you explicitly teach the sounds.
Cover graphemes that have not been taught yet.
Reveal graphemes as you explicitly teach each one individually.

First and Second Grade Homeschool Classroom
(white paper covering untaught graphemes)

A large focus of first and second grade is spelling instruction. Activities like phoneme-grapheme mapping will help students to take individual graphemes into permanently stored specifically ordered strings of graphemes. It is vital that teachers follow a scope and sequence for reading and spelling instruction. A sound wall can greatly assist students while spelling. Sound walls also help to teach the teacher the reasons why students are making the errors that they are.

The nature of a sound wall is to focus student attention from speech to print. This means that students can look to the sound wall to help them spell the sounds that they hear when they say and segment words. Once a word has been orally segmented into its individual phonemes, students can reference the specific cards for each phoneme in order to determine spelling options. Once modeled, this process is simple for learners to do on their own. It also fosters a strong sense of independence and confidence when spelling and writing. Below are some tips from experiences in my own first and second grade class.

Photo courtesy of Christina, 2nd Grade Teacher
(Photo taken before graphemes were covered)

Tip: Spelling Generalizations
Have discussions regularly about spelling generalizations and how those are conveyed on a sound wall. Ex: /k/ can be spelled c, k, _ck, ch. The _ck is shown on the sound wall with the underscore before the ck because _ck only comes at the end of a word or syllable after a short vowel. Students need to be explicitly told this. Understanding the underscore will help students as they are writing.

Tip: Voiced and Unvoiced Sounds
In the primary grades, many spelling errors are made when mouth placement is the same, but voicing is different. For example: the sounds /t/ and /d/ are produced with the same mouth placement (see the picture below, tiger and dolphin cards). The only difference is that /t/ is unvoiced and /d/ is voiced (notice the yellow megaphone on the /d/ card). On a sound wall, voiced and unvoiced consonant pairs are placed together. See the yellow square images of a megaphone in the picture below? This represents the voiced consonant within the consonant pair. If a student spells spider like this, S-P-I-T-ER, this is an error with voicing. Any time the student spells with an unvoiced rather than a voiced consonant (or visa versa), draw attention to this pair of sounds on the wall. Have students physically touch their throats to feel the vibration of the vocal cords as they pronounce the word. Explicitly explain that mouth placement is the same, but voicing is different. This will increase student awareness and accuracy.

Photo courtesy of Patricia, First Grade Teacher

Tip: Vowel Teams
There are so many vowel teams spellings for students to learn. Sound walls list the frequent vowel teams within the vowel valley. As you teach the vowel team, reveal it on the grapheme card. Students should be taught that vowel teams will only be present within the vowel valley, not on the consonant wall, because vowel teams are made with two or more vowels together (2 – ai, ea, ou, 3 – igh, 4 – eigh). For vowel teams, the mouth is open and the production of the sound is unobstructed by the lips tongue or teeth. With instruction and practice, students will learn to refer to the phoneme card that they need when spelling. Understanding the spelling generalizations and frequency of each vowel team will help as well.

Ideas for Grades 3-5
Display pictures of kids’ faces showing the correct placement of the lips, tongue, and teeth.
There may be more buy-in from older students if you all them to take pictures of their mouths for the wall. 
Spend time discussing how and where the sounds are made, especially new sounds.
Add a quick sound wall review to typical morning meeting
Use mirrors to allow students to see their own mouth placement.
Sound wall cards with accurate key word pictures
Follow your curriculum scope and sequence as you introduce sounds.
Most of the phonemes have probably been taught, however, consider the needs of your class.
Cover graphemes that have not been taught yet.
Reveal graphemes as you explicitly teach each one individually.
Extremely helpful for ELLs and striving readers.

Photo curtesy of Hannah, 3rd Grade Teacher
(No phonemes or graphemes covered, as all have been taught.)

Many times third, fourth, and fifth graders come into our classrooms without a strong foundation in the phonemes and graphemes of English. You may see this very evident in their spelling. Students with difficulties in spelling, often need explicit instruction in phoneme-grapheme correspondence and mapping. Spelling develops at a slower rate than reading from second grade on, so reading and spelling should be taught separately in the upper grades. Sound walls are an excellent reference for students in this situation. They will feel empowered and confident when they can actually use something as a tool to read and spell.


Are you new to using sound walls? Does it interest you? Ready to jump in? What questions do you have? Leave a comment below!

Do you use a sound wall? What benefits have you seen so far? Leave a comment below to share!


Sources and Recommendations

EDVIEW360 Podcast – How to Use Sound Walls to Transform Instruction – Mary Dahlgren & Antonio Fierro

EDVIEW360 Podcast – Retire Your Word Wall: How Sound Walls Support the Science of Reading – Mary Dahlgren

Tools4Reading – Sound Wall resources and free teacher resources – Mary Dahlgren

Wakelet – Sound Wall Collection – Pam Kastner, PaTTAN

LETRS Training 3rd Edition – Professional Development Course – Dr. Lousia Moats & Dr. Carol Tolman

The Reading Teacher’s Top Ten Tools – Professional Development Course – Dr. Deb Glaser

Filed Under: Literacy, Sound Walls Tagged With: literacy, Sound Walls

Getting Started with a Sound Wall

Why use a sound wall?

Babies are born and quickly learn the sounds of their native languages. They are sponges, soaking up the language, recognizing similar sounds, building connections between sounds and words, and eventually speaking. Our brains are wired for spoken language. This is not new. Humans have been speaking since they first existed. 

Contrary to popular belief, our brains are not wired to read. There is no part of the brain that has the sole function of reading text. There is, however, a part of the brain that has the sole function of producing speech. When children or adults learn to read, they are quite literally rewiring the brain. Humans utilize many parts of the brain when learning to read. The connections between these parts (orthographic processor, phonological processor, meaning processor, and visual processor) have to be created, strengthened, and repeatedly used to achieve automaticity.

We can facilitate a learner’s early reading and writing journey by approaching the code from their point of view (speech) and leading them toward our point of view as a fluent reader (print). Sound walls help by building upon what students already know (spoken language) when they are acquiring new knowledge. 

What is a sound wall?

A sound wall is an interactive reading and writing instructional tool for students. By definition, a sound wall focuses on sound, the 44 phonemes in the English language. Sound walls are created to facilitate the connection from speech (spoken language) to print (reading and writing). A sound wall has two main components – a vowel wall (often referred to as a vowel valley) and a consonant wall. They focus student attention to each specific speech sound, rather than each of the 26 letters, and how that sound is formed by the lips, tongue, or teeth. 

Students are directed to first focus on what words sound like because that is what students already know. Sound cards are organized by the sound’s category (vowel or consonant, plus consonant types) and how it is articulated. The place of articulation (where the sound is produced) and the manner articulation (how the sound is produced) are used to determine how sound wall cards are organized and posted for students. Most sound walls have pictures of student mouths or pictures of mouth clipart that show students what the mouth looks like when producing that sound. These pictures are placed above each of the sound cards. Students are encouraged to feel their mouths, look in mirrors, and focus on the vocal cords and air flow in order to determine sounds and their spellings. Commonly used graphemes (spellings) are listed beneath each sound in the frequency that they occur in English. For example, on the /oi/ phoneme card, the grapheme OI will be listed first. Then the grapheme, OY will be listed below the OI. This shows students that the most likely spelling is OI, followed by the next likely spelling OY. Learners use this as a support along with the core instruction in phonemic awareness and phonics.

What is not a sound wall?

Phonics posters, grapheme (common letter combinations in English that spell a specific sound) walls, and word walls are not sound walls. Sound walls focus first on the phonemes (sounds), and then on the graphemes (spellings that represent that sound). Sound walls include all 44 phonemes. If using phonics posters or grapheme walls, that is a wonderful support for students as well. Just remember, that it is not a sound wall if it does not represent all 44 sounds in English.

A Common Comparison

Teachers and parents of elementary age students are typically familiar with word walls. Word walls are common in K-5 classrooms around the country, and the world! Word walls are a student support posted on a classroom wall or placed in a folder. Word walls typically are organized in alphabetical order from A to Z, the 26 letters of the alphabet. Many times, high frequency words and irregular words (often referred to as “sight words”) are placed on the word wall. Words are posted under their initial letter. For example, the word “she” would be placed under letter S. Therefore, words are placed based on their visual first letter, or what you actually see first in the word. Students are encouraged to use the word wall as a resource to help them spell these words. 

Many would see sound walls as another option instead of or in addition to a word wall. I personally do not use a word wall any longer. However, I do see how a word wall may be helpful with more of a vocabulary focus for math, social studies, or science content.

The Common Predicament

Because word walls are organized from A-Z, there are often words posted under a letter that do not match with the word’s initial sound. For example, the word “she” is placed under the letter S on a word wall. Visually, there is an S at the beginning. However, “she” does not begin with the sound /s/…. “she” begins with the sound /sh/. The SH digraph consists of two letters that make one brand new sound. An emerging writer will walk up to the word wall, looking for this word and saying it aloud: “she”. No matter how slowly they say the word or how many times they say it, they will never hear /s/ at the beginning.

Think about this: If the learner does not yet know how to spell the word, then they probably will not know the initial letter either. How will this learner find the word they are looking for? How will they write the word in their story?

The same scenario happens with hundreds of other words in the English language. English has 44 phonemes (sounds). Forty-four. Yet, the English alphabet only has 26 letters. How can we expect all of the words to fit within those 26 letters? We cannot. Think about these words. Where would you place them on a word wall? Where would you place them on a sound wall? What would students be thinking of if they were speaking these words aloud while searching for them on a classroom wall?

that, chat, photo, she, gnat, out, autumn, of, arm, oil, about

A Personal Connection

This is the situation that radically transformed my thought process. Word walls had always been a requirement at each school I’ve worked in. Requirement. As in, “We are coming in with the beginning of the year checklist, and one of the items is WORD WALL”.

About a year ago, I first heard a presenter say something like “Why would you put ‘she’ under S?”. I quickly made a decision to research this more. I was determined to have a classroom support that would be continuously used as a tool in reading and writing instruction and practice. I was determined not to have another “resource” that became wallpaper as students interacted with it less and less.

Fast forward to this year. I have used a sound wall for eight months so far in my first and second grade classroom. It has transformed the way I teach. I have the knowledge to instruct students in the phonemes of our language. Because of using a sound wall and doing my own research to fully understand its components, I am equipped to help my students make sense of our language.

It has also strengthened the way my students interact with words. They now have the knowledge and the tools to read, spell, and write confidently. They aren’t searching for words that are posted. Rather, they are using what they know about the individual sounds in the target word, segmenting them, and determining how to spell each sound. What a way to build self-confidence. You CAN do this. Use your tools to help you.

Never before have I had a student explain the complete reasoning behind why a vowel changes slightly when it’s coarticulated (pronounced together) with a letter like N or M. Now, my students are eager to explain the nasalization of the vowel while pointing to the sound wall. They say /n/, /m/, and /ng/ are nasal sounds and that the sound is produced by air passing through the nose. Therefore, when a vowel is beside a nasal sound, the sound of the vowel also gets pulled into the nose a bit as we get ready to say the sound of the nasal consonant /n/, /m/, /ng/. I don’t think I even knew this last year. And I would never have expected a student to describe it. They are also able to explain the many ways to spell the /j/ sound, with the letter J or with the letter G. They can tell you which is most common and which is used when. I could go on and on…

Student knowledge of speech sounds and how they are written in English has improved. Reading has improved. Spelling has significantly improved. Confidence has increased exponentially. 

Of course, I cannot say that the sound wall caused all of this to happen. Yes, I’m doing tons of other things throughout the day and teaching many different foundational skills. However, I can tell you that using the sound wall has literally changed how I approach teaching everything (phonemic awareness, phonics, spelling, high frequency words, and writing) and it has changed the way my students approach words.

If you are interested in learning more about sound walls, I encourage you to dig into these resources.

Sound Wall Wakelet – a collection of resources about sound walls put together by Pam Kastner from PaTTAN. Such a wealth of information, PD, and free documents to help you on your journey.

Tools4Reading – created by international sound wall expert Mary Dahlgren. Mary Dahlgren’s KidLips products are perfect for building your sound wall. The back of each sound card includes valuable information about the phoneme, how and where it’s articulated, and how it is commonly spelled. Highly Recommend.

Creativity to the Core on Instagram – See highlight labeled “Sound Walls” as well as various posted videos.

Sound Wall with Real Photos – Creativity to the Core on TpT

Feel free to reach out if you have any questions! You can leave a comment below or contact me directly on Instagram @creativitytothecore or by email at creativitytothecore@gmail.com.

Filed Under: Literacy, Sound Walls Tagged With: literacy, Sound Walls

How-to Create a Mary Poppins Bulletin Board

This year, my classroom theme is Mary Poppins. It has been my favorite classroom so far in my teaching career. It’s not in your face, but it’s also pleasing to the eye. It is my happy place.

SUPERCALIFRAG..... bulletin board. Perfect for a Mary Poppins themed classroom and versatile for the entire year!

One of my absolute favorite aspects of the room is actually outside of my room – our hallway display board! It’s so simple and so vibrant. It’s easy to create and (seriously, the best of all) it can be kept up all year long! I’ve had questions about this board from the second I put it up, so here we go!

You will need: black bulletin board paper, bulletin board paper in a bright color of your choice, a fun border, bulletin board letters or white paper to print your letters on.

Step 1: Tape a long piece of black bulletin board paper to any type of Smart Board or onto a wall if you have a projector.

Step 2: Find a Mary Poppins silhouette image online (by searching “Mary Poppins silhouette” on Google Images) and enlarge it to your entire computer screen by zooming in on the picture. Project this on your Smart Board or wall.

How to make a Mary Poppins bulletin board

If your paper does not fit over the entire image (see the suitcase above) you may choose to use another piece of black paper and tape them together at the end.

Step 3: Trace the outline of the image with a pencil.

Step 4: Take the black paper down and cut out the image.

Step 5: After adding the colorful background paper and border, place the Mary Poppins cut out on the board. Slightly lift her off of the board so that she looks as if she were flying. Staple carefully to the board, and tape any excess pieces that hang off onto the wall.

How to make a Mary Poppins bulletin board

Step 6: At the beginning of the year, I use this as my welcome board. I used an image of a umbrella from Google, inserted it into PowerPoint, and added each child’s name. You can download the font here (I used the Solid option). Print these onto patterned card stock for a fun look!

Mary Poppins welcome back bulletin board

Step 7: To make the title, use bulletin letters or download the font I used to make your own. If you choose to make your own, the SUPERCALIFRAGILISTICEXPIALIDOCIOIUS title on the board will take for.ev.er to cut out. But, just embrace it. You’ll only have to do it once. Grab your stack of paper, scissors, and start that Netflix marathon!

Step 8: Staple the letters from one end of the board to the other. Overlap some, because it may JUST fit. Add the umbrellas and any other text that you want on the board. Ta-da! Done!

Mary Poppins welcome back bulletin board for any grade level!

This board display is extremely versatile!

Titling the board with SUPERCALIFRAGILISTICEXPIALIDOCIOUS makes it perfect for displaying student work. I did not change anything but student work the entire school year. I will never again change paper, borders, and titles each month. Work smarter, not harder! Below are some of the displays our class has had so far this year…

SUPERCALIFRAG..... bulletin board. Perfect for a Mary Poppins themed classroom and versatile for the entire year!
London Bridge is… (Kindergarten was England for Multicultural Night)

SUPERCALIFRAG..... bulletin board. Perfect for a Mary Poppins themed classroom and versatile for the entire year!
What do you eat for Thanksgiving?

SUPERCALIFRAG..... bulletin board. Perfect for a Mary Poppins themed classroom and versatile for the entire year!
Describing the setting of our gingerbread men stories.

SUPERCALIFRAG..... bulletin board. Perfect for a Mary Poppins themed classroom and versatile for the entire year!
Penguins!

SUPERCALIFRAG..... bulletin board. Perfect for a Mary Poppins themed classroom and versatile for the entire year!
Duck for President opinion writing – Should Duck be President?

If you are interested in using Mary Poppins as your classroom theme next year, check out these other ideas!

First Day ideas – FREE printables

Mary Poppins first day of kindergarten treat for parents.
Parent gift for Meet the Teacher night before kindergarten

Data Wall in a Mary Poppins themed classroom and versatile for the entire year!
Student data wall with a Mary Poppins spin!


signature

Filed Under: Decor, Misc Tagged With: Bulletin Boards, Classroom Environment, decor, welcome back, Writing

Low Prep, Easy to Manage Math Centers

Low prep, easy to manage math centers for kindergarten

If you teach kindergarten or have been in a kindergarten classroom for a while, you know that centers can be difficult to put into place. Young students come to us with very little independence and are not able to read directions. Hands-on activities are key to a successful kindergarten classroom.

I came from teaching high achieving first and third grade, so I was familiar with a fast paced, centers-based, independent, active math block. As I prepped for kindergarten math, I made sure I had many activities and manipulatives ready to go. BUT as I began getting into the groove of teaching math to my scholars, I reflected on what was and wasn’t working with my young students. You can read more about that here. I realized that I needed to simplify and make activities low prep for myself and predictable for my students.

Here are a few of the centers that are working WONDERFULLY for our classroom this year…

White Boards  – The magical oh-so-much-more-wonderful version of paper. At the beginning of the year, students practiced writing numbers 1-30 using a number line. Currently, my students are writing as many addition sentences as they can on their own. I’m not quite sure why, but they are so engaged, and I am not complaining! About 3-6 students are at this center together.

fact fluency using white boards

When using white boards, I just ask that students keep their largest number 10 because I really want them practicing facts up to 10 to build their automaticity with those facts which will be a HUGE blessing to them in first grade. Other than that, students choose which facts they write and solve. However, if I know the student is above level, I will challenge them with using numbers up to 20 or beginning to subtract.

fact fluency using white boards

Technology – I am blessed to have quite a bit of technology at my school. We are not 1-to-1, but we currently have 5 laptops, 2 desktops, 3 iPads, and a Promethean Board. I do not tell you these things to brag. I’ve also been at schools with less technology. I just want you to realize that I have these as part of our rotation and it definitely does cut down on the overall noise level of our classroom when almost 10 students are on devices. If you do not have access to technology or certain technologies, you can always add an independent center to help cut down on the noise level while you work with a small group.

technology math center
All computers and laptops are used for i-Ready, a individualized program that our school purchased. Students are required to complete a certain amount of lessons each week.

Student technology in math centers
Our Promethean Board is used as an interactive addition center or for subtilizing practice.

This ice cream addition game is a class favorite. You can find it here. It’s great because you can differentiate it by which addition facts (1-9) it gives the students. We also use the Teacher Tools for Interactive Whiteboards from DreamBox Learning. Our favorites are the ten frames, math racks, and matching number pairs. This subtilizing practice has greatly increased my students’ number sense this year!

Student technology in math centers
Three iPads are used with multiple apps. Students may choose any math app that they wish. The magnetic numbers are used with the Touchtronic app.

Here are some of our favorites: Marble Math, Splash Math, Learn with Boing, Touchtronic 123’s

Pocket Chart – About every 2-3 weeks I switch out this activity. I do not fill this center with an activity kids will need lots of help with. Most activities are strictly number sense or addition. About 4-5 students work at this center together. We loved this 1-20 number sense activity, but I can’t find where I downloaded it. 🙁 It was free.

pocket chart number fluency

Recently, I decided that I wanted my students to really understand the patterns that are in a 100 chart. I was also curious to see which students could quickly identify and order numbers to 100, and which needed assistance. I chose three colors of paper and cut them into fourths. I wrote all of the 5’s and 10’s on blue. Then, I alternated the horizontal rows to make it easier on little eyes as they sorted. All in all, this took me 10-15 minutes while my kids enjoyed indoor recess during a thunderstorm. Low Prep.

The results have been fantastic. The activity is time consuming for students, which allows me to truly concentrate on the students in my small group. It is also quite challenging! I have heard some fabulous conversations between students this week. When introducing the center, I explained that if you see a number in the wrong place, you must explain why it isn’t in the right place before you move it. This has helped the kids to work collaboratively with almost no arguing. Yahoooo!

life-size interactive 100s chart

As an extension, my students completed their very own hundred’s chart using this differentiated hundreds chart freebie. I love that I can print different levels of difficulty for each student! Soon, I will put these in clear sheet protectors and add them to our “white board” center for extra practice.

100 chart fluency

So, let’s talk prep. I don’t need to prep any of the technology centers. I don’t need to prep any of the white board activities. I prep the pocket chart once every 2-3 weeks. The only prep I regularly do is for my small group.

I truly love this set up because I really enjoy focusing on the 4-5 kiddos in front of me when we are in math small group. The repetitive predictable nature of the other centers leaves students feeling successful and allows for fewer teacher distractions. Although the entire arrangement may not work for everyone, you can pick and choose aspects of these centers that may be a success in your classroom as well!

Do you have any other low prep activities that your students enjoy? Share them in the comments below!

signature2

Filed Under: Math, Misc Tagged With: fluency, kindergarten math, math, Math Centers, number sense

Quick Fluency Games to Increase Student Engagement

Fluency is such an important part of our lives in the primary grades. Letter fluency, sound fluency, sight word fluency, math fluency…the list goes on and on. Our classroom even has a “Fluency Center” where students practice their very own set of 10 sight words each day. However, there is not enough urgency at that center….and to be honest, I was craving more urgency. I wanted my students to want to see how quickly and consistently they could recite letter sounds and sight words, but I wasn’t quite happy with what I had going on.

Fun fluency games that are focused on academic skills and increase student engagement. Great for small group warm up in math and reading!

Then I was introduced to Spot It. By a second grader. …and of course I ordered it the very next day. Yup! That’s the truth!

This game transformed my small group warm up in literally one day. All students are on task. They have to be. They game requires that you are constantly observing, constantly reassessing, constantly making connections between different images or words. There are so many versions of this game, which is wonderful for teachers who want to keep those struggling students actively engaged.

Fun fluency games that are focused on academic skills and increase student engagement. Great for small group warm up in math and reading!

How to play:

The game is extremely simple, but challenges the brain the entire time. Because of this, it is perfect for primary grades. Students feel successful and are excited to play every time you open the game. To play you simply deal out the deck of cards evenly to the small group of children, place the last card face up in the middle, and make matches. There is no “taking turns”. Students must quickly scan the middle card and then search their top card for a match. (This is key. ONLY the top card. “One card at a time, or you are cheating, and scholars don’t cheat!” That is the end of that issue!) The quicker you are, the better. You want to get rid of all your cards as quickly as possible. First one with no more cards is the winner!

Fluency Activities:

-Simple alphabet matching – say the letter you identified as a match as you place your card in the middle.

-Letter/sound matching – I used the alphabet set, but my students had to say the letter sound as they placed their match in the center. This was a lot more challenging (even for me) because your brain wants to say the actual letter that your eyes see.

-Math fluency using the number/shape set.

-Simple English word fluency – I plan on using this set with my ESOL student so that he can become more familiar with common day to day words.

Fun fluency games that are focused on academic skills and increase student engagement. Great for small group warm up in math and reading!

Overnight, we have become Spot It kings and queens. We are competitive and focused on building letter/sound knowledge every day. We also had a kindergarten conversation about not bragging, complimenting others no matter who looses, and saying congratulations. 

If you use this game, share your ideas and experience with it in the comments. We’d love to hear new ideas for our classroom. If you’re interested in grabbing a game of Spot It for your kiddos, check out the link below.

signature

Filed Under: Literacy, Misc Tagged With: fluency, games, Reading, Reading Centers

Learning to Thrive in Kindergarten Math Centers

Learning to thrive in kindergarten math centersWhen I taught first grade, our math centers rocked. Like seriously, it was awesome. The kids were on task while using manipulatives, journals were getting done on time, each group came to me for small group, and we finished 3-4 rotations per day in about one hour and ten minutes. I used this organization of centers and small group to make our time together as successful as it could be.

When I taught third grade, math was even more independent. We had math early finisher projects that the kids LOVED. The kids came to small group, had a computer center, and a math activity center. I pulled them for extra practice often, used lots of manipulatives to practice multiplication, and enjoyed watching them grow into upper elementary math scholars.

Teaching kindergarten is a totally different ball game. Independence is a far-fetched idea. I rarely get through more than two groups. I can no longer prep center activities that match our current skill. Centers are completely review. …And for a while, I felt awful.

Math was the one time of the day I would get anxiety. I had spent a lot of time this summer prepping and updating my math center resource so that I could use it in my classroom again. It had worked so well in first grade, and I just knew it would keep me super organized. I had the students grouped into 4 groups, storage for each day’s center, and rotation cards posted on a beautiful brand new huuuuggeeee pocket chart. math rotation boardPeople, it didn’t work. It didn’t flow at all. It was not successful like it was in my first grade classroom. It was like my math block was completely planned out, and completely broken at the same time. And that’s when I realized my mistake. For some reason, I thought that a system that worked for seven year olds would work for five year olds. It sounds insane as I write it here. Of course it wouldn’t. But I will tell you that I tried to make it work. And I will tell you that I failed, miserably. Some parts of teaching are just trial and error.Recognizing a need for change within your kindergarten math blockI decided that I needed to stop forcing my OCD on this hour of my day, because it was just making everything crazy chaotic. As I started to let go, I began to see elements of my math block that were thriving. Kids weren’t expected to switch activities as many times throughout the hour. Students were focusing on one task for longer periods of time. I was able to spend quality time with about 8 to 15 of my 19 students each day during small group.

So…What has changed?Add the white dots on a domino to practice addition. Stack the dominoes on the correct sum.

Switching from Small Group – This has been BY FAR the best change we have made. Students no longer switch centers on a regular schedule like they do during our literacy centers each morning. I pull a group of five students to my table at the beginning of our math block. As I see students who finish quickly or who are demonstrating the skill well, I dismiss them to the groups that are at centers. Usually, I will say, “Molly, you may go switch with Holly. Tell Holly to come to small group, and you can start working in her place.” Molly leaves small group. Holly comes to small group. If there is a student who is having trouble, this allows me to keep them with me even longer. Ta-da! (Super fancy, I know!)

Small Group Instruction – I usually meet with 8-15 students each afternoon depending on which kids are doing well and which need more assistance. Students stay at small group if they are having trouble. Kids come for five minutes if they can demonstrate the skill well.

Centers – Centers are now ALL review. (I used to change them every week or two. Now, they remain the same for our entire chapter or unit, unless I see kids beginning to work less and play more.) During these centers, I am pulling kids and swapping kids between activities as I see fit. It just seems to work for us this year.

1. One center usually includes creating addition sentences on white boards. For some reason, the kids love this. (I’ll take it!!!) Easy, no-prep center. Creating addition sentences on white boards and modeling with counters.
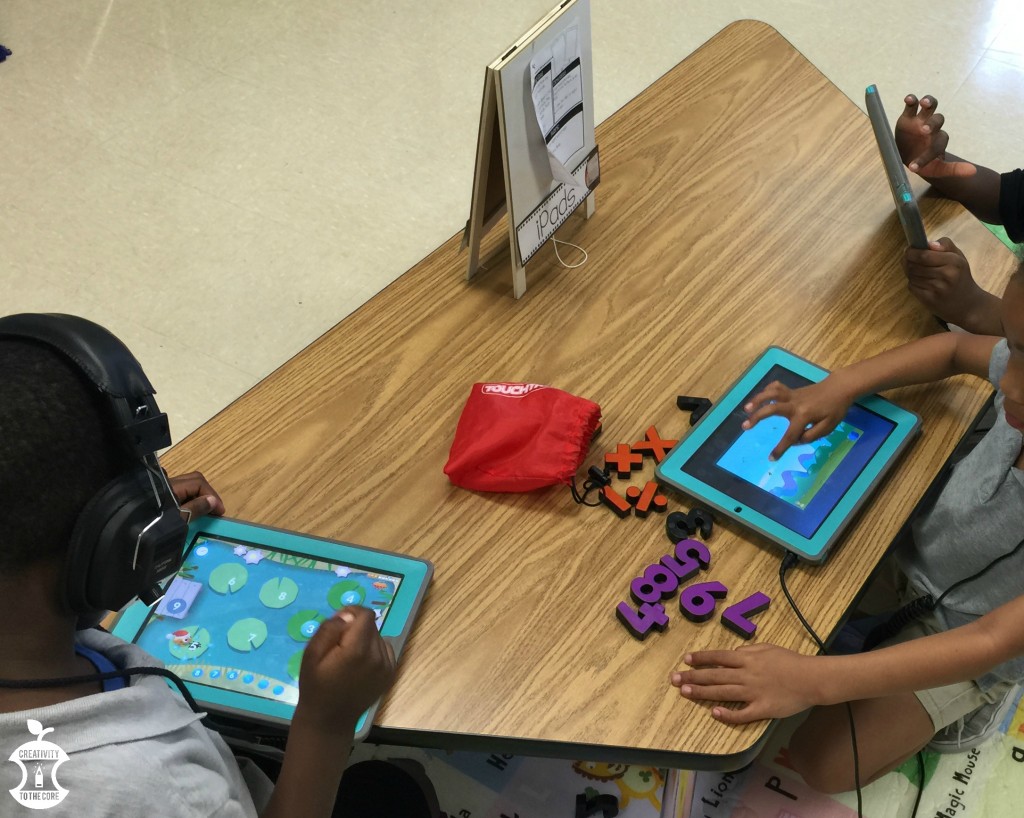
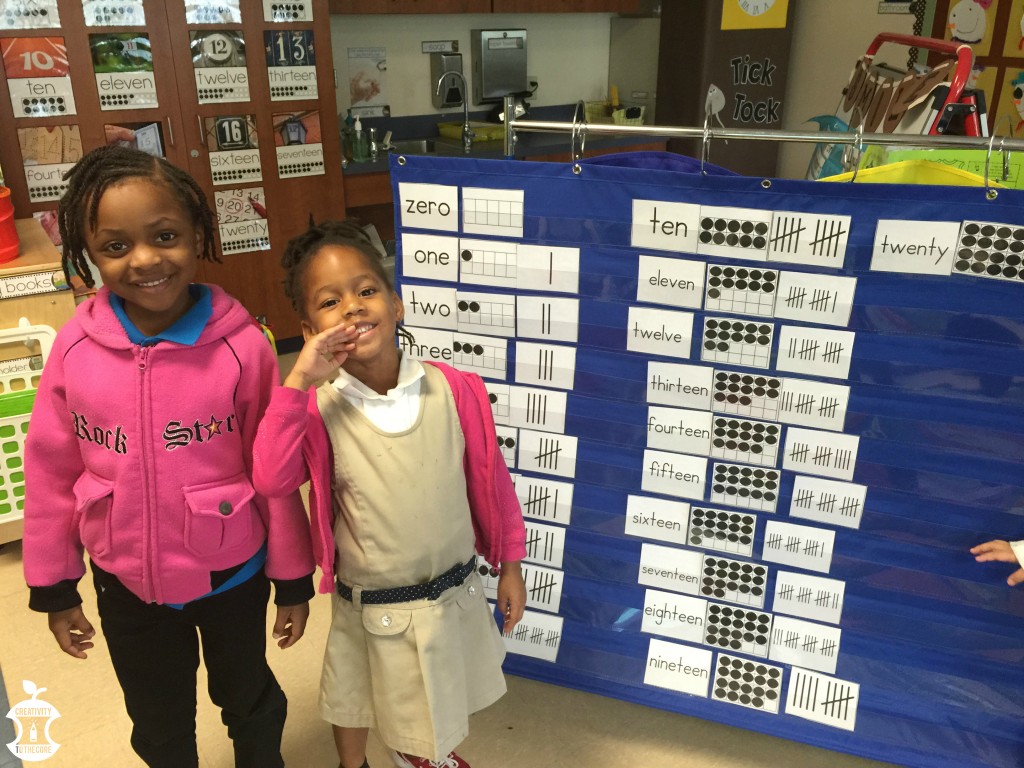
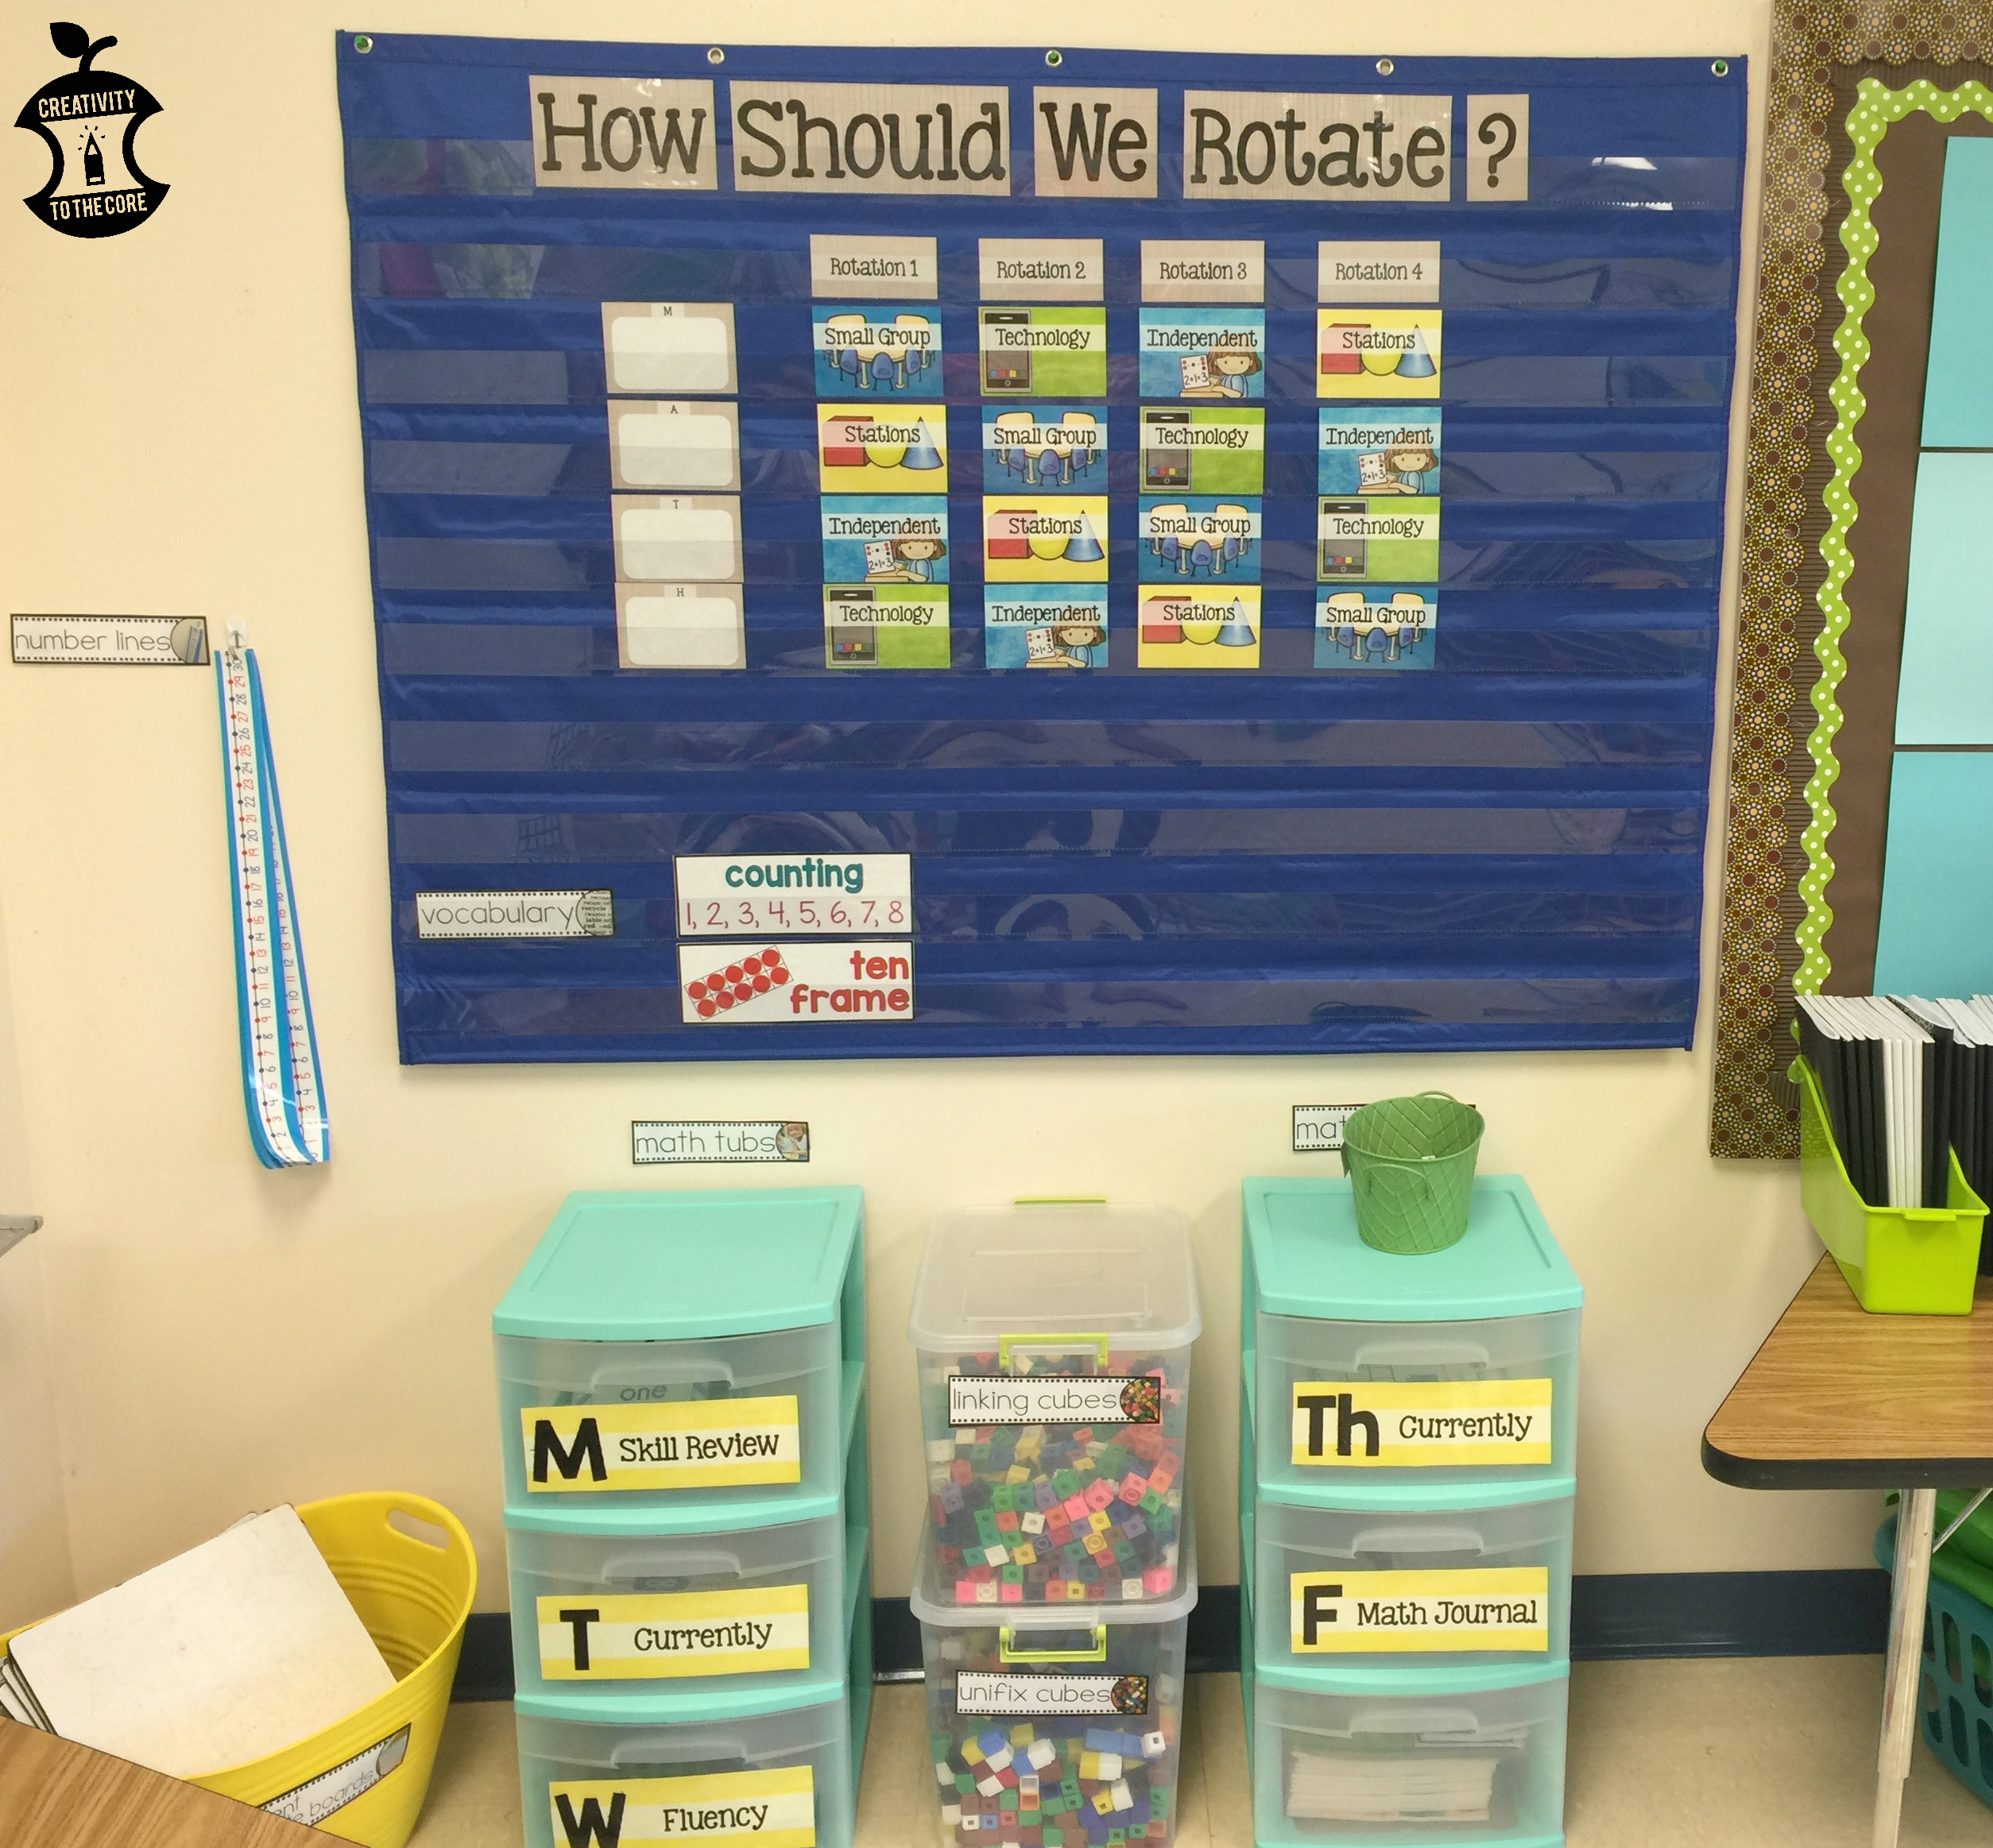
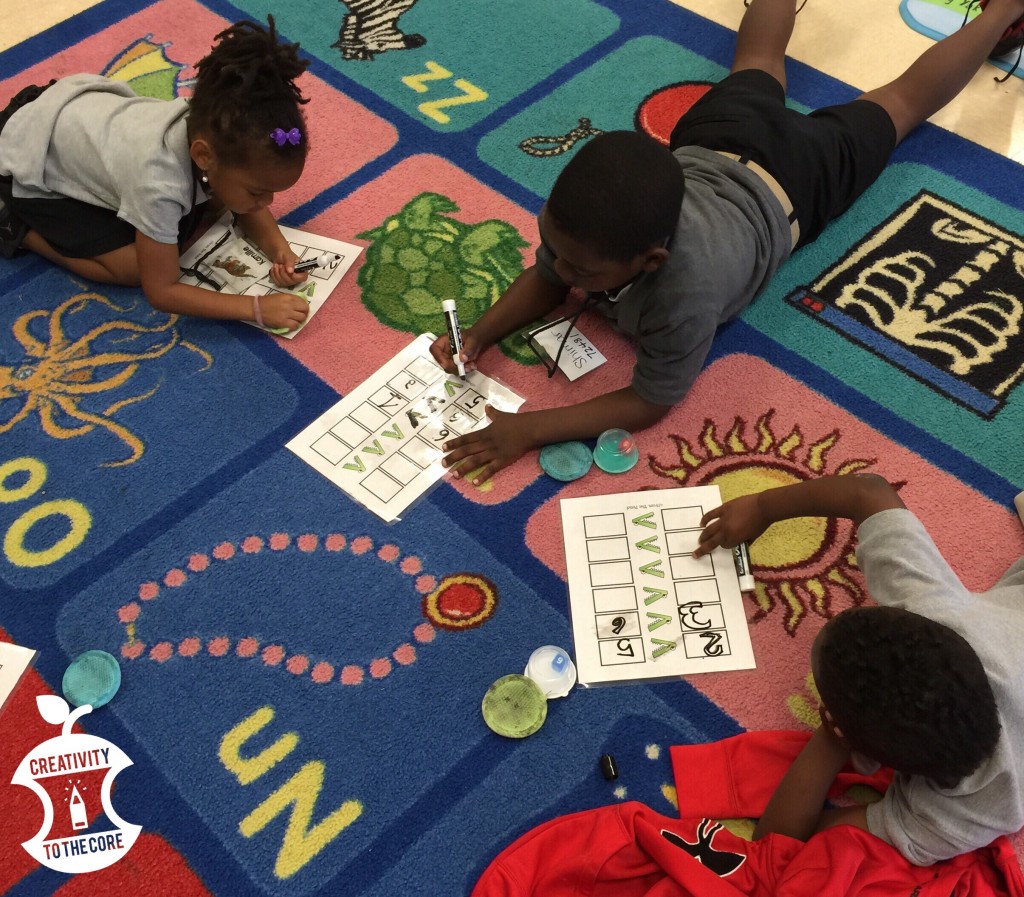
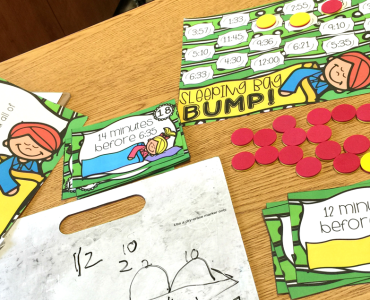
2. Another center is always ten frame fluency. Students quiz each other on how quickly they can identify the number in the ten frame as well as how many more are needed in the ten frame to make a ten. This helps them practice subtizing and addition fluency.Ten Frame Fluency Quiz & Trade
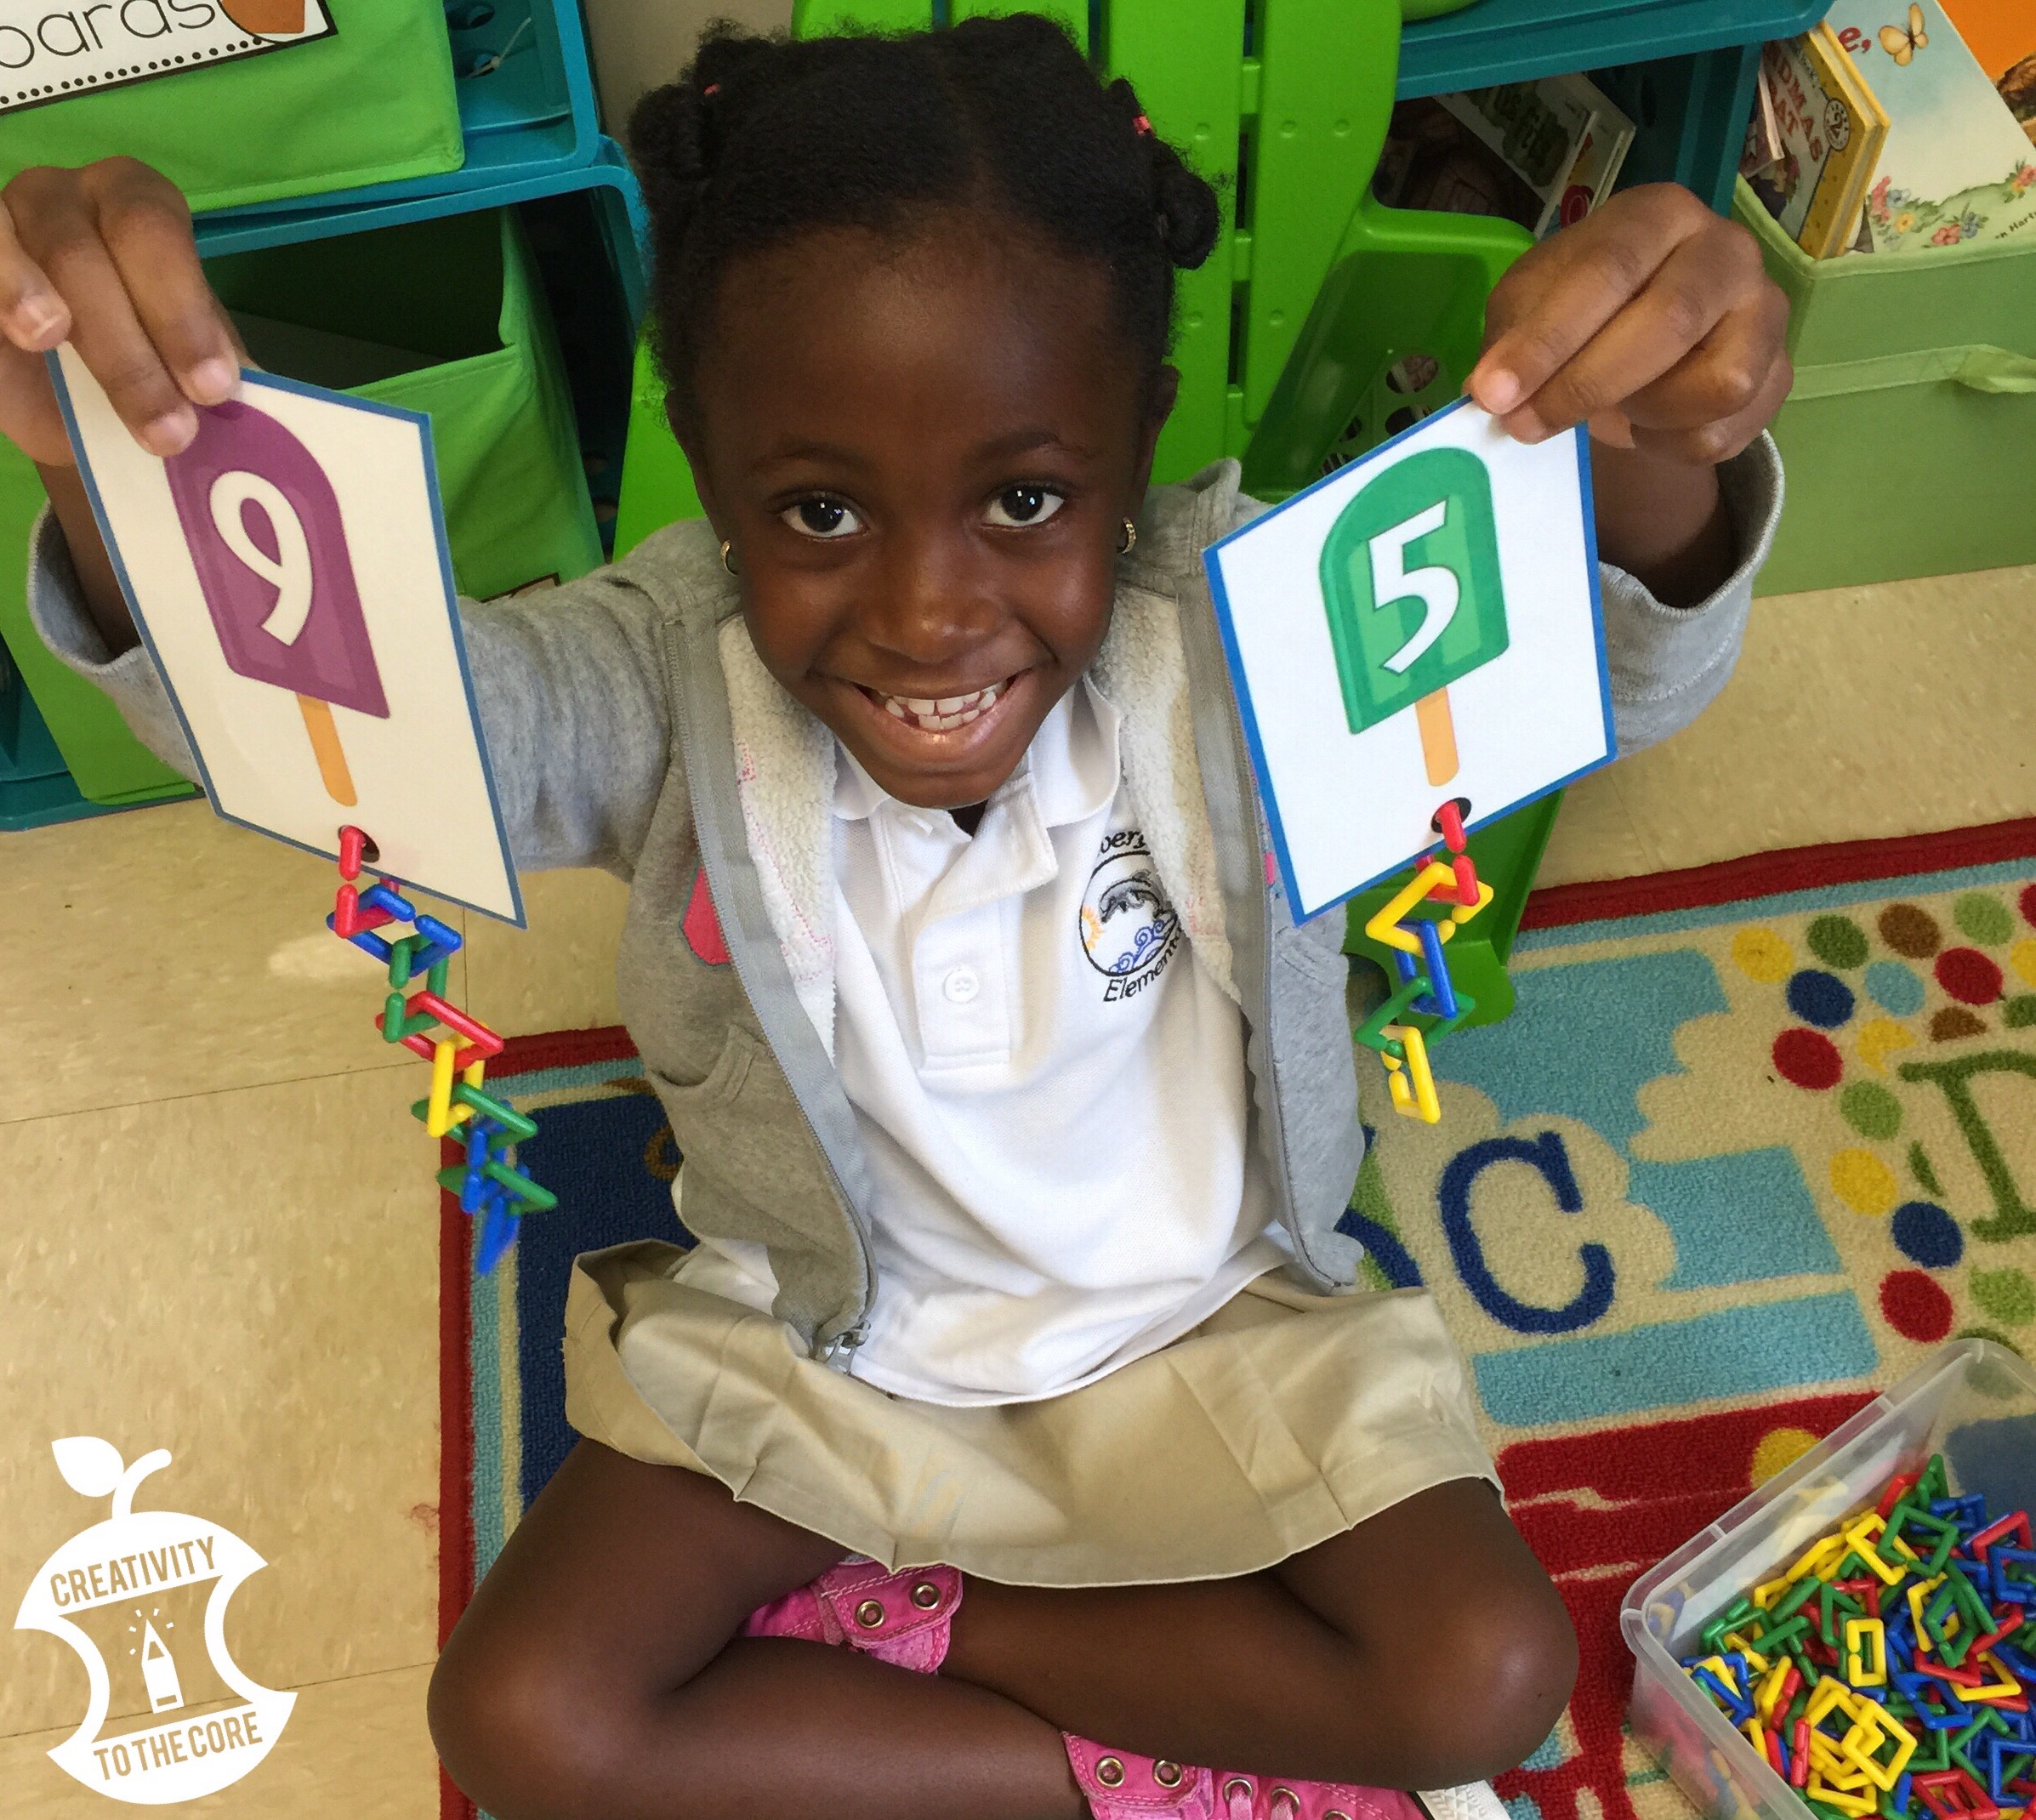
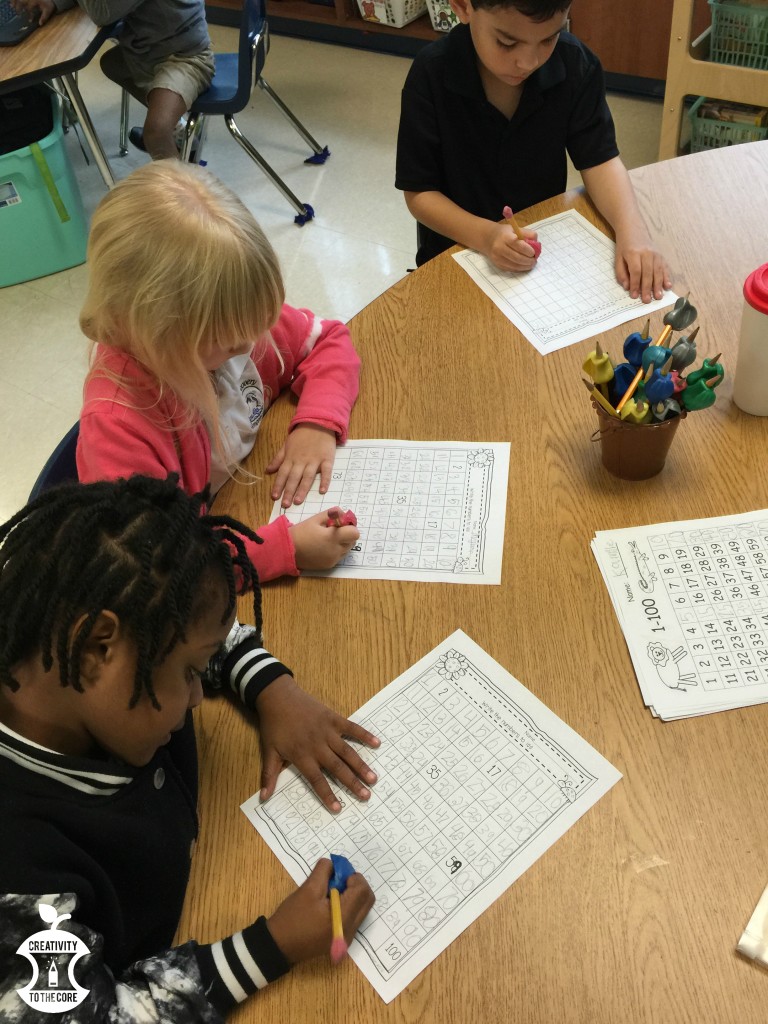
3. The last center is a review activity. This may include ordering number cards, using links to build numbers, comparing numbers, or counting by 5’s and 10’s. You can find this popsicle center here.
Use math links to create chains of each number. Quick prep, easy to complete centerComparing numbers with dice to practice greater than/less than symbols

4. Technology stays pretty much the same because our school requires us to use a program called i-Ready. We also have 3 iPads that students may play any math games on. Butterfly Math is my current favorite.

What’s the lesson? Do what is best for you!Do what is best for your kids. Do what is best for your classroom. Do what is best for you so that you can implement high quality instruction each and every day. What works beautifully one year, may be the bane of your existence the next…I exaggerate, but you understand. Your best instruction will be exposed when have found your groove. Be open to change. Change as you go. Find your groove, and teach on!

Want to read more? 

  • Literacy
  • Decor
  • elapsed time open number lines
    Math

signature

Filed Under: Math, Misc Tagged With: kindergarten math, math, Math Centers

5 Effective Ways to Practice Short Vowels Within Text

5 effective ways to practice short vowels within text

Learning short vowel sounds is a critical part of the early reading process. Usually, short vowels are some of the very first sounds children learn. Some students will catch on quickly, while others will need more instruction and review. Here are some fun ways to practice short vowels in a whole group and small group setting so that you will keep your students engaged in purposeful learning!

  1. Short Vowel Chants – After introducing a vowel, teach your students a chant. Place the words of the chant under a document camera or on a Smart Board so that your students can read while you chant. Practice it many times, add motions to the words, and practice saying words that have that specific vowel sound. Throughout the day, use this chant as a brain break or transition helper. Students LOVE these chants! You’ll even hear them singing the chants throughout the day. Watch our short O chant here.

Short Vowel Chants help to increase student engagement and practice short vowel sounds. They are wonderful to use as transition helpers or as brain breaks!
Short Vowel Chants help to increase student engagement and practice short vowel sounds.

2. Identifying Vowels in Readers – Find easy printable emergent readers or sight word readers online. These texts are perfect because they are normally very repetitive. Even readers that support your thematic units, which are generally less repetitive, are great for this activity. As you read with students, have them identify consonants and vowels. Students mark a “V” over the vowels that they find in any word. Soon, you will see little “V’s” popping up on math assignments and homework pages. You may also allow students to highlight vowels or use the thin post-it notes to mark them. (This turkey reader can be found from A Year of Many Firsts)

Identifying short vowels by annotating text

3. Leveled Readers with Short Vowels – I was lucky enough to inherit a class set of Harcourt decodable leveled readers. These are gold!!! Each book has three short stories. Each story is only about 5 pages, so students do not get frustrated. The words used in the book are specific to a certain vowel. Usually (at least at the lower levels), the books focus on CVC words. Students are over the moon with excitement when they see vowels that they know and can read! They feel successful. They are engaged in reading the entire time. Happy students. Happy teacher. (If you do not have access to any decodable readers, you can find some online through Amazon or you may even consider creating a Donors Choose project for them.)

4. Short Vowel Reader’s Theater – Use Reader’s Theater scripts that focus on one short vowel sound at a time. Students each take a part and read the script together. This provides speaking and listening practice, as well as, short vowel practice. Use these in small group or in a “Read to Someone” station. Kids are always eager to read a play together!

short vowel reader's theater

5. Short Vowel Comprehension Passages – As students begin to master short vowels in isolation and within text, move forward to the comprehension of short vowel words. Use passages that are focused around one rime (an ending like -op in hop) to reinforce the short vowel and rhyming words. Once students decode the passage, begin reading again to fully understand what is going on. Student comprehension is strong when it is not blocked by stumbling over difficult words or unknown vowel combinations. (Reading passages with a familiar repeated rime is not “real world”. This simply gives students confidence when reading so that they are able to have an understanding of what they actually read.)

Short vowel 5W comprehension passages for primary grades

I hope you can take an idea or two back to your classroom! If you have other ideas on how to practice short vowels within text, share them in the comments below!

signature

Filed Under: Literacy Tagged With: comprehension, reader's theater, short vowels, student engagement

  • Go to page 1
  • Go to page 2
  • Go to page 3
  • Interim pages omitted …
  • Go to page 8
  • Go to Next Page »

Primary Sidebar

Hi, I’m Meredith!

READ MORE

Search

Follow on Instagram

Footer

Copyright © 2022 · Creativity to the Core · Site by Ready to Blog Designs