• Skip to primary navigation
  • Skip to main content
  • Skip to primary sidebar
  • Skip to footer
Creativity to the Core

Creativity to the Core

Learning Makes Us Who We Are

  • Home
  • About
  • PD
  • Resources
    • Freebies
    • Recommendations
  • Blog
  • Book Now/Contact
  • Shop
  • TPT
  • Instagram
  • Facebook
  • Pinterest

Reading

Quick Fluency Games to Increase Student Engagement

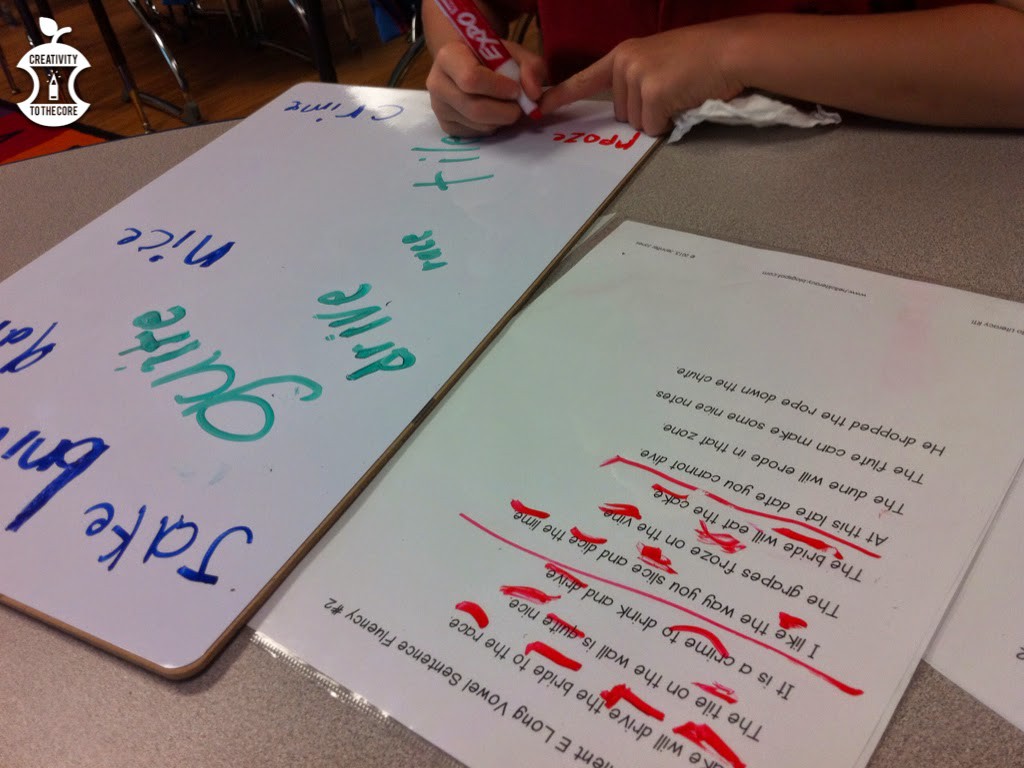
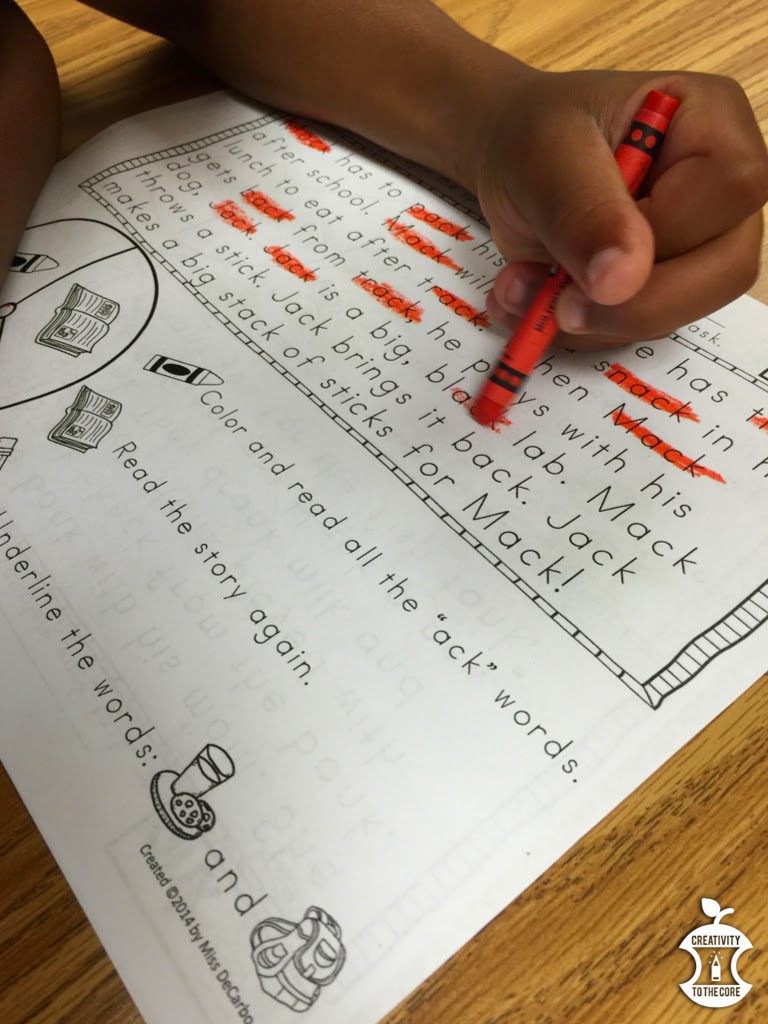
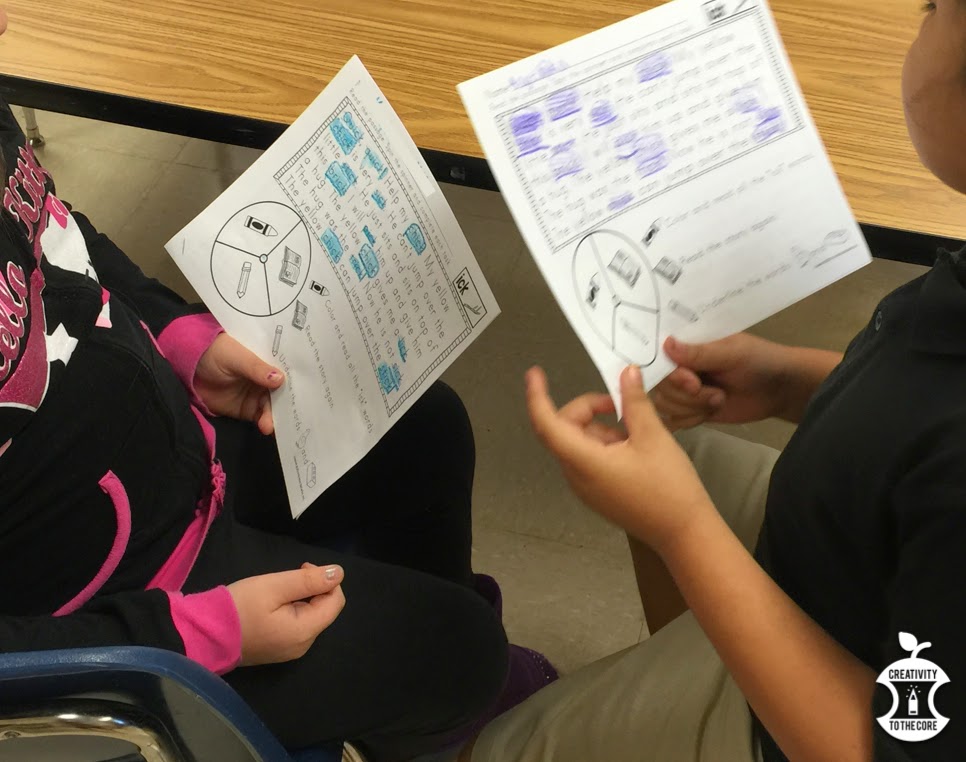
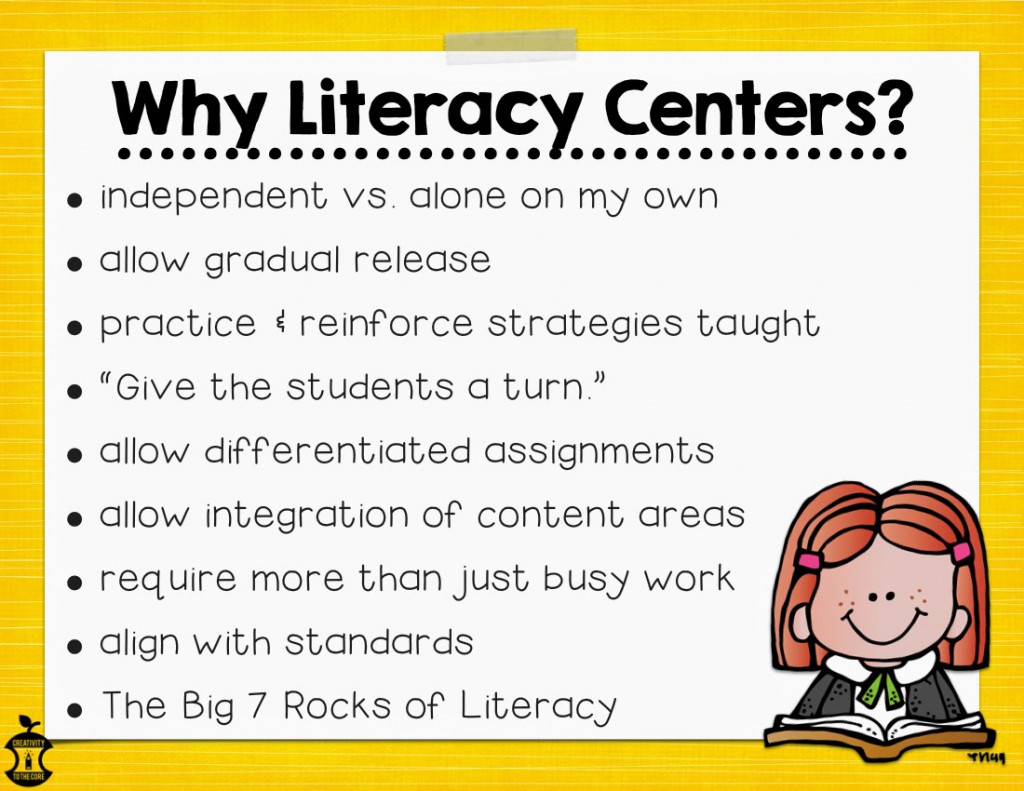
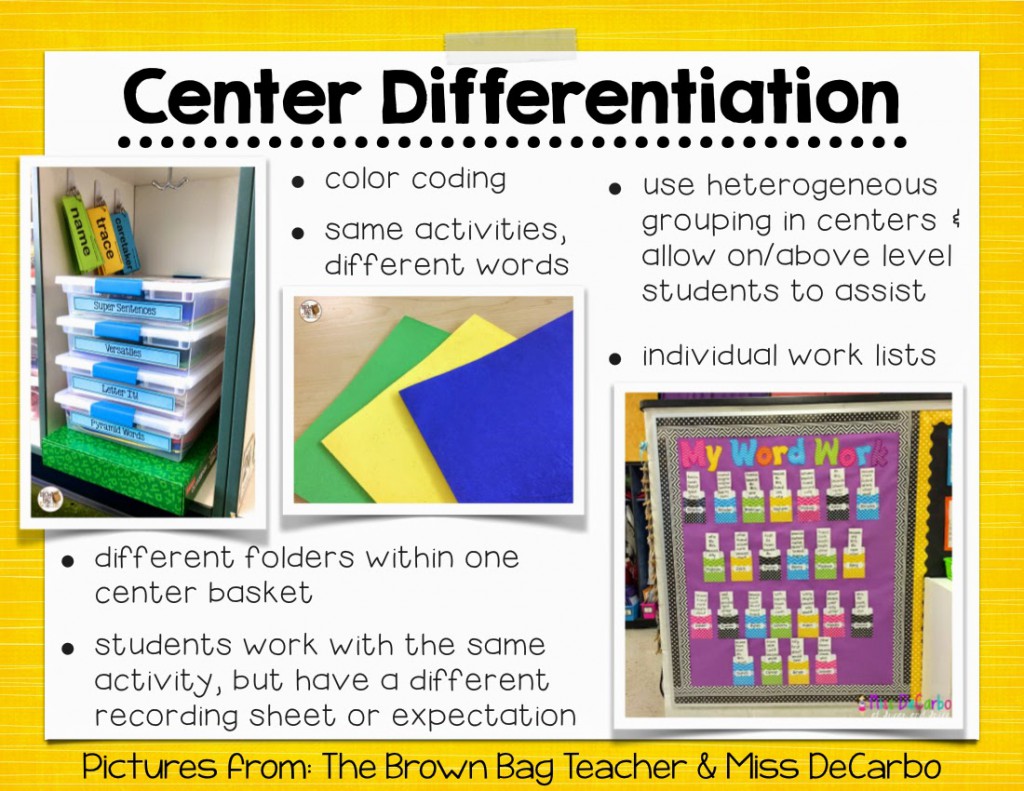
Fluency is such an important part of our lives in the primary grades. Letter fluency, sound fluency, sight word fluency, math fluency…the list goes on and on. Our classroom even has a “Fluency Center” where students practice their very own set of 10 sight words each day. However, there is not enough urgency at that center….and to be honest, I was craving more urgency. I wanted my students to want to see how quickly and consistently they could recite letter sounds and sight words, but I wasn’t quite happy with what I had going on.

Fun fluency games that are focused on academic skills and increase student engagement. Great for small group warm up in math and reading!

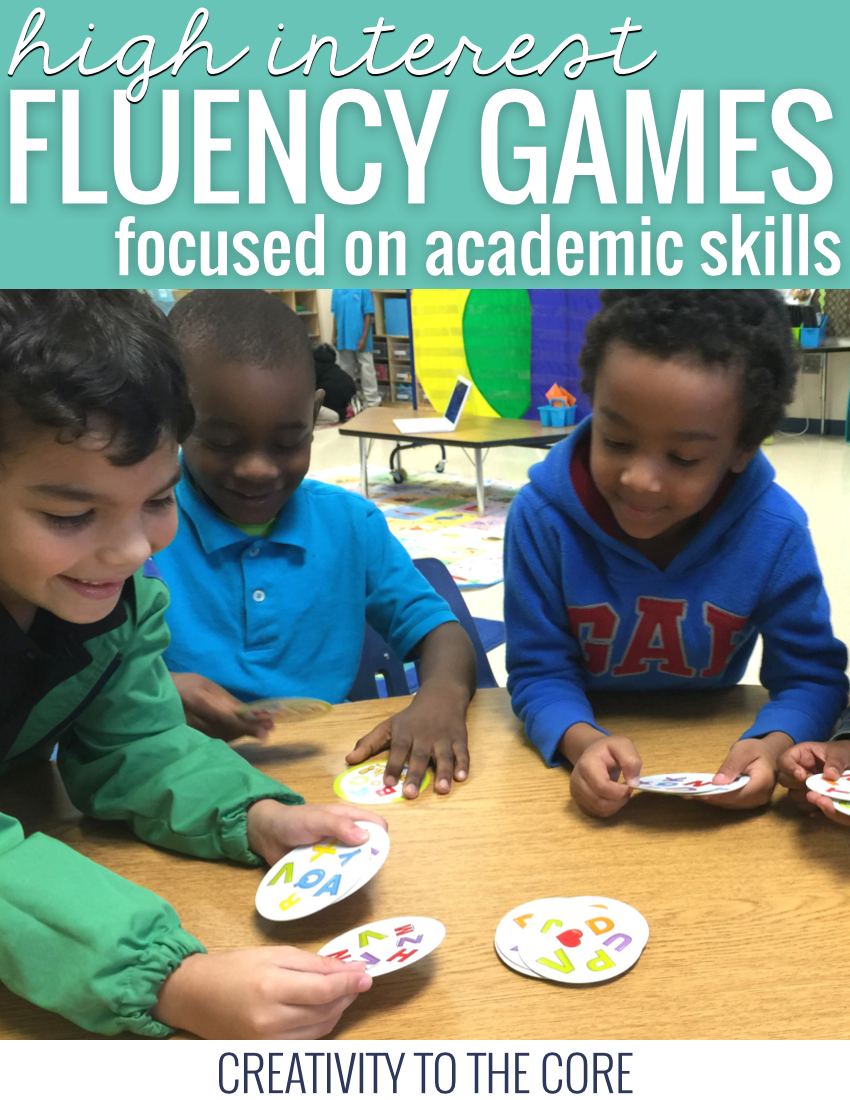
Then I was introduced to Spot It. By a second grader. …and of course I ordered it the very next day. Yup! That’s the truth!

This game transformed my small group warm up in literally one day. All students are on task. They have to be. They game requires that you are constantly observing, constantly reassessing, constantly making connections between different images or words. There are so many versions of this game, which is wonderful for teachers who want to keep those struggling students actively engaged.

Fun fluency games that are focused on academic skills and increase student engagement. Great for small group warm up in math and reading!

How to play:

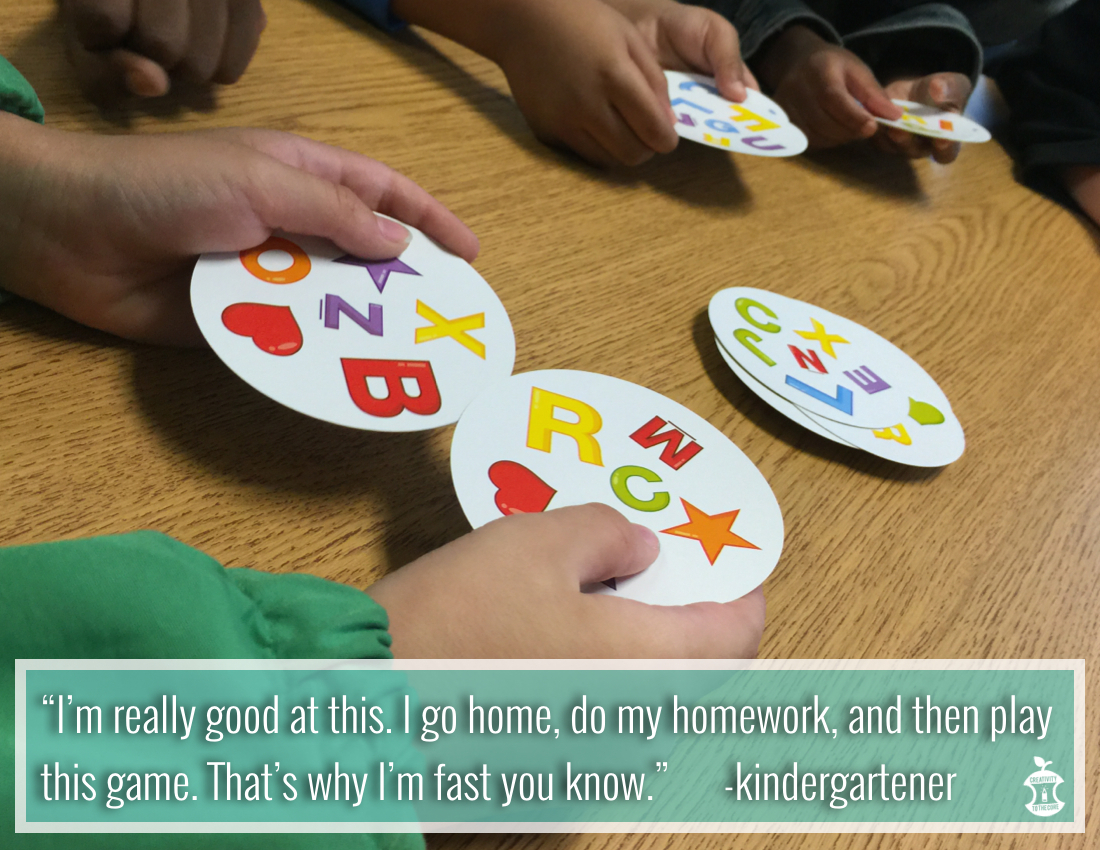
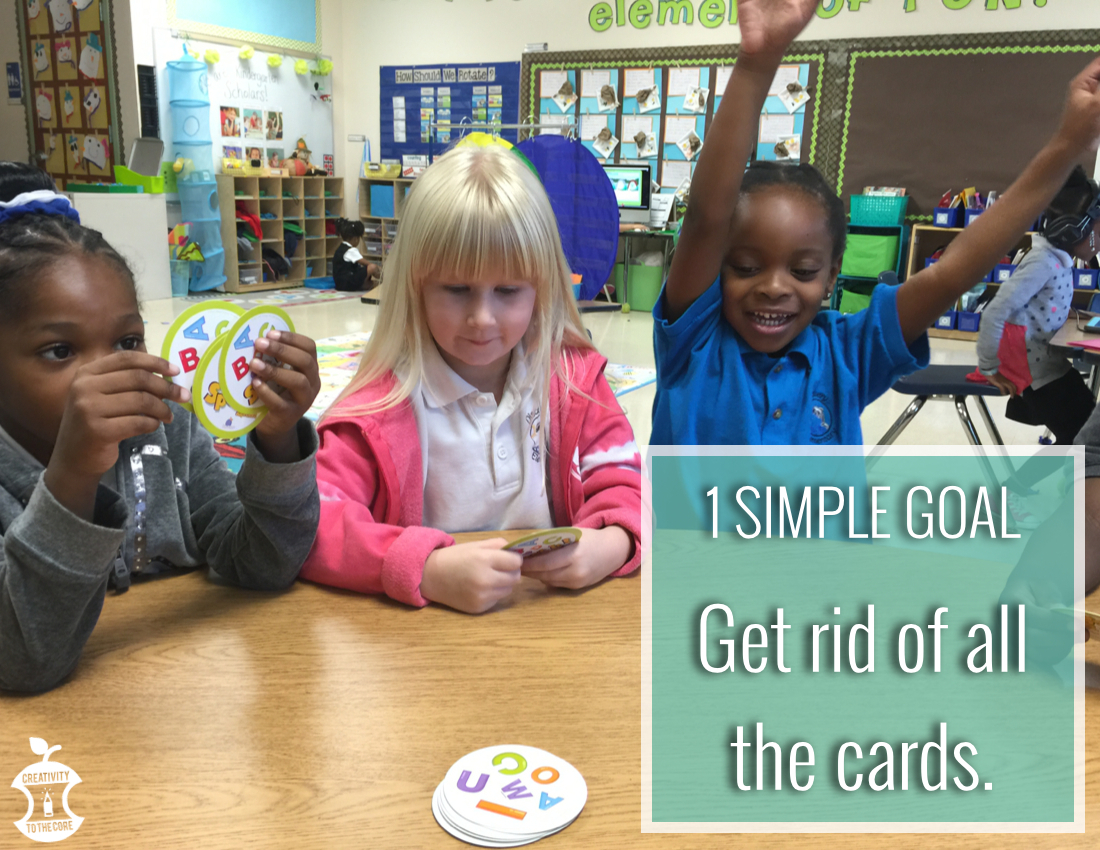
The game is extremely simple, but challenges the brain the entire time. Because of this, it is perfect for primary grades. Students feel successful and are excited to play every time you open the game. To play you simply deal out the deck of cards evenly to the small group of children, place the last card face up in the middle, and make matches. There is no “taking turns”. Students must quickly scan the middle card and then search their top card for a match. (This is key. ONLY the top card. “One card at a time, or you are cheating, and scholars don’t cheat!” That is the end of that issue!) The quicker you are, the better. You want to get rid of all your cards as quickly as possible. First one with no more cards is the winner!

Fluency Activities:

-Simple alphabet matching – say the letter you identified as a match as you place your card in the middle.

-Letter/sound matching – I used the alphabet set, but my students had to say the letter sound as they placed their match in the center. This was a lot more challenging (even for me) because your brain wants to say the actual letter that your eyes see.

-Math fluency using the number/shape set.

-Simple English word fluency – I plan on using this set with my ESOL student so that he can become more familiar with common day to day words.

Fun fluency games that are focused on academic skills and increase student engagement. Great for small group warm up in math and reading!

Overnight, we have become Spot It kings and queens. We are competitive and focused on building letter/sound knowledge every day. We also had a kindergarten conversation about not bragging, complimenting others no matter who looses, and saying congratulations. 

If you use this game, share your ideas and experience with it in the comments. We’d love to hear new ideas for our classroom. If you’re interested in grabbing a game of Spot It for your kiddos, check out the link below.

signature

Filed Under: Literacy, Misc Tagged With: fluency, games, Reading, Reading Centers

Samuel Eaton’s Day: Mentor Test Lesson Plan Ideas

When I was in elementary school, my aunt and uncle lived in Boston. We would travel to Plymouth (because I begged each year) to visit the recreated Plymouth Plantation during the summer. Ever since, I have loved learning about the lives of the early colonists.

Now that I am teaching, I enjoy focusing on the Pilgrims and Plymouth Plantation during the month of November. We often read three books off and on over the course of the month: Samuel Eaton’s Day, Tapenum’s Day, & Sarah Morton’s Day. These three books are written from the child’s point of view and are highly engaging because of the real photographs. The children in all three books are based off of a real child who lived in Plymouth long ago.

Samuel Eaton's Day

Depending on the grade level you teach, these books can be read from cover to cover (they’re quite long) or by simply focusing on specific parts. When teaching first grade and kindergarten, I pick certain pages to read every few days. When teaching third grade, I would read half of one book during our real aloud.

My favorite way to use this book to teach about the way pilgrim children dressed. Samuel Eaton’s Day gives a step-by-step process of how to put on a young boy’s clothing. Students LOVE looking at each individual piece and laughing at the fact that little boys wore dresses! After reading, we compare and contrast the way Samuel dressed to the way we dress. I will be using this book with my kindergarteners this year to practice sequencing when writing. We will be writing about what the pilgrim boys wore using Samuel Eaton’s Day and then what the pilgrim girls wore using Sarah Morton’s Day. My students will have to list three pieces of clothing in the order that the children put them on in the 1600s. I will add pictures of that soon!

Samuel Eaton's Day Freebie

If you are interested in using this book in your classroom, click here to download the writing paper and head over to Amazon and grab a copy!


signature

Filed Under: Literacy, Misc Tagged With: books, mentor text, pilgrims, Reading, Thanksgiving

Interrupting Chicken: Lesson Plan Ideas

Interrupting Chicken Activities
Because August marks the beginning of the school year and we are just starting to focus on classroom rules, I love reading Interrupting Chicken! This book is all about…how did you guess??…an interrupting chicken. The little chicken wants a bedtime story, but he constantly interrupts his father throughout the book. David Ezra Stein uses powerful illustrations and speech bubbles to show how and when the little chicken interrupts.
I use Interrupting Chicken during the first week of school to teach students the importance of being respectful and not interrupting others.  There is some repetition throughout the book which helps students to participate actively the entire time. One of my favorite aspects of this book is the fact that the chicken appears inside a book inside of the book! This is an excellent opportunity to show students the difference between the actual book and the story within the book. My students are always thrilled to read this story again and again!
After we have read the book one time, I show my class this video as a review. Then, we use this freebie from Mrs. Wheeler (see the pictures above) to apply the book to our real lives. We sort the cards in a pocket chart and discuss how we can all be “Respectful Students” instead of “Interrupting Chickens”. Throughout the year, I may teach a few mini lessons on this same topic to remind students of respectful behaviors. This book is the perfect addition to your year, because students will never forget the interrupting chicken!
Do you love books? We do! Each month, I will be joining 12 teacher bloggers for a link-up called Books Bloggers Love. We will each share one of our favorite books to use for the following month and show you how we use it. Keep in touch and you will have a chance to win 4 of the 12 books that we blogged about each month! Enter below to win 4 books this month!

a Rafflecopter giveaway

An InLinkz Link-up

Filed Under: Literacy, Misc Tagged With: Back to School, books, freebie, literacy, Reading

My 3rd Grade Schedule

I am so {beyond} excited to be sharing my schedule with you today as part of the #2getherwearebetter monthly link up hosted by Schroeder Shenanigans in 2nd & Lucky Little Learners. (Let’s just stop right here and talk about two of the most genuine, friendly, encouraging ladies on the face of the planet! …I may be biased; Ashley & Angie are amazing!)


Scheduling is my thing. I love it. Could be my type A personality. Could be my colorful flair pens…but I love it. 


Wait! 🙂 My schedule is a bit confusing and very broken down into groups and rotations. I co-teach during reading only, so this is helpful to note:
8:00-10:10 – Classroom A with Ms. H, Reading
10:40-2:00 – Classroom B with Ms. N, Reading
(No, I do not have my own classroom this year, however, I do have students registered under my name, if that makes sense…)

—–


Here’s a little peek into my day of co-teaching third grade!


8:00-8:15 (Classroom A)
Welcome students, attendance, check homework, announcements, begin morning review.

Homework usually consists of a reading comprehension passage and a math review page. We check homework for completion (Except if there are BIG noticeable mistakes…then we conference with that student for a few minutes). We use a simple checklist with their names so that we can keep track of who is frequently not completing homework. This helps us when report card time comes around.

8:15-8:30
Because our 3rd graders in Florida have to pass to state assessment to be promoted to 4th grade, our school creates reading and math review packets. Students complete a page or two of the reading review packet before our mini lesson each morning. Ehhh you know…nothing really fun, but they are helpful, so we do them as test prep.

8:30-8:40
Mini-lesson – This changes often, but may include Picture of the Day or a YouTube video or maybe a short read-aloud to introduce a topic.

We loved this SUPER engaging {and hilarious!} mini lesson about comparing and contrasting using Apples and Oranges: Going Banana’s with Pairs (Thanks to Teaching with a Mountain View!)

Students love watching YouTube videos before practicing or reviewing a skill! Read more about this activity here!

8:40-10:10
Integrated Reading Block

Because there are two of us teaching at all times, we try to maximize our time and meet with all of our students. 

(Our school uses Journeys for the reading curriculum, however, we are urged to use other resources. Journeys is only one tool. We do not use it often at all. It is usually only used for intervention students.)

We teach completely in small group during reading. There are two groups of six students who are below grade level and three groups of four to five students who are on-level or above-level. Both teachers hold small groups at the same time. We are on opposite sides of the room, so it’s not distracting. We basically split the entire room in half when we are teaching — it’s like two separate groups of small group and centers in the same room. 

Monday and Tuesday – The main classroom teacher always begins the week with the below grade level students to lay a foundation. She has 2 small groups for about 30 minutes each. I always start the week with the on- or above-grade level students. I have 3 small groups for about 20 minutes each.

My Mon./Tues. schedule:
9:00-9:20 – Rotation 1
9:20-9:40 – Rotation 2
9:40-10:00 – Rotation 3

Wednesday and Thursday – SWAP! This gives students the ability to hear the same concept in two different ways, from two different teachers. I reinforce the lesson with the below-level students. The main classroom teacher reviews and enriches the lesson with the on- and above-level students.

My Wed./Thurs. schedule:
9:00-9:30 – Rotation 1
9:30-10:00 – Rotation 2

Friday’s schedule:
Assessments and finish any incomplete centers.
This was taken from my small group area. You will see the other teacher’s “side” directly across the room. One of her groups is in small group and the other is working on computers in the far corner of the room. When she is ready to switch, she will simply have those two groups trade spots.

Centers
While we are teaching our small groups, these centers are happening throughout the classroom. Students spend two days at each center. Our centers have broad labels, so that we can change them to include activities that are meaningful for students throughout the year. See the pictures below for some real-life examples:

  • Computer – We have a program called iReady that is used throughout the school. Students take individualized reading and math lessons on the program.
  • Vocabulary/Novel Study – My novel study groups read their novel, make annotations, and respond to their “flippy prompts” (blue flaps seen below). When we are not reading a novel, students complete vocabulary activities at this center.
  • Skill Practice – This center changes depending on our skill. It is differentiated for the different groups of students. There are often two separate activities for certain students. This center almost always includes writing. Sometimes it has task cards. Overall, it is based on the standard that we are teaching that week.
  • Text Evidence – Students are given books or passages and questions. We make sure that they are focusing on finding text evidence and responding in complete sentences with evidence based sentence starters. Paired text passages are a hit with students in this center.


Grab these Fiction and Nonfiction prompts that can be used to extend reading comprehension or during novel studies from The Teacher Talk.
Here is a student making predictions and reading Stuart Little in our Novel Study center. Many of our on-level students still struggle with forming complete sentences to explain their thoughts. We infuse TONS of writing throughout the day to help students to improve throughout the year.
This is a student practicing research and point of view in our Skill Practice Center.

10:00-10:05
Wrap up small groups, clean up centers, go to Specials.

10:10-10:40
Specials – Computer, Art, PE, Music, Media, or Chess

—–


When I switch classrooms, the students in Classroom B do pretty much the exact same activities as in Classroom A. I will just list times for you here. The activities are almost identical to the ones explained above.
10:45-11:20 (Switch to Classroom B)
Wrap up math from before Specials.
Snack and reading review packet warm up (same one mentioned above).
11:20-11:30
Mini lesson
11:30-12:40
Integrated Reading Block
My Mon./Tues. schedule:
11:30-11:50 – Rotation 1
11:50-12:10 – Rotation 2
12:10-12:30 – Rotation 3
My Wed./Thurs. schedule:
11:30-12:00 – Rotation 1
12:00-12:30 – Rotation 2
Friday’s schedule:
Assessments and finish any incomplete centers.
12:30-12:40
Wrap up small group and centers, clean up, go to lunch.
12:45-1:20
Lunch
1:20-1:40
Recess
(Truth – It’s Florida. It’s hot. Sometimes it’s miserably hot at this time. It’s optional to go outside. Many times we just do a series of GoNoodle dances in the classroom instead of sweating profusely.)
1:45
Assign homework, pack up
2:00
Dismissal
Thank you for stopping by to read about our day in third grade! Be sure to check out other teacher schedules below!
 
 
An InLinkz Link-up


Filed Under: Literacy, Misc Tagged With: literacy, Reading, Schedule

The Early Reading Process

I’ve recently been spending a lot of time studying and reviewing for my state’s K-12 Reading assessment which I have to pass to obtain my Master’s degree in Reading. This test also certifies you to be a Reading Specialist, if you so choose. As I was talking to my friend from class who already took the test, she said, “I thought it focused a lot on emergent literacy, but you’re more…you know…you’re dealing with that every day.”
As I read through the emergent literacy section of the review book, I realized that there were SO many technical terms that primary teachers use quite often. On the other hand, intermediate elementary teachers may not. 
My friend has been in all of the same courses as me in the last two years, but she didn’t feel as confident with these terms. All of a sudden it made SO much sense to me! I mean, we’re human. If we don’t use complex (Tier 3, if you will) vocabulary often, we forget the true meaning.
I get confused and think too far into all of these Ph words often, so these are the details that have helped me! Let’s take a look at a few of those technical teacher-y terms that we throw around with colleagues. Hopefully, this breakdown will help you all to gain a firm understanding of each concept or just review some that get a bit confusing (phonological, phonemic, phonics….ahhh!). 
Phonological Awareness
Phonological awareness is recognizing the sound structures of spoken language, or speech sounds. Phonological awareness focuses on large parts of spoken language. It includes syllable awareness, sentence awareness, word awareness (rhyming and alliteration), onset-rime awareness and phoneme awareness. 

Syllable awareness (deletion) example: What is bookshelf without book? Shelf
Sentence awareness example: How many words are in the sentence, “Did you have a fun trip?” 6
Word awareness example: Do these words rhyme: bark and bike? No
Onset-rime example: What word is this: m-ath? math
Phoneme awareness example: What is the beginning sound in path? /p/

Phonological awareness focuses only on sound. It does not address the symbols (letters) for the sounds. Students are not looking at words or any print, they only listen and produce sounds. It is a broad term. Phonological awareness is the umbrella. Phonemic awareness falls below. Many researchers believe that phonological awareness is a key indicator of a child’s future success in reading and spelling.

Be sure to check out Hello Two Peas in a Pod for amazing phonological awareness activities created by Jen Jones from Hello Literacy and Katherine Zotovich from Pure Literacy. They are PERFECT!

Phonemic Awareness
Phonemic awareness is a subcategory of phonological awareness. Phonemic awareness includes identifying and manipulating individual sounds within spoken words. The smallest units of sounds are called phonemes. Phonemes combine to form words. So, phonemic awareness only deals with the phoneme level of language.

***Rhyming is considered phonological awareness, NOT phonemic awareness, because it does not relate to the individual sounds in words.

When students have phonemic awareness they have knowledge of the smallest units of sounds, or phonemes, in a word. Students should be actively identifying, segmenting, blending, and manipulating the separate sounds in words. Only sounds. This is key! No visual symbols — no letters! If students have phonemic awareness, they can connect sounds together to form words!
Phonics
Phonics is often confused with both phonological awareness and phonemic awareness (above). The main difference is easy to remember. Phonics deals with letters! A professor at a reading conference once said to our group, “The second you give a kid a letter or word to look at, BOOM!, it’s phonics!” And it’s very true. While phonological awareness deals with only sounds, phonics deals with actually seeing and working with the letters that make the sounds.
PSA: When you are googling or Pinterest-ing phonemic awareness activities, PLEASE be careful. I know someone who was doing a doctoral project on this topic. Many times, honestly most of the time, phonics activities (activities including letters) are listed under the label “phonemic awareness”. Just be on the lookout…
Alphabetic Principle
Letters represent speech sounds. Arrangements of letters represent spoken words. Students learn letter names by singing the alphabet song. Then students learn the shape of letters by looking in books, playing with blocks, or playing with plastic/wooden letters. Finally, students relate to the letters they see to the speech sounds they hear and produce. The alphabetic principal is the understanding that there is a relationship between speech sounds and written letters. 
Decoding
Directly teaching phonics patterns will make decoding easier for students. If students recognize relationships within words, they can figure out words they have not seen before. When students can decode quickly, they are able to spend more of their working memory on comprehending the text.
Decoding incorporates the ability to:
-use what one knows about patterns in letters
-understand the correspondence between letters and the sounds they represent
-pronounce printed words correctly
Morphology

The smallest units of meaning are called morphemes. For example, the “s” that is added to the end of the word “dog” to make is plural is a morpheme. A single morpheme can change the meaning of a word. Morphology is the study of the structures of words that are formed with the smallest units of meaning.

Whew, okay. That’s all the teacher jargon I have for today!
Happy Reading!

Filed Under: Literacy, Misc Tagged With: alphabetic principal, decoding, literacy, morphology, phonemic awareness, phonics, phonological awareness, Reading

Digital Game Shows

Hey! I am so excited to share my brand new game show idea with you! 
I have some third graders who are quite low. They struggle with vocabulary and basic sentence structure. I decided that I needed to think of a way to engage them, but still teach hard-core vocabulary before our state assessment.

So, I began working on this game show product a few weeks ago. Since then, it has been played by my kiddos and edited by many other teachers to make sure that there are no kinks. I am happy to announce that my first digital game show is posted and ready to be enjoyed by many students! Keep reading to hear more about it, and scroll down for a link to the product.
What is a digital game show?
Basically, it is like playing Jeopardy! The game is created in PowerPoint and has clickable links throughout. You MUST have PowerPoint to play it. As you click, new pages appear. The kids were amazed that the answers were instantly given to them!
Why do I need a digital game show?
First of all, who doesn’t love a game show?!?! 🙂 
Digital game shows are engaging to all learners in my classroom. Students really get involved and excited about these games. We have been using this game show as a review of multiple meaning words. It is perfect timing, because our state assessment is in about 17 days.
How do I keep students engaged whole group?
I hardly ever teach whole group. If I do, it’s a mini lesson or review that lasts about 10-15 minutes. However, the game show I created is 20 questions and takes longer than 15 minutes if you are talking and teaching as you go. In my two third grade classes, we use white boards ALL THE TIME. So, we asked students to take them out and record their answers as we read. I also included a recording sheet in the PowerPoint in case you would like to print that out. We all have those few kids who stare off into space! 🙂 Having some form of writing keeps students accountable for their learning. Plus, they actually enjoy recording and checking their answers.
How can I integrate skills?
If I am playing a game with my students, I am trying my very best to get their best effort. I read with funny voices, jump around, and act silly when they get the correct answers. I am also embedding skills in our fun. In the picture above you will see that my kids wrote “verb” on their boards. For each question, I asked them to record their answer, and then explain if it was a noun, verb, or adjective. This was tricky for many of my struggling students. These little additional activities can give you LOTS of data on your students. (Let me be honest. This part sincerely scared me! I had some kids writing noun when it was an action and adjective when it was a place. AHHHH!)
 How can I use game shows?
I have created this game show to be very versatile. I have personally used it as a mini lesson and in whole group to review for our upcoming test. I even had a couple girls who wanted to play the game on my computer during our break on Friday. Whether it be with the entire class or one person, the game show is engaging and effective. I am excited to add this file to our classroom computers so that students can play the games during centers as well!
I can’t wait to make more of these games in the future, because my kids are certainly hooked! I welcome you to take a closer look at the preview file in my store to see if it is something that you would enjoy. Have fun!

Filed Under: Literacy, Misc Tagged With: digital game show, literacy, Reading, technology, test prep, vocabulary

Skill-based Fluency Instruction

Fluency Overview

In the past, fluency was defined as the ability to read smoothly and effortlessly, at a quick, automatic rate (Harris & Hodges, 1995; Logan, 1997). A student’s reading rate and accuracy are very important because less time spent on decoding leaves more time for the brain to focus on comprehension. However, after recent research, fluency has come to encompass much more. It now includes prosodic elements such as expression, volume, phrasing, pacing, and smoothness. When students read with prosody, they are able to capture the meaning of the story or script. Current research supports phrasing, pacing, and smoothness as elements that help develop fluency in students. (Clark, Morrison, & Wilcox, 2009)

Students who do not read fluently segment the text and read it word by word. However, students who read smoothly with appropriate expression, pacing, and phrasing make reading sound like natural language (Zutell & Rasinski, 1991). Fluent reading develops when students are able to make their reading sound like individuals speaking as they do in daily life.

Although fluency is a large part of reading curricula, it is often neglected in reading instruction (Reutzel & Hollingsworth, 1993; Zutell & Rasinski, 1991). Many teachers refer to traditional methods of measuring fluency. This is usually comprised of giving students an unfamiliar passage and timing their reading while keeping track of errors. Research has shown that varying the fluency practice is beneficial in the classroom in order to motivate those students who are not motivated by competition (Tyler & Chard, 2000; Worthy & Prater, 2002). Repeated readings of familiar texts are necessary in order for fluency, and therefore prosody, to increase.

Fluency in My Classroom
            If you teach primary grades, then I’m sure you are used to the Oral Reading Fluency (ORF) Assessments or something of the sort. These are short stories that we ask students to read while we time them and note any mistakes. Last year, I had very high first graders who already read fluently, so our ORFs were easy to administer. I didn’t stress about them. I simply tested my kids, plugged in their scores, and clicked submit.
            Fast forward to this past fall. During the first half of the school year, I taught in a private school. One of the small groups that I worked with consisted of first graders who were struggling readers. Fluency was….not quite their strong point.
            Fast forward to January. I transferred back to the public school I was at previously. I now work with third graders, many of whom are at a lower level than the first graders I had last year. So I began to ask myself….What are they missing?
            After attending a training in Orton-Gillingham, {LOVE! If you ever have the chance to go, GO! Run! I recommend it over any conference I have ever been to!} I was convinced that students (or at least the ones I have worked with) were lacking basic instruction in phonics skills. If I could teach them the skills that they were lacking, would they then be fluent? Could they then comprehend?
 
Skill-Based Fluency
            I love the idea of fluency practice every day, especially in the primary grades. I have seen the benefits of repeated readings, and the smiles and giggles from successful readers. BUT I have always thought that fluency passages were sort of…random. I’m not saying that they are ineffective. I am not telling you not to use them as part of your curriculum. In fact, many curriculums require them.
Let me just explain my reasoning…
If I am teaching silent E, wouldn’t it be great to immerse the kids in silent E? Letting them SEE silent E everywhere they look or read will help them to identify silent E in the future. Right? So, why not include that skill in your fluency instruction?
I began doing this with two different groups of struggling readers, and have seen the positive effects already! We use LOTS of hands-on activities to drive this concept home. The following pictures are from two groups of students – first graders and second graders.
One activity that my students love is this silent E set from the talented Lavinia Pop.
Use sound chips when saying each sound.
Add the silent E with a dry erase marker and use the sound chips to read the word again, changing the vowel sound.
I then ask students to change the onset of the word while keeping the rime the same. Once they have written the word, they cover the onset so that they see the pattern in the rime. They come up with as many words as possible.
            Another day during the same week, we read these Rhyming Poems which are WONDERFUL because they have Elkonin boxes for the rhyme sounds. We use sound chips again here. The students would put a sound chip in the box each time they heard a long vowel and saw a silent E. Then, they would underline the silent E words. In pairs, they would face each other and take turns reading the poem as I listened in and gave advice on pausing and pronunciation of words.
            During the same week, I introduce fluency sentences. Jen Jones {my literacy hero} created these amazing fluency sentences that are organized by skill. AHHHHH! Can you hear the hallelujah chorus?! Perfect for RtI and intervention groups!
Students read each sentence and underline and silent E words that they read. I then have them check with their partner to see if any have been missed. Then, they add any underlines that they missed.
I have the kids whisper read to themselves as I listen in to them one at a time. Then, we read together. Finally, they read to a buddy.
You will see here that this sweetie underlined “the” in the second sentence above. This was a GREAT teachable moment to discuss the fact that “Not every E at the end of a word is a silent E.” Use these mistakes to help students understand the reasoning behind the skill.
This student needed more chunking. The text was too overwhelming. I drew lines between sentences and had him only focus on three sentences at a time. He then wrote down all of the silent E words and read them from his white board before continuing to the next few sentences.
            At this time, I am currently working with struggling second graders for my final practicum project. These short vowel fluency passages from Miss DeCarbo are a savior! The kids seriously love spinners, so that’s a plus! This set requires students to hunt for words and participate in repeated readings of the text. And guess what!?! They are ALL based on a phonics skill!
This page focused on “ack”. The kids were SO excited that the word backpack had TWO “ack” sounds in it!
After completing all of the steps and reading the passage together as a group a few times, students buddy read. They listen for changes in their partner’s voice each time there is punctuation.

Focusing on a skill while practicing fluency has been SUCH a blessing for my second graders. They are not at grade level and cannot handle second grade fluency passages. Using these passages with the same phonics skill repeated over and over again helps the students to read a full paragraph without stopping to “sound out” any words. They know the phonics skill and are able to apply it throughout the passage. After one day, I had these kiddos giggling and reading with expression in their voices. Why? Because the text was predictable and they had confidence in their skill.

As you go off into your classroom this week, think about including your skills into your fluency practice. There are oh so many ways that you can do this. Just keep practicing in a variety of ways, and make fluency fun! As they say, “Practice Makes Permanent!”

Filed Under: Literacy, Misc Tagged With: fluency, literacy, phonics, Reading, short vowels, skill, skill-based, small group instruction, vowels, Word Work

Literacy Centers & Student Achievement

Recently, I gave a professional development to the teachers who are new to my school as a requirement for the last semester practicum of my Master’s (yippee!). The PD was focused on how to teach in and through literacy centers. But, not just any literacy centers. Real, data driven, standards based literacy centers. 

RIGOR is an important word these days with our new Florida Standards (as with Common Core). The goal of this presentation was to give teachers a deeper look into providing center activities that required students to do more than move task cards, match cards together, or order magnetic letters. I am not against the former. Yes, there is a time and place for both. However, the teachers that were in this PD were interested in how to create activities that would promote the thinking and writing that we are pushing for with our new standards.
After many requests, I’ve decided to share some of the slides with you below. Enjoy!
Disclaimer: Before we start, I know many people cannot call daily academic activities “centers” anymore, because administration and some researchers associate centers with play. “Stations” is becoming the popular term because it seems more work-based. However, my school still uses “centers”. Please think in this mindset as you read. 🙂

Why should you teach through literacy centers?
Literacy centers allow us to gradually release students throughout the year. We teach them directly in small group when they are just beginning, and then as they become more knowledgable, we allow them to work on their own. This gives students a turn to practice and reinforce the strategies that we teach them.

When students are at centers, it is easy to differentiate their work. Differentiation is also not as obvious to other students when it is done in centers. I can have completely different activities going on, but students do not realize it because they are around the room working in groups. Integrating content is SO simple when you teach in a classroom that is full of centers. Students can connect material throughout the day in reading, math, social studies, and science.

And of course, you can plan centers to align directly with your standards.

Finally, literacy centers should include the 7 main components of reading: comprehension, phonemic awareness, phonics, fluency, writing, speaking & listening, and vocabulary. Jen Jones, from Hello Literacy, calls these the Big 7 Rocks of Literacy.

If you do not have centers up and running in your classroom, the first thing you will need to do is figure out a layout for your furniture. Furniture should be placed in a way that will promote movement. In primary classrooms, it is convenient to have activities rotating around the perimeter of the room. In the picture above, you will see my first grade classroom last year. I placed my small group table in the back corner (with the ball chairs). My centers were then placed around the perimeter of the room so that I could “keep an eye on” everyone. Students who were reading would sit on the carpet in the center of the room. I liked this set up because the groups of students were separated just enough so that each group was able to stay on their assigned task.

Centers do not have to be at tables that are separate from desks. Frequently, I would set a center bin at a group of desks. Students would sit at that group of desks to complete the center. We also use the floor a lot. Students LOVE reading and completing sorting activities on the floor!

Is your school in love with data?
Mine is! There are state assessments, county assessments, school-wide assessments, grade level assessments, in class assessments, and observations. Whew! It can make a teacher crazy. However, we can use the important data to help us create center groupings.

In my classroom, I use summative assessments to determine reading groups at the beginning of the year. At this point, I do not know much about my students or their strengths and weaknesses. As reading groups are used throughout the first few weeks/months, I use the subsequent summative assessments to regroup students.

Formative assessment is perfect for taking note of how students are reading. While in small group, I use black return address labels to write little notes or observations that I see. At the end of the week, I simply peel each label off and place it on the inside flap of the specific student’s folder. These notes are wonderful during conference time. I am just beginning to use the app Confer to do this same thing. See my previous post about this data tracking app here. Formative assessment helps teachers to differentiate center work. Don’t wait for a formal test to change a student’s assignment! If you see something that they need, go for it!

Mini-lessons are the first part of my day.
I teach a short 10-15 minute mini-lesson to introduce our topic of the week or review something that we need to practice. I always love using literature, a short movie clip, or a song to grab the students’ attention! As teachers, we often teach too long in the beginning of a lesson because we are excited about the material. When we think about it, we are talking and students are “listening”. It is important that we let the students do the talking. When you keep a mini-lesson short, it leaves time for students to show their independence on that particular skill.

—

Literacy Centers
When you begin forming your literacy centers, you should think about the centers that you want to include in your classroom. Everyone has different preferences here. I had 6 different centers in my first grade classroom: read to self, spelling, word work, computers, content area, and work on writing.

How do you rotate?
Above is my rotation chart. I had three reading groups that I met with daily (horizontal across the top). These were homogeneous groupings. Vertically on the left, I had “center partners”. These were heterogeneous groupings. One child from each of the reading groups was placed together as “center partners”. So, at the end of the day, each student went to two centers and my small group.

When I asked students to find their first center, they would all go to the center in the first column. Three students would be at each center. Then, I would call my first reading group “Cardinals”. One child from each center would come to me, leaving two kids at the center. This continued during reading group two and three. After about two weeks, I didn’t need to send students to their centers first. They learn quickly and know to just skip the center during their reading group time!

Differentiation is my favorite part of centers. Centers make differentiation so simple! Look at the image above to see some fun ways to provide students with instruction that is at their individual levels. I love these ideas from two of my favorite teacher bloggers! The Brown Bag Teacher uses folders that are color coded to match student reading groups. These folders are placed in each center activity bin. When students go to the bin, they just grab their folder and begin working! Miss DeCarbo differentiates word work by integrating student choice and differentiated sight words. Students keep words for a short time or for a few weeks…depending on what the specific student needs.

Remember, these images are from the PD given to my school. In our county, social studies and science are NOT given separate times in the day. We must integrate social studies and science (and math!) into our reading block.

Integrating content into literacy centers allows teachers to create thematic units in the classroom. Students in my classrooms have always enjoyed learning when it is built into what they are reading. Using nonfiction texts or magazines in small group is a great way to integrate! As students begin to discuss and respond orally to what they are reading, it is easy for teachers to incorporate the new speaking and listening standards!

I compiled the following literacy block examples for different grade levels in my school in order to show teachers how to use the same topics and standards throughout many centers throughout the week. They may not work for your students or your curriculum. Please remember, these are just examples! 🙂

I also wanted to show teachers how the same six centers can be used in K-5 classrooms. I created these little charts as a way to show the progression of ideas and activities within each center from grade level to grade level. Again, these are just examples! Add or subtract anything you wish.

Small group is my favorite time of day. I love the “almost” one-on-one interaction that I get with my students. This is when I really get to know them. I love the layout that Dianna from Sassy Savvy Simple Teaching created. I printed it out and gave it to all of the teachers in the PD. It is easy to understand and perfect for planning your small group instruction! Below is an example of Dianna’s layout as well as a tweaked version that I created for our 3-5 grade teachers.

Fonts: Hello Literacy & KG Fonts. Backgrounds: Sassydesigns.net. Clipart: Melonheadz.
That’s it! I hope you enjoyed a mini version of my literacy center PD! Thank you for stopping by!

Filed Under: Literacy, Misc Tagged With: Complex Text, data, literacy, Organization, Reading, Reading Centers, Schedule

Character Report Card

I’m linking up with Miss DeCarbo for Wordless Wednesday! I know this is longer than a normal Wordless Wednesday, but I’m excited!
This month we’ve been working on identifying character traits in books and short videos. This week, we watched Ormie the Pig. It is an adorable video about a pig who is attempting to get a jar of cookies off of the top of the fridge. He puts many different ideas to use trying to knock the cookies over. The kids LOVED this video.
Before watching, students were given this handout. We (teachers only) chose specific traits, and students copied them into the boxes. As they watched the video, students graded Ormie and showed their evidence. We explain a general scale aloud to students before they begin. As you will see below, we allow students to disagree as long as they have evidence to support their opinion! It creates FANTASTIC discussion in groups. And that’s about it! Super simple. Highly engaging.
Example Grading Scale for the Character Report Card
A = OH! He is definitely _____!
B = I see that he is ______.
C = He can be _______, but _____.
D = He’s not very _________.
F = I didn’t see him being _____ at all!
Here, an on-level student accurately described Ormie’s character traits.
Here, a below-level student gave different grades, but he was able to provide accurate support from the video.
Click the image to see more pictures of classroom activities this week!

Be sure to head over to Miss DeCarbo’s blog to read more!


Filed Under: Literacy, Misc Tagged With: Character Traits, literacy, Reading, Wordless Wednesday

  • Go to page 1
  • Go to page 2
  • Go to Next Page »

Primary Sidebar

Hi, I’m Meredith!

READ MORE

Search

Follow on Instagram

Footer

Copyright © 2022 · Creativity to the Core · Site by Ready to Blog Designs