• Skip to primary navigation
  • Skip to main content
  • Skip to primary sidebar
  • Skip to footer
Creativity to the Core

Creativity to the Core

Learning Makes Us Who We Are

  • Home
  • About
  • PD
  • Resources
    • Freebies
    • Recommendations
  • Blog
  • Book Now/Contact
  • Shop
  • TPT
  • Instagram
  • Facebook
  • Pinterest

Literacy

Co-teaching Reading in 3rd Grade

It’s been about a month since I began the leap from first to third grade, and I am loving it! Last year, I taught high achieving first graders who were almost (if not, just as high) as my third graders. So thankfully….the leap wasn’t too difficult. 🙂

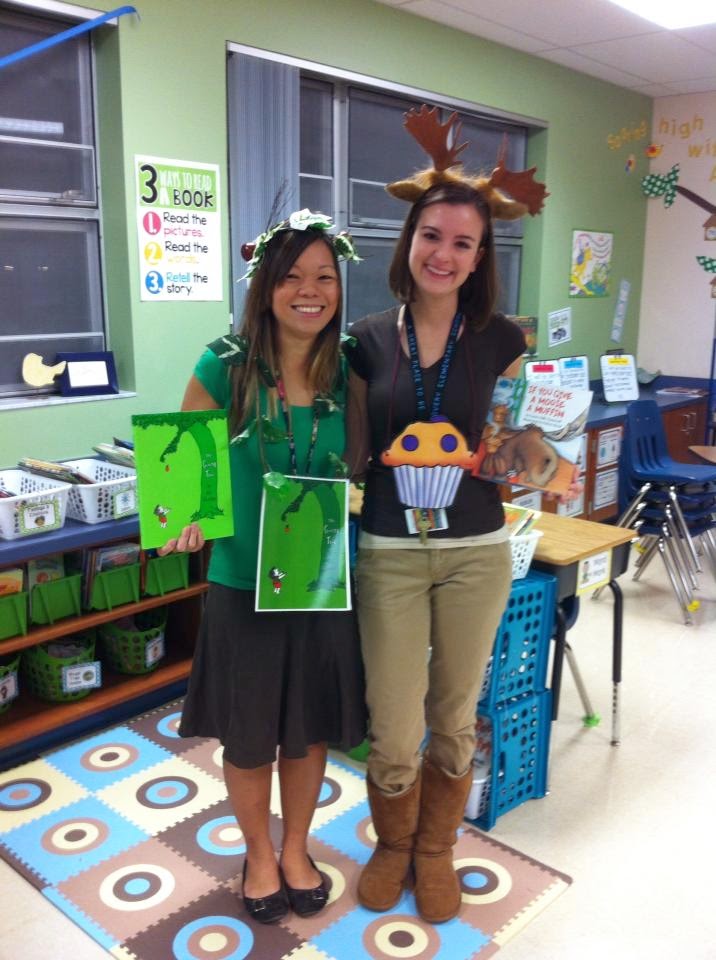
My friend and now co-teacher last year
in my first grade classroom.

Co-teaching with one of my best friends and another energetic, hilarious, engaging teacher has been an amazing experience. We are each other’s physical, mental, and emotional help each day…which in the teacher world can be a wonderful thing! Today, I wanted to share a few of the things we have been doing…

Schedule
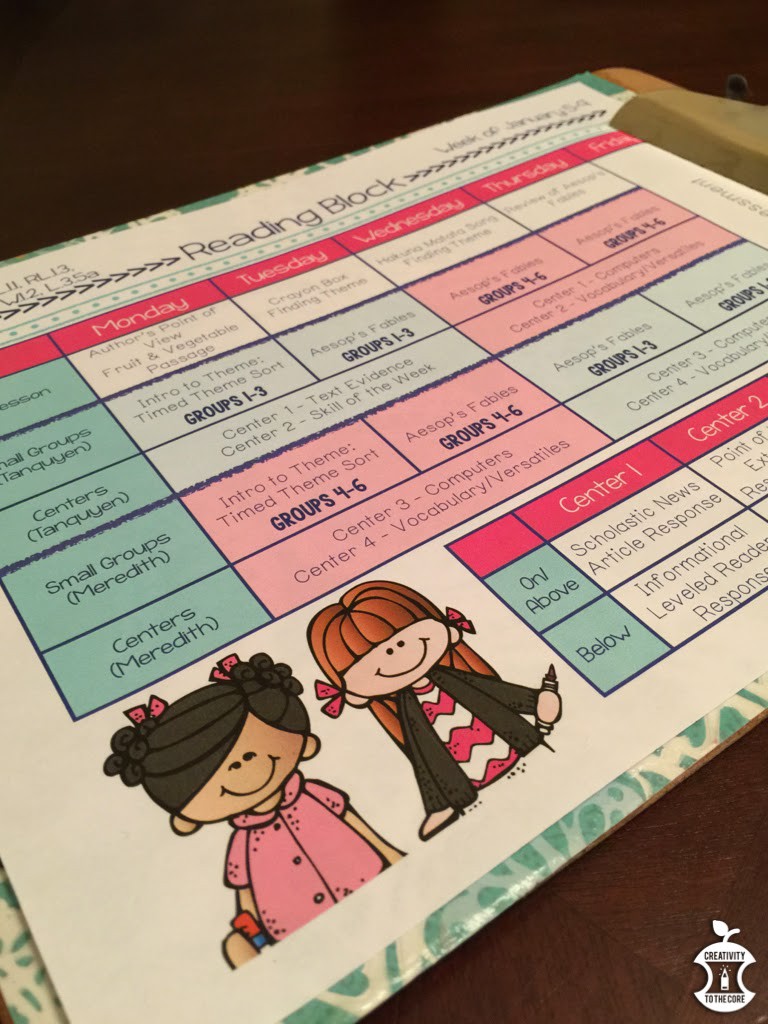
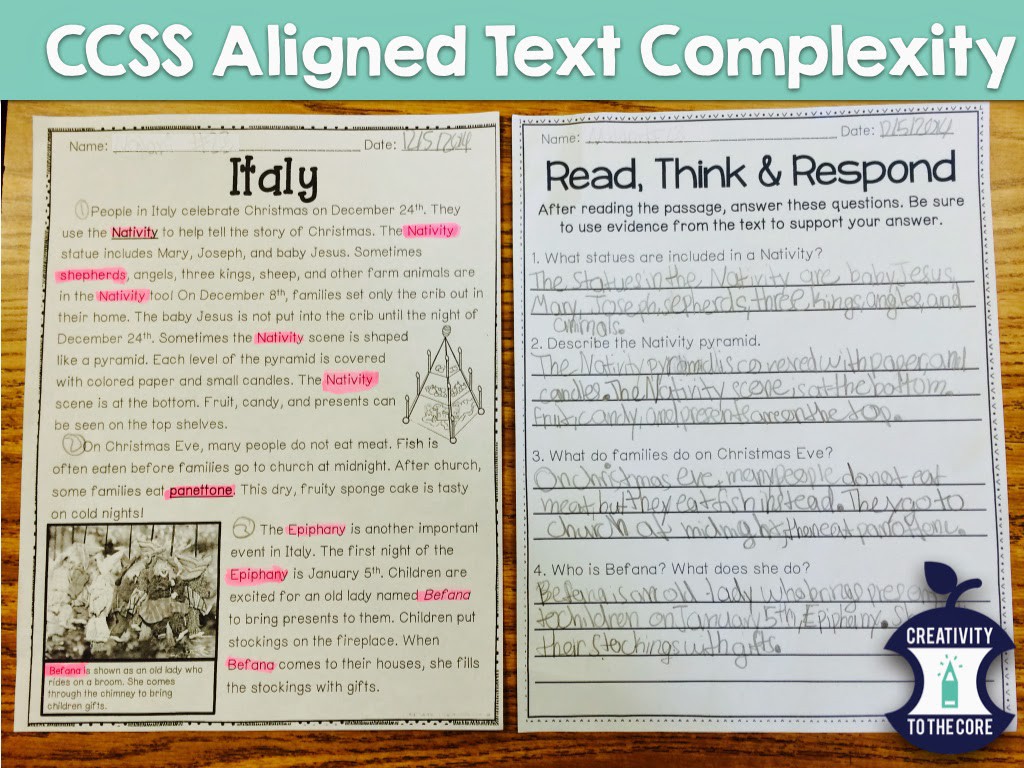
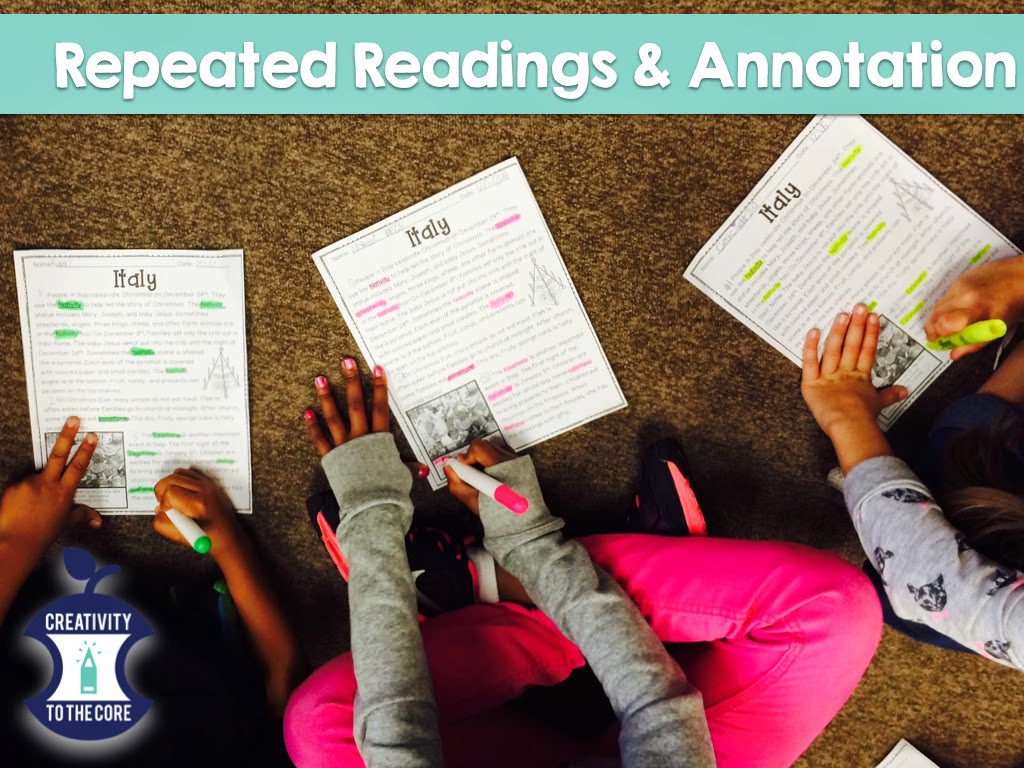
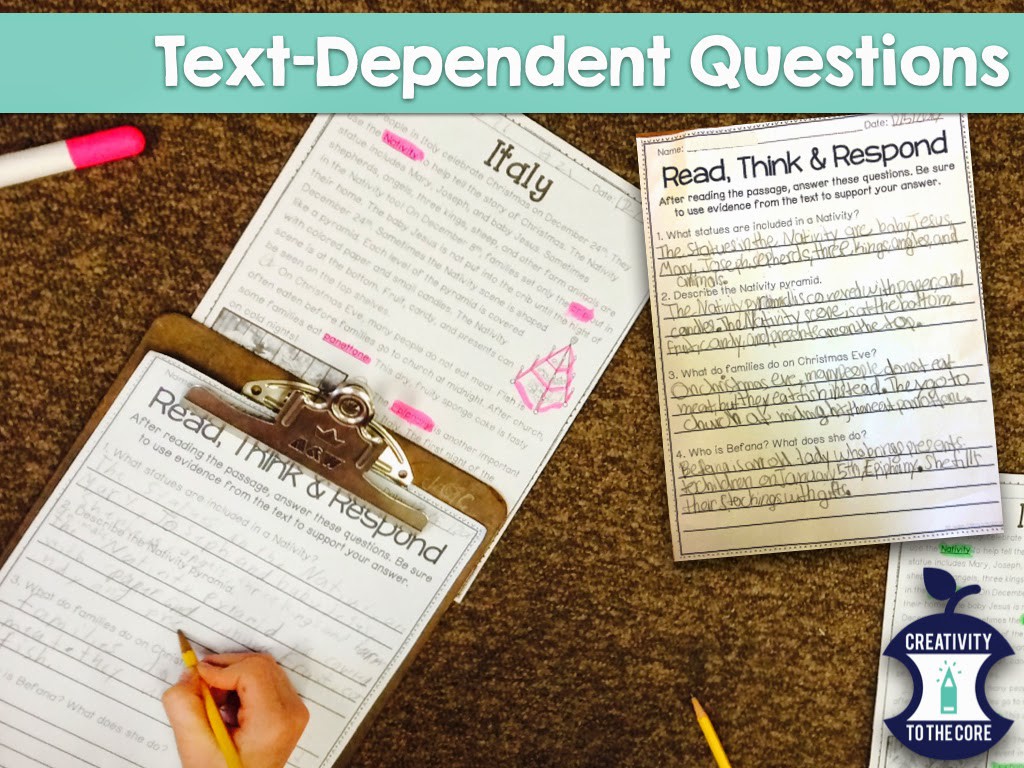
In our county, 18 is the maximum amount of students allowed in each classroom. Both third grade classes that I work in have about 25 students. Therefore, the school had to hire an extra teacher (me!) to work in both classrooms and provide support. I am teaching only reading. I begin each day with one teacher, and begin after lunch with the other.  The three of us have synced our schedules. This way, I am teaching the same lessons when I am in both classrooms. It is SO nice for the three of us to plan together and bounce ideas off of each other! Here’s the layout we have. Grab an editable one here!

Because there are two of us teaching at all times, we try to maximize our time and meet with our students. We teach completely in small group during both reading and math blocks (although I am not with co-teaching with them during math). Each class has been broken up into 6 groups of 4-6 students. There are two groups of six students (groups 1-2 above) who are below grade level in each class. There are three groups of four to five students (groups 4-6 above) who are on-level or above-level. We each keep our groups for two days. Then, we swap groups for the last two days. This gives students the ability to hear the same concept in two different ways.
We basically split the entire room in half when we are teaching. This helps to keep the noise level down and also keeps students from getting confused. This picture was taken from my small group area. If you look across the room, you will see the other teacher’s “side”. She has the lower groups and is working with a small group while the other group is working at the red pocket chart on the far side of the room. When she is ready to switch, she will simply have those two groups trade spots. My “side” of the room is to the left of this image. We have a table of computers for one group and then a reading area on the floor for the other. My students go through two centers and my small group on this side of the room.
Minilessons
Almost every day, we give a minilesson on a new topic or an important topic that needs review. Both teachers discuss with the students and plan together for these lessons. Here I am leading a minilesson on comparing and contrasting using the book Apples and Oranges: Going Bananas with Pairs. The kids were obsessed with this book! It comes HIGHLY recommended for all grade levels!
Small Group
The main teacher is always “Small Groups 1” and “Centers 1” on our plans above. Each week she begins the week with her lowest performing students and lays a foundation. She ends with her highest students. I am considered “Small Groups 2” and “Centers 2”. Each week I start with the highest performing students and end with the lowest performing students. Two small groups are running at the same time. However, we are at opposite sides of the room, so it is not too distracting. 🙂

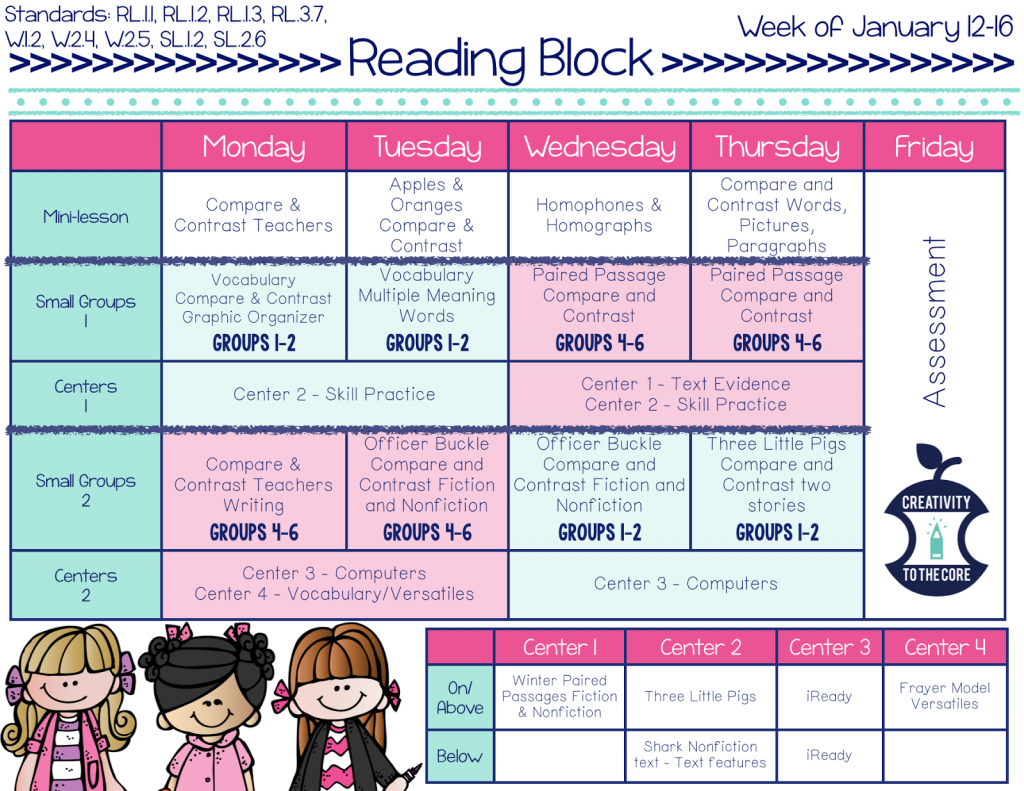
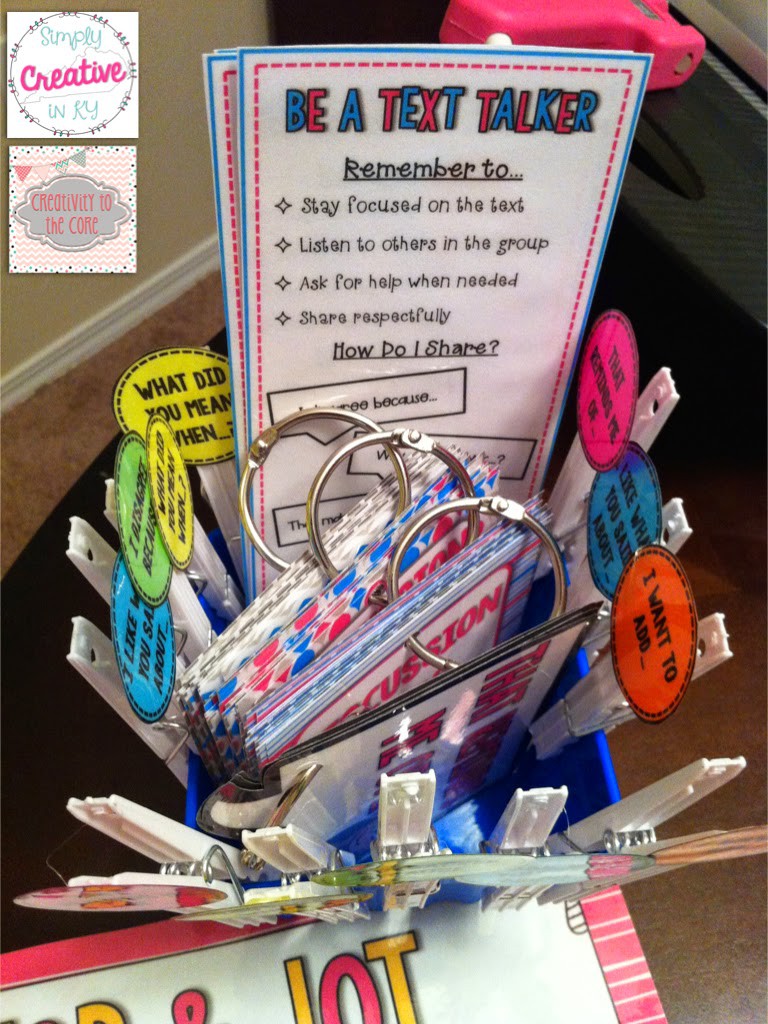
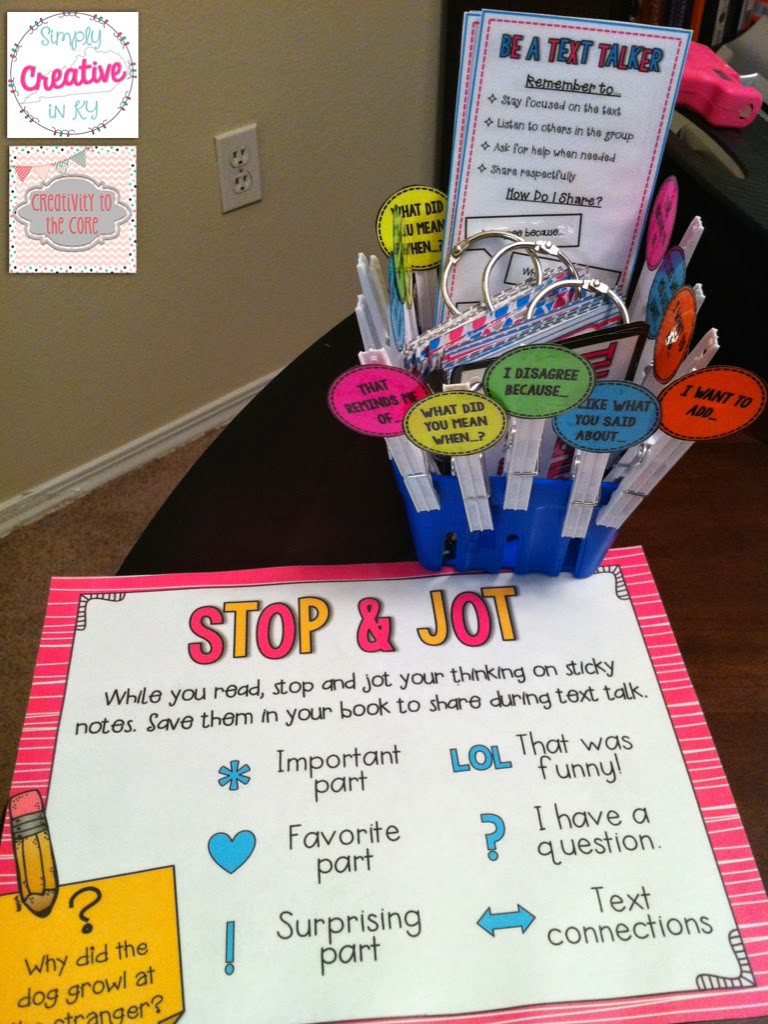
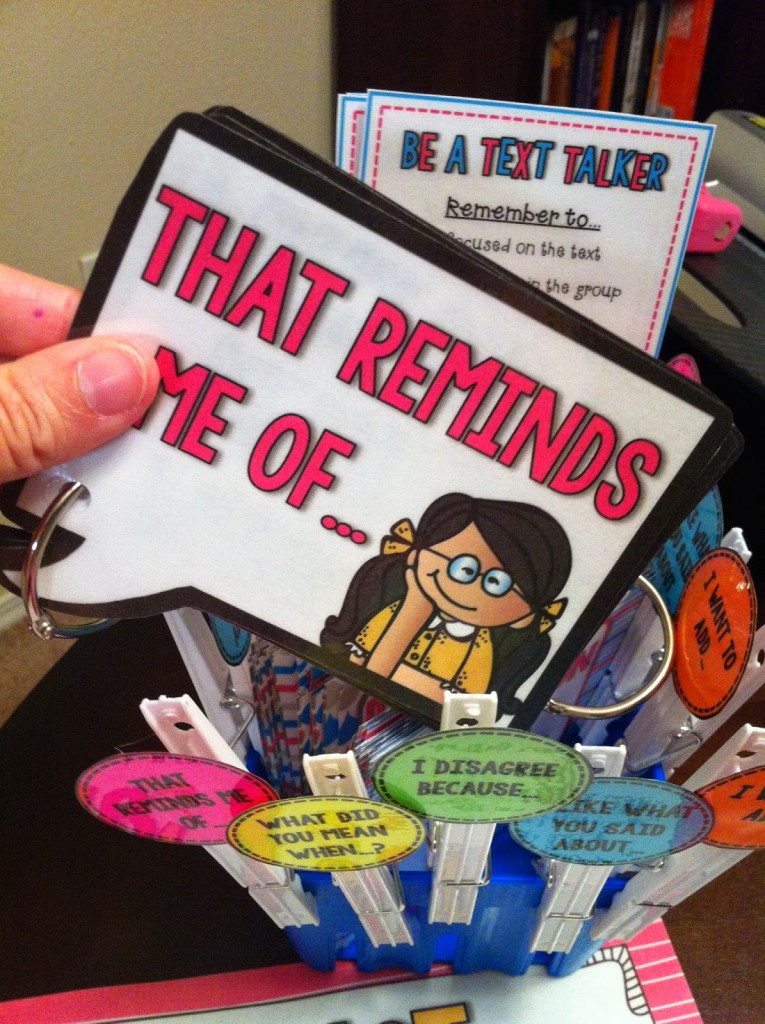
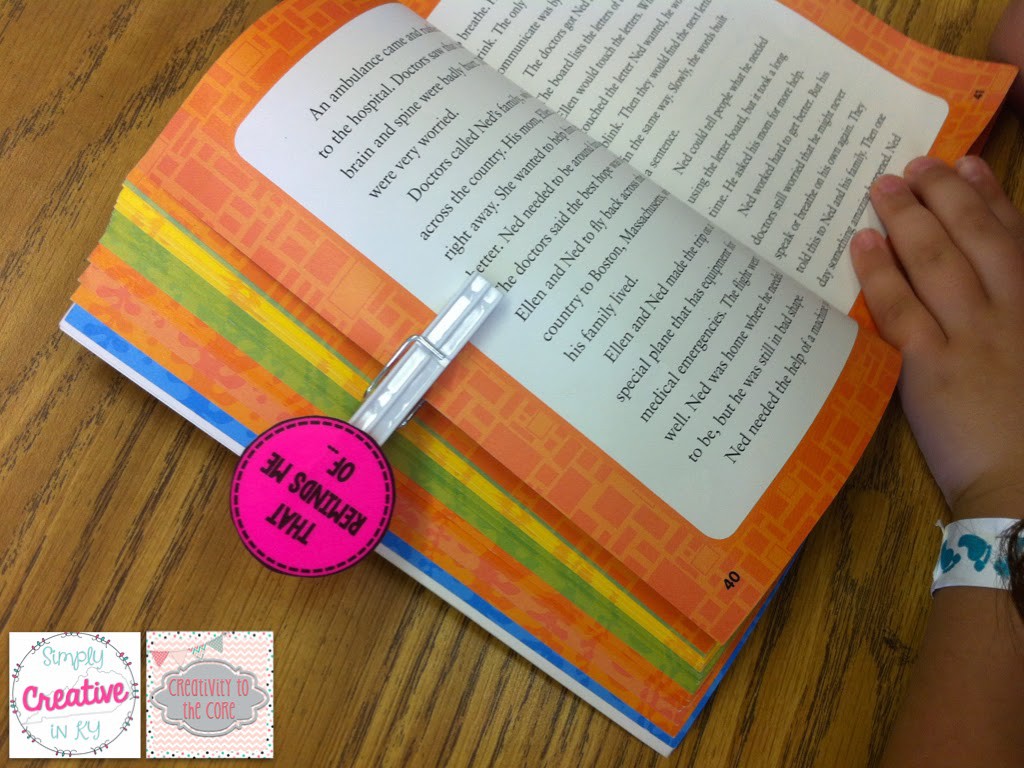
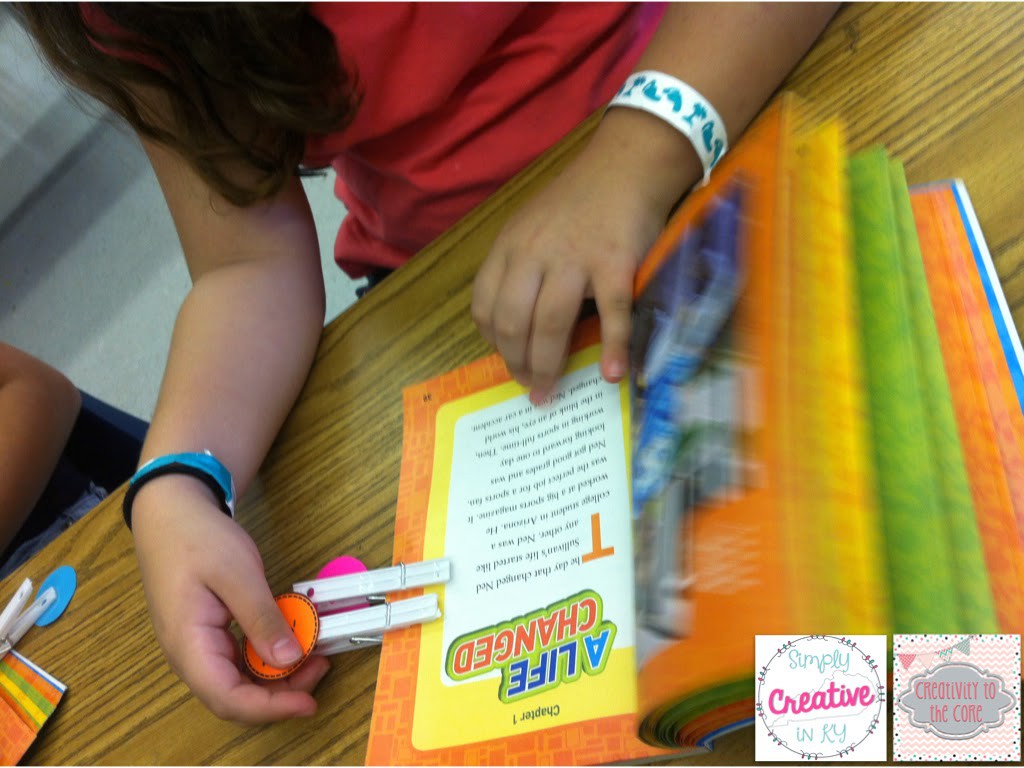
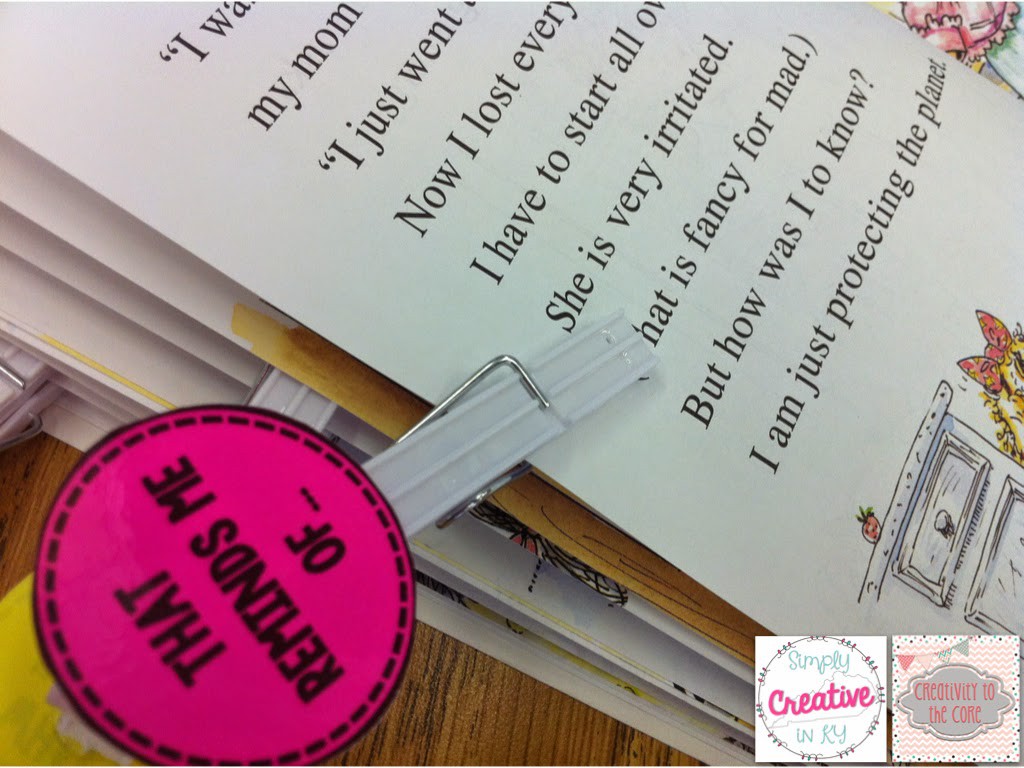
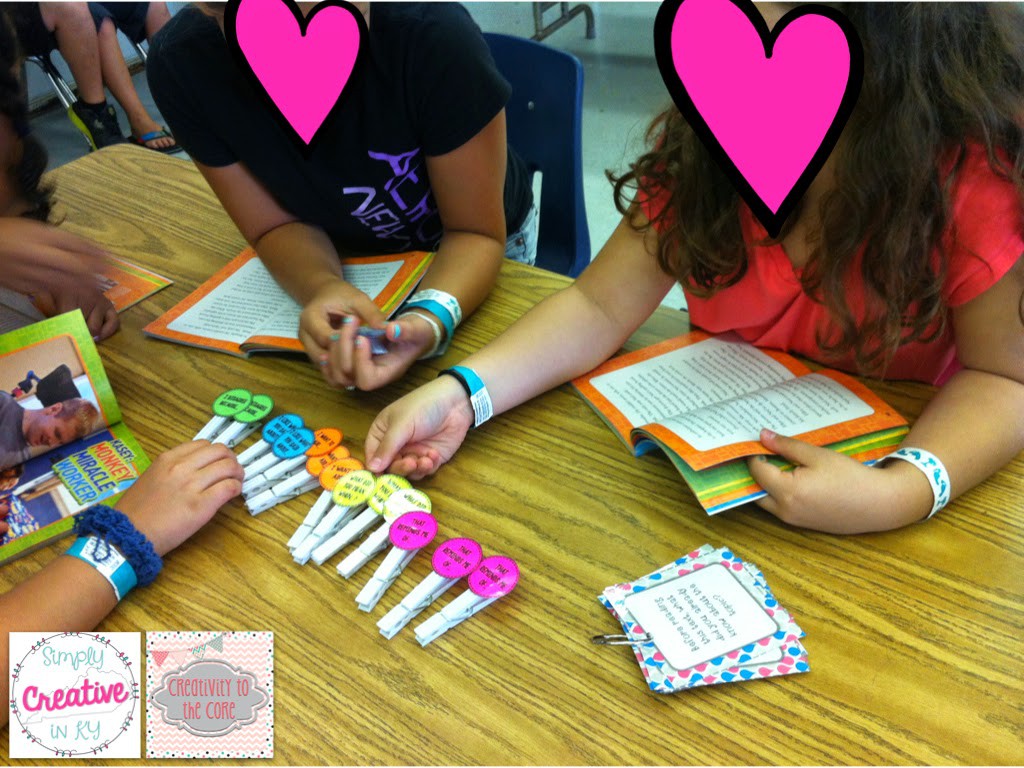
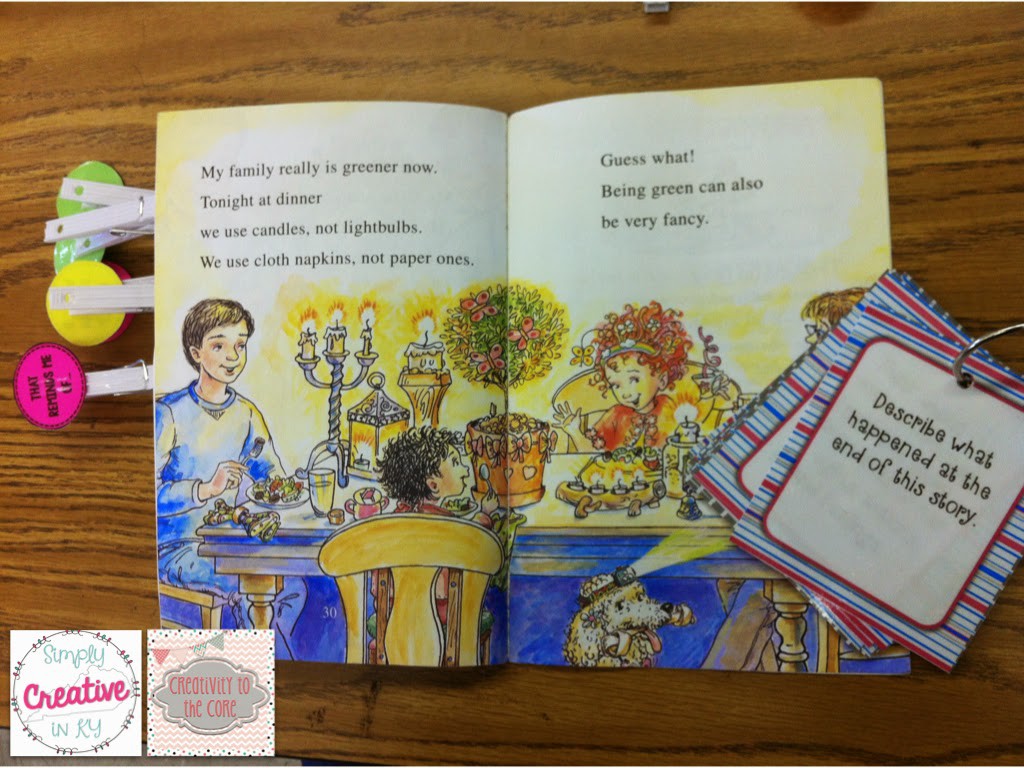
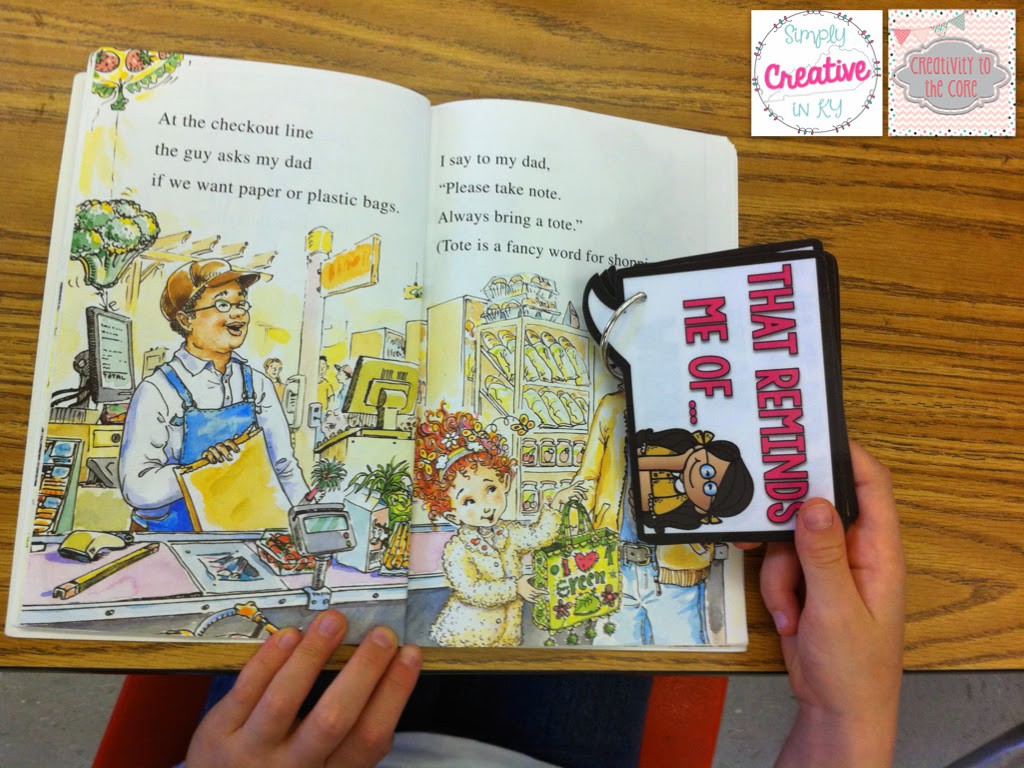
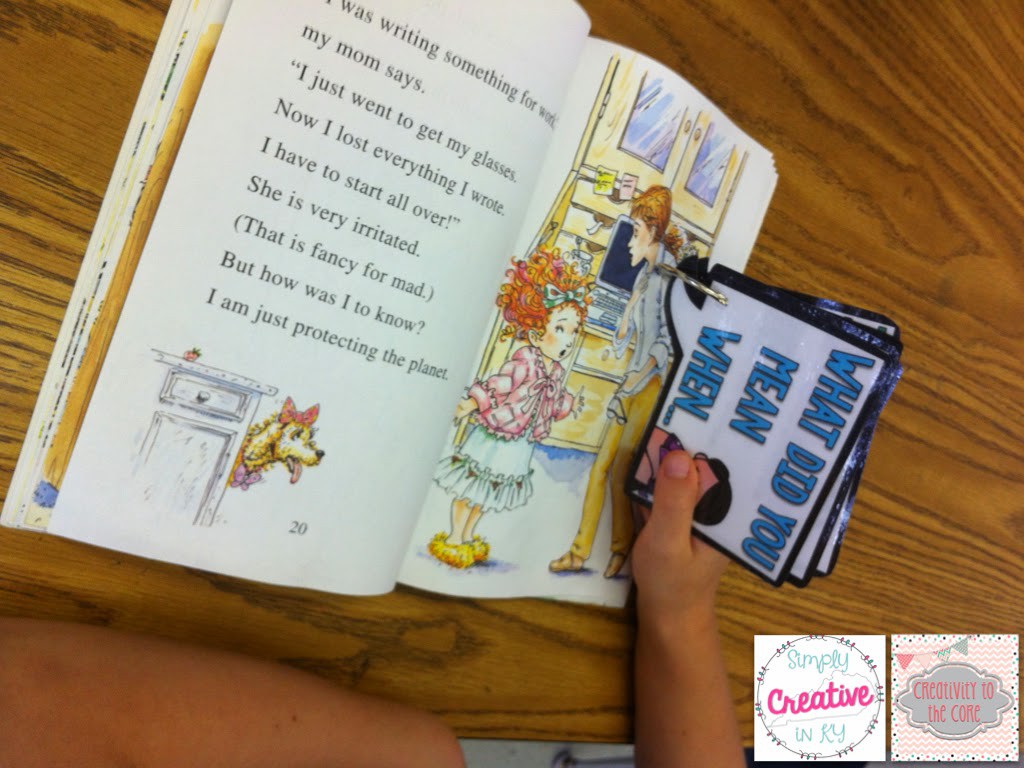
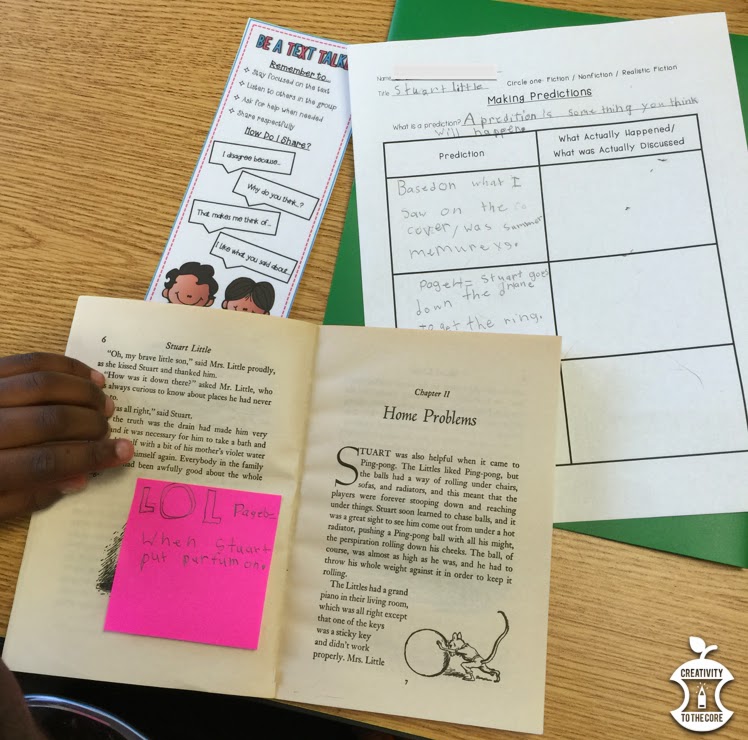
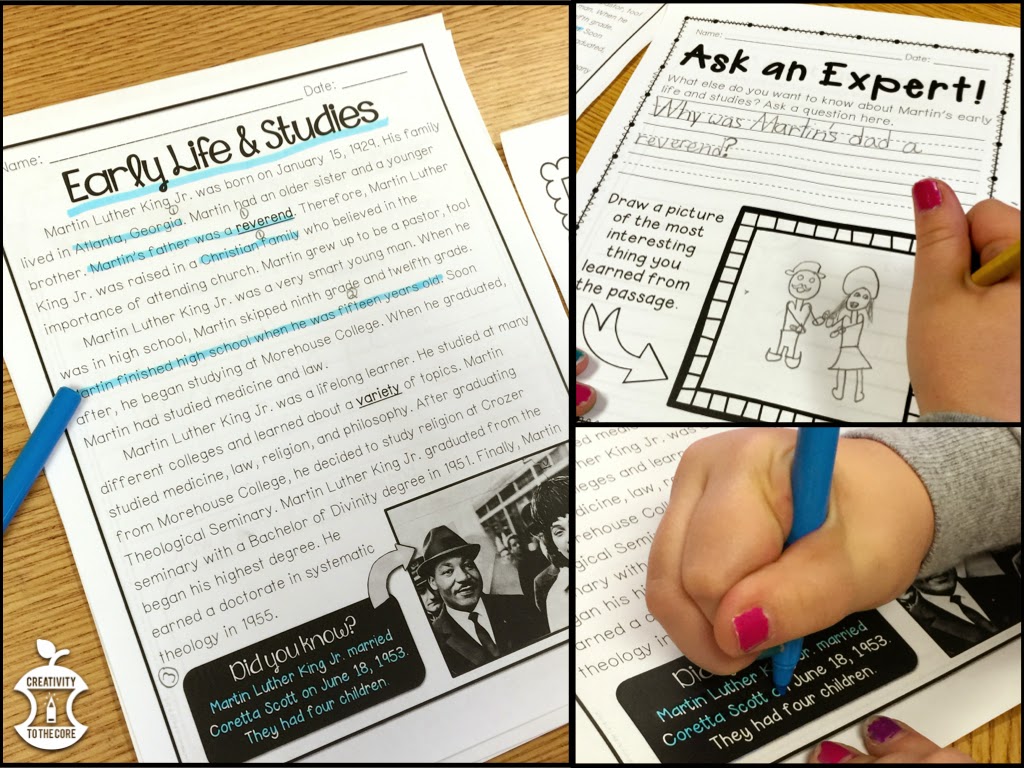
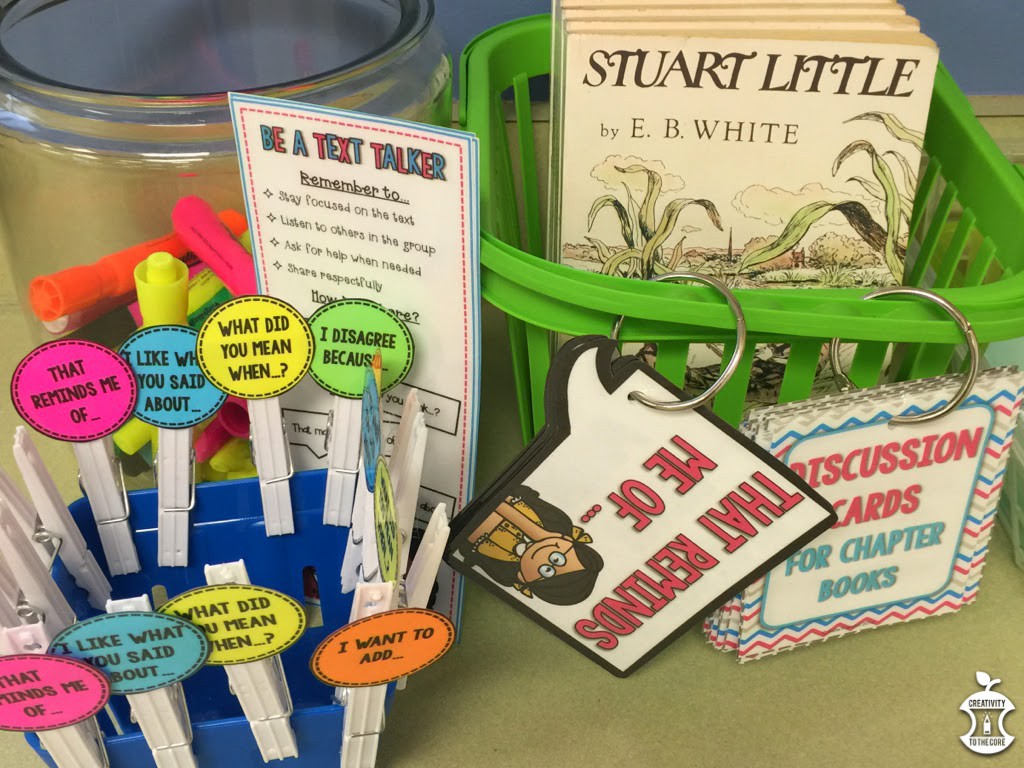
During my first two small groups of the week (on- and above-level students), we are reading the novel, Stuart Little. Here are some of our supplies. You can grab them here. My readers are working SO hard on accountable talk and discussion. Some groups are getting really comfortable with it! One little boy even said, “Hey, you can’t talk so much! You’re suppose to be invisible!”

By the time the kids come and go, our table is a {big ole} mess! 

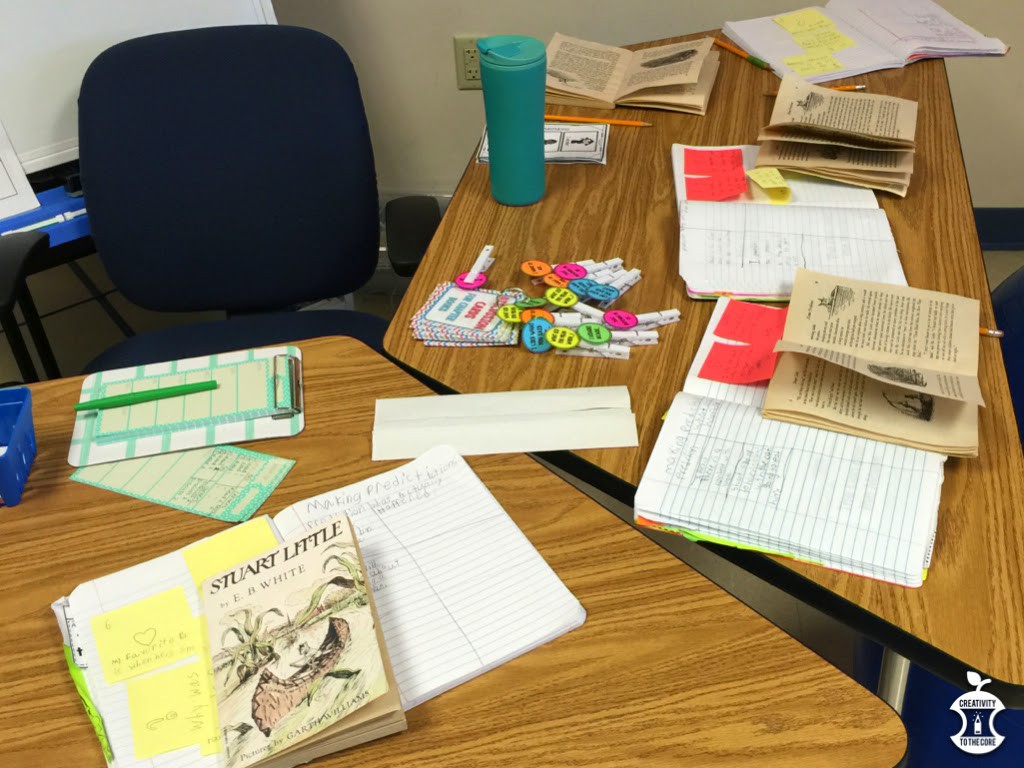
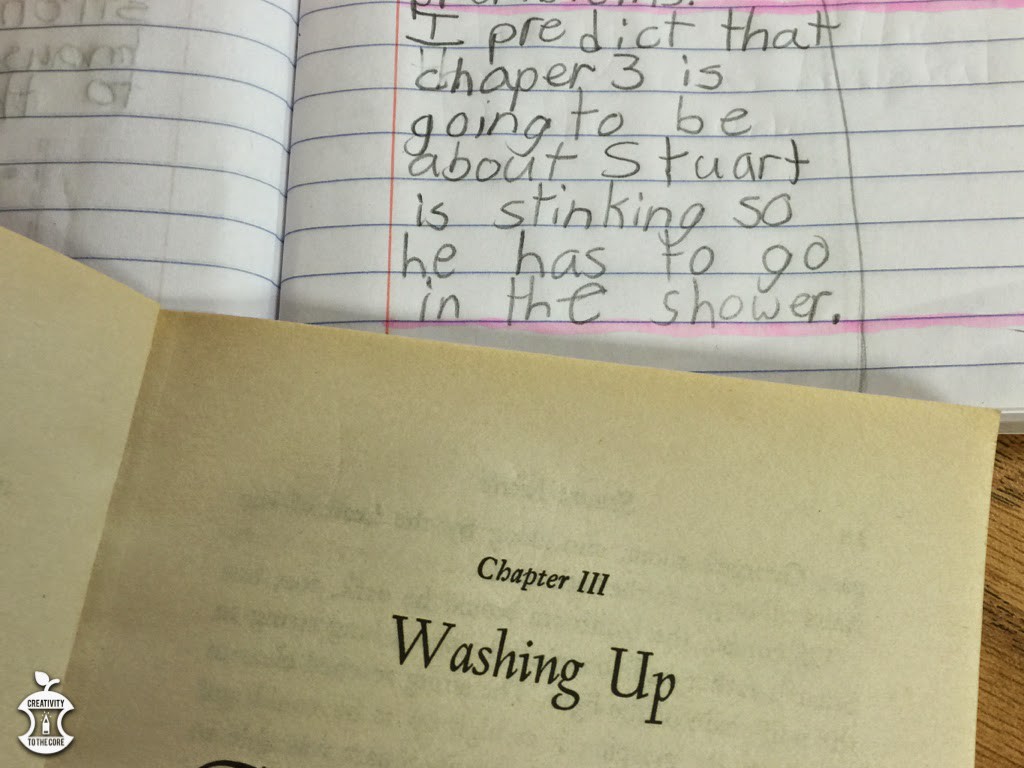
 Our on-level students still struggle with writing complete sentences and explaining their thoughts. We do LOTS of writing to try to fix this. Here is a prediction that one of my students made before reading chapter 3. It is not a perfect sentence, but she was working oh so hard!

Right now we are only 33 days away from our BIG state assessment that determines promotion of third graders, so our below level groups have been practicing comprehension strategies every.single.day. Yes, we know they need to do practice passages, but they also need to have fun! I introduced these sentence strips from The Teacher Talk as a way to extend our thinking after reading a test prep passage. These are the students who normally struuuuggggle with writing. However, these fun flippy prompts helped them to write quite a bit! I was one proud teacher!
When our below level groups are not doing test prep, test prep, test prep, we have lots of fun! We make inferences and find evidence in the passages. We read stories and determine character traits. We practice past skills with task card games in small group. Basically, the three of us remediate again and again until our little ones catch on!
Centers
My side of the room has two centers: Computer & Text Evidence
The main teacher’s side of the room has two centers: Skill Practice & Vocabulary/Reading
Our lowest two groups stay in small group for 30 minutes each and only go to one center per day.
Our higher three groups have 20 minutes of small group and go to two centers day day.
  • Computer – We have a program called iReady that is used throughout the school. All students take individualized reading and math lessons on the program during this center.
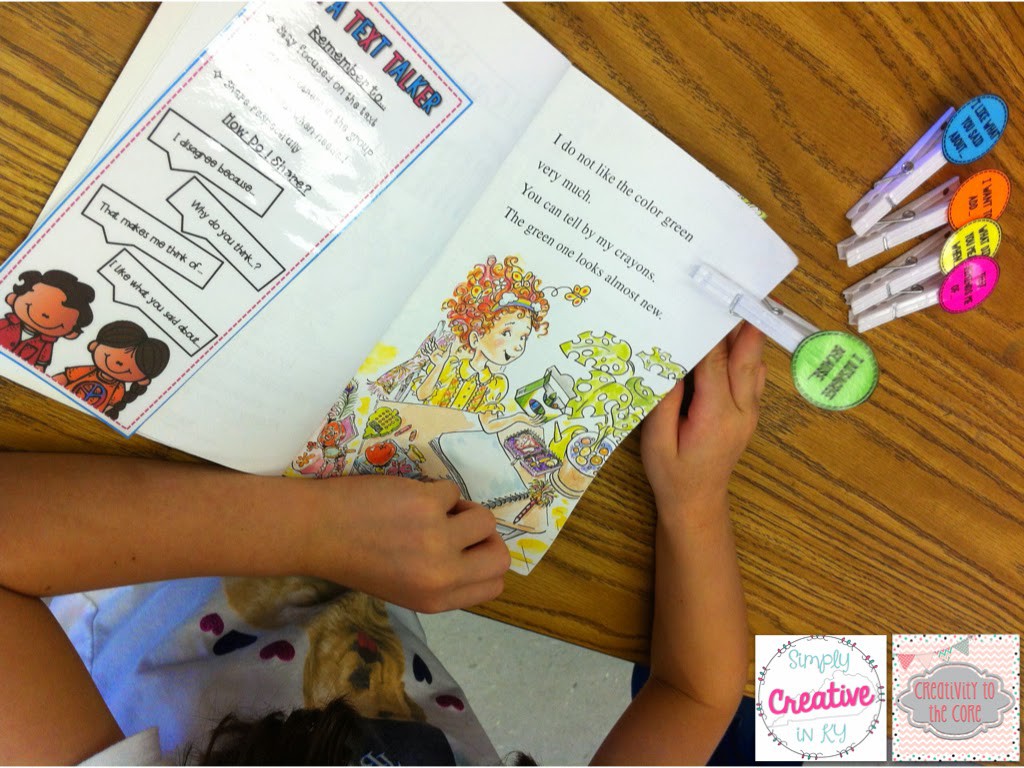
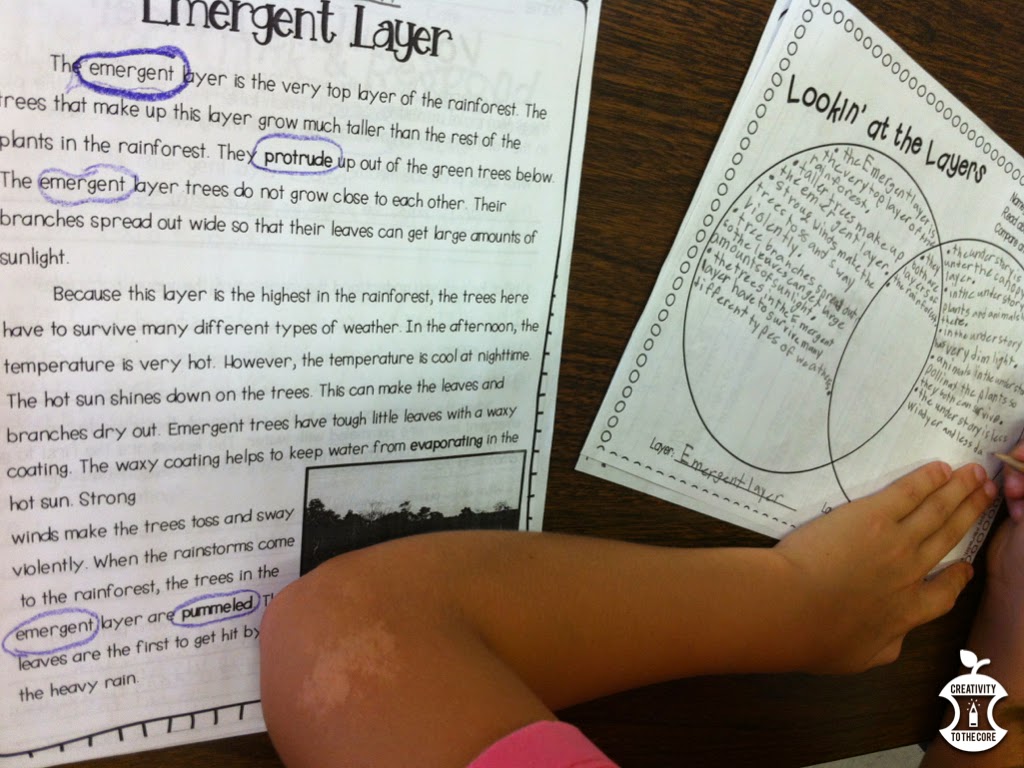
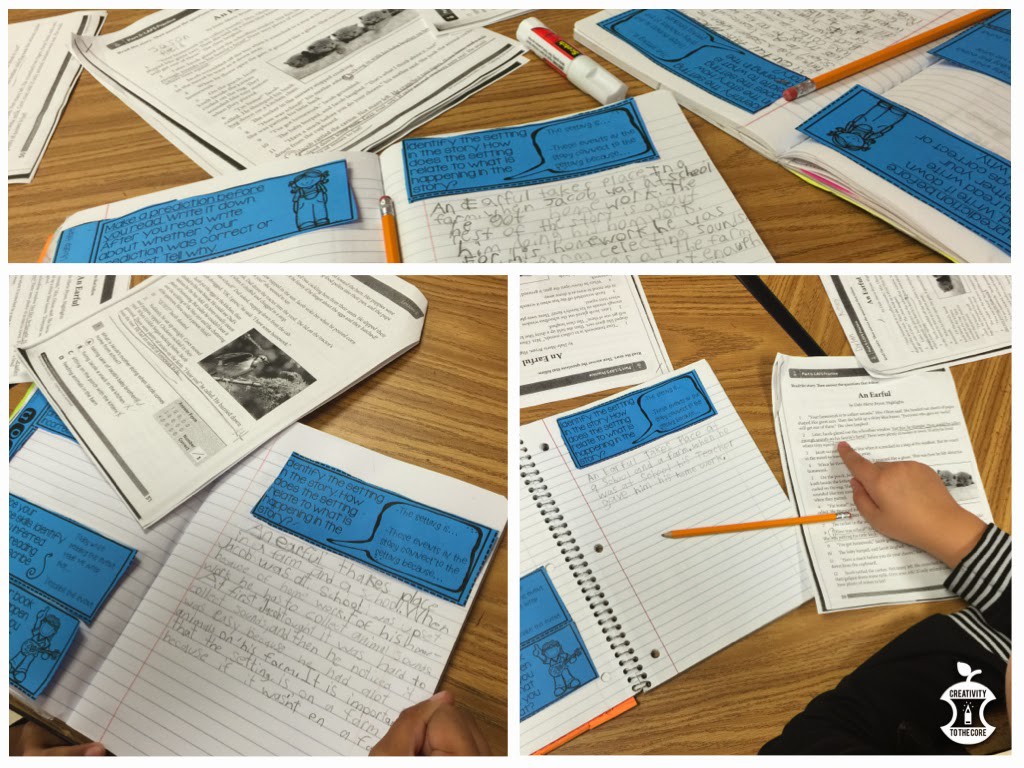
  • Vocabulary/Reading – My novel study groups read their novel, make annotations, and respond to their flippy prompts (blue flaps seen above). When we are not reading a novel, students complete vocabulary activities at this center. Our lower groups do not go to this center because vocabulary is taught explicitly to them in small group
  • Skill Practice – This center changes depending on our skill. It is differentiated for the two sets of groups. Sometimes, there are even two separate activities for certain students. This center usually includes writing. Sometimes it has task cards. Overall, it is based on the standard that we are teaching that week.
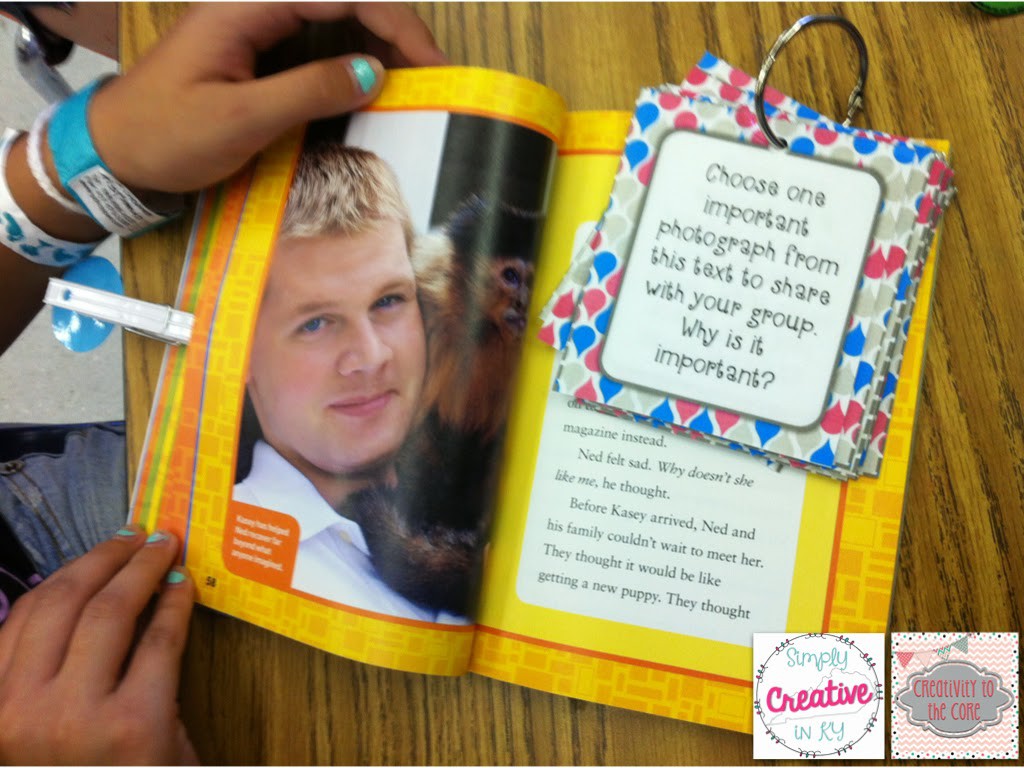
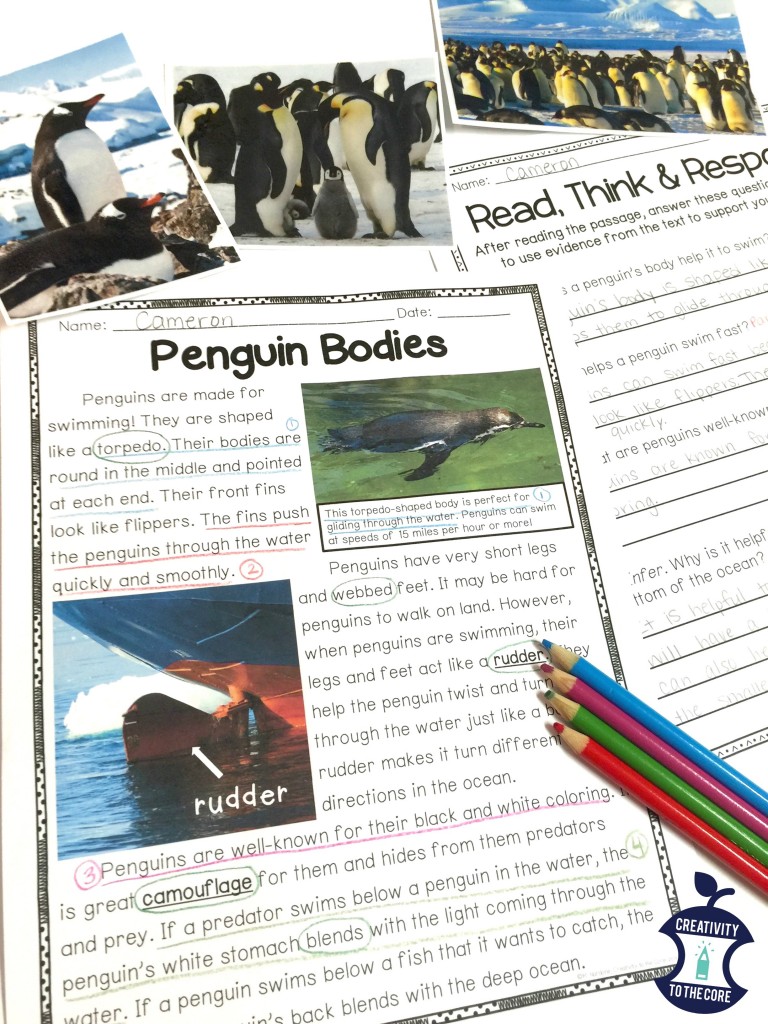
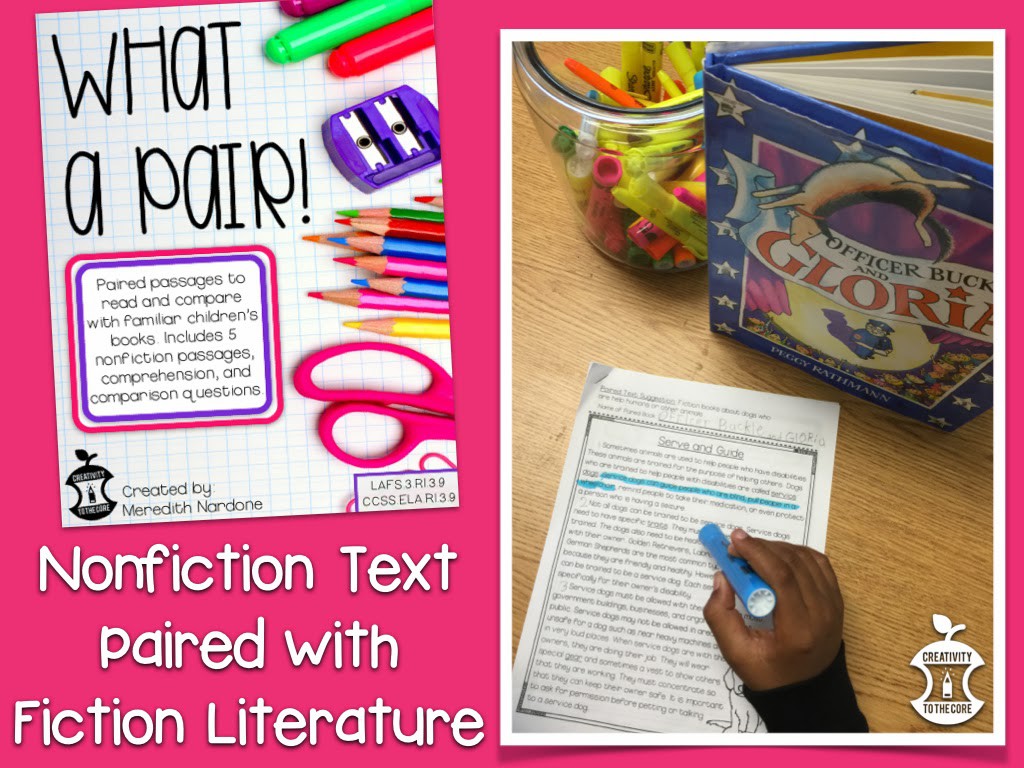
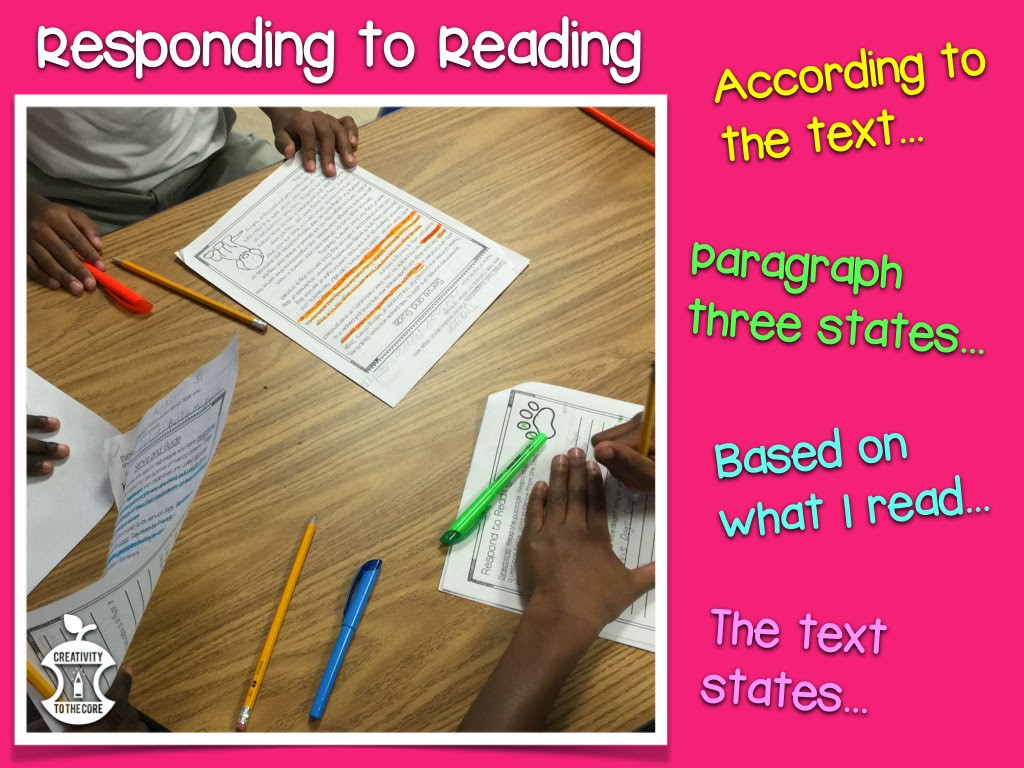
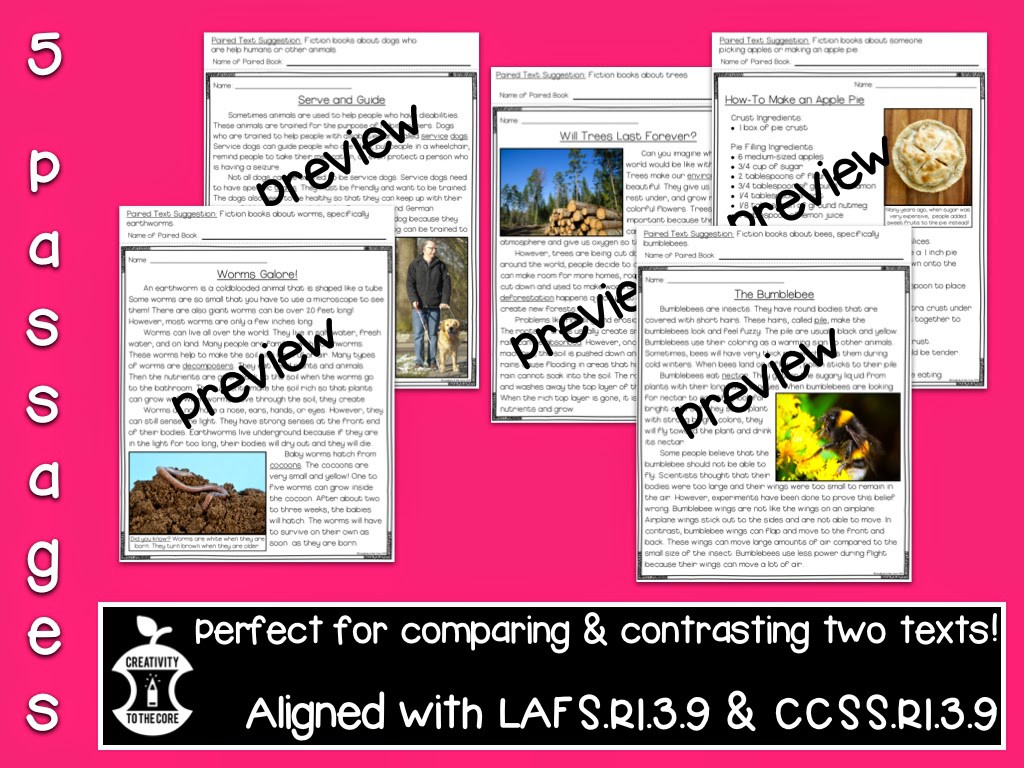
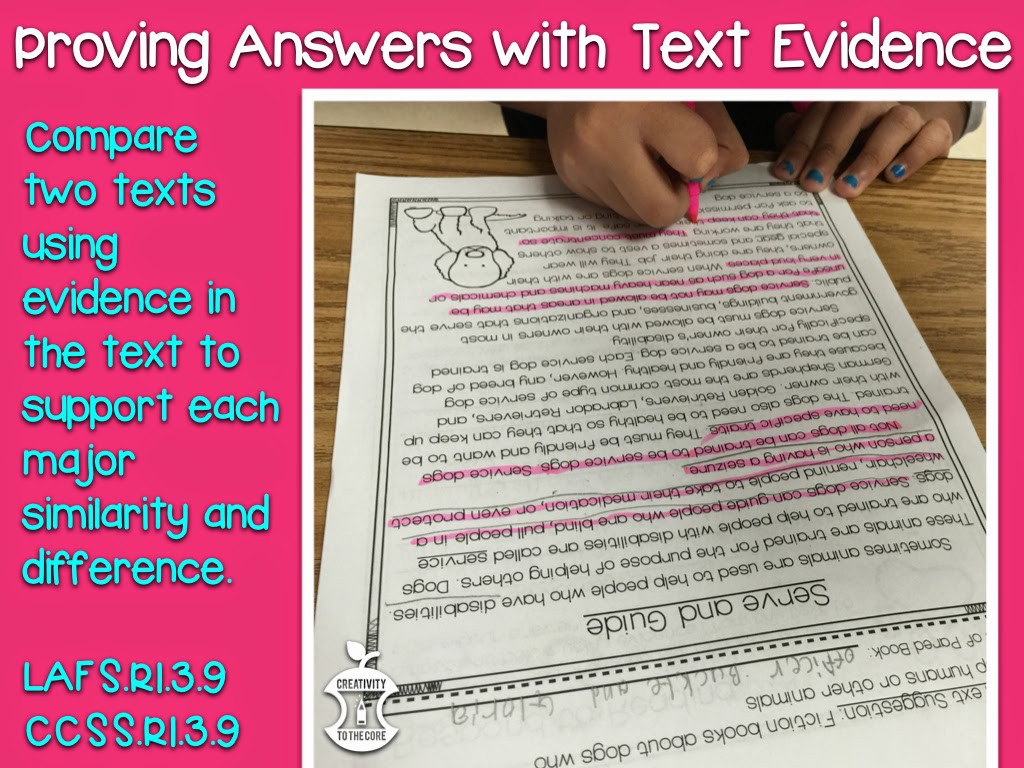
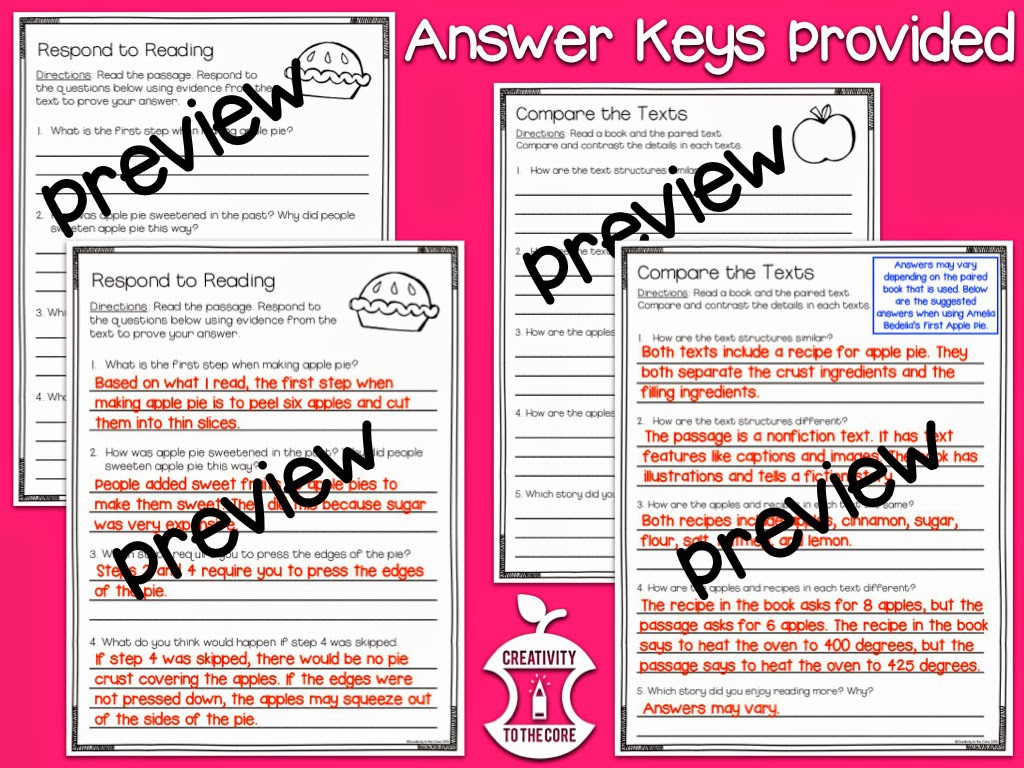
  • Text Evidence – This center is completed only by on and above level students. They are given books or passages and questions. We make sure that they are focusing on finding text evidence and responding in complete sentences with evidence based sentence starters. Paired text passages work very well with students in this center. 

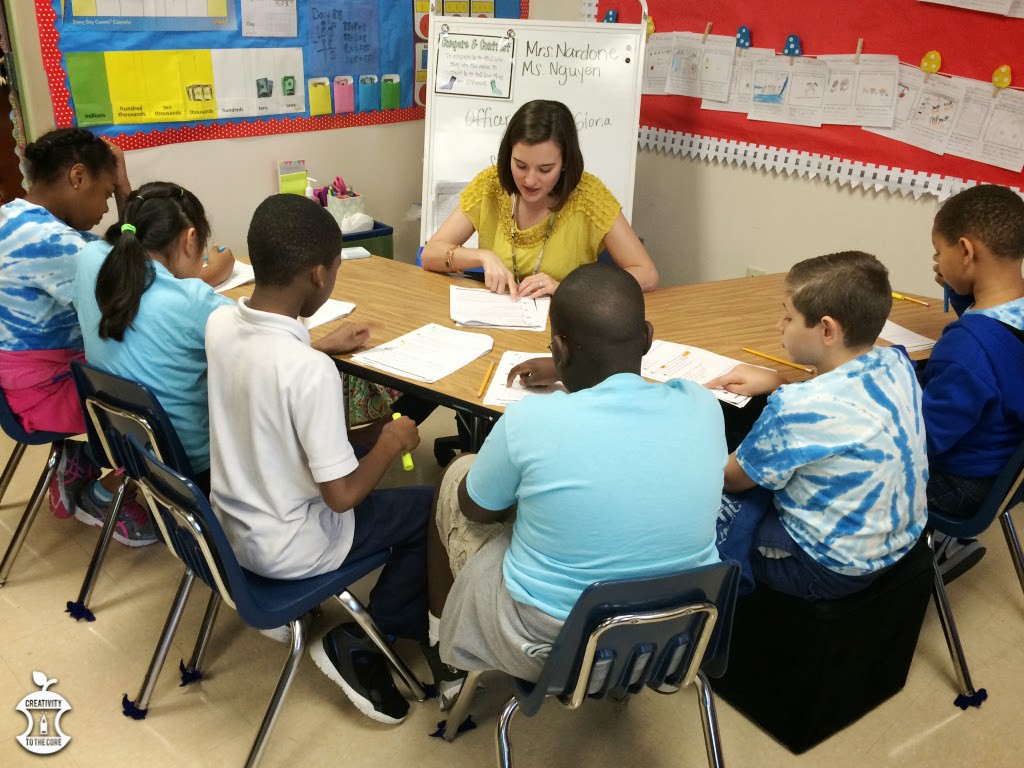
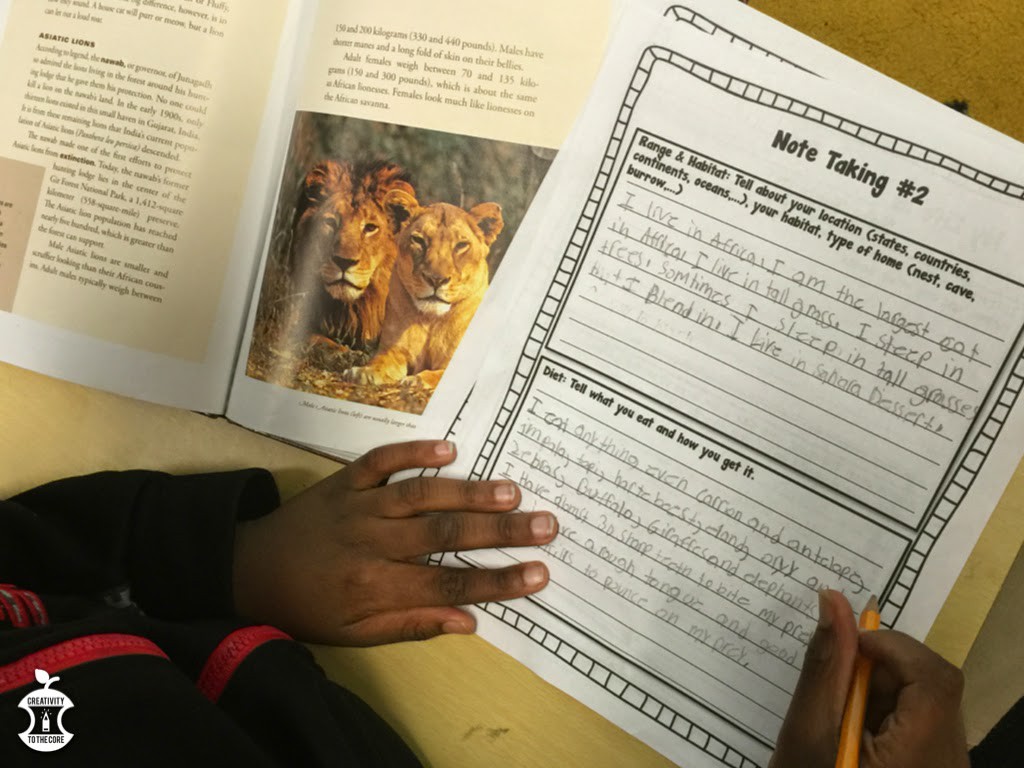
This is a Skill Practice center focused on point of view. Students were researching an animal and then writing about the animal from the animal’s point of view. 
That’s a little look into our Reading Block! I hope you enjoyed it!

Filed Under: Literacy, Misc Tagged With: Accountable Talk, Annotation, Co-teaching, literacy, Paired Text, Reading Centers, Schedule

Professional Development

Today linking up with my friend Christina from Miss DeCarbo for Wordless Wednesday! My week has been filled with meetings, sessions, and testing. It has been crazy. BUT on the positive side, I am so excited to say that my first ever Professional Development session is complete! I am so thankful for all of the teachers who provide me with my own “Virtual PD” daily. Blogs and teacher friends are a beautiful thing!

Have a great week!

Filed Under: Literacy, Misc Tagged With: literacy, Reading Centers, Wordless Wednesday

What A Pair! {Using Paired Texts to Compare and Contrast}

I have be crazy busy with my new job back in the classroom {more to come on that soon}, but I wanted to share this fun set with you today! Last week, our skill was to compare and contrast two texts. In third grade, students are asked to compare and contrast the major points in two texts about the same topic. My two coworkers and I were searching for products to use, but we weren’t finding anything that worked for us…

Fast forward to the weekend. I decided to create a passage to go along with the book Officer Buckle and Gloria. We wanted the students to be engaged in the topic {dogs}, so we used a fun fiction book that they would giggle at. 🙂 In the past, I have read Officer Buckle and Gloria to kindergarteners and first graders, so I was slightly worried. I didn’t know for sure if my third graders would think it was funny. OH was I wrong! They were laughing and asking to see the flipping dog picture again and again.

Reading two texts can be time consuming, but “Just Do It!”.
With my on level groups, I read Officer Buckle and Gloria aloud and then students read the paired passage silently. With my below level groups, I read the book aloud, but the students read some of the passage and I read some of the passage. With my lower below level groups (many are already in RtI or receiving services), I read both texts aloud. In one of my classes, I read the book aloud whole group which saved a bit of time. Yes, it takes a long time, but there’s no other way to expose them to two texts before discussing and responding.

Discussing the texts
After reading, we started discussing each text separately. I asked students to retell aloud using major details, and we talked a little bit about each character. I prepped students for the questions to come by showing them similarities and differences in the structure of the text: fiction/nonfiction, text features, real pictures/illustrations, paragraphs, etc. We also looked at similarities and differences between the characters/subject in both texts.

My school is big on accountable talk right now, so we made sure to answer questions in complete sentences with sentence starters. My friend Katie from Simply Creative in KY, has a great pack that helps remind us to use accountable talk. You can check it out here.

Responding to the Text
In order to hit two standards at once, I added response questions AND compare/contrast questions to the passage. My on level groups only did the compare and contrast questions with me, because they are able to answer text-dependent questions on their own. My below level groups were guided through everything. {A picture of both handouts is shown below.}

We compared and contrasted the text structure and the topic (dogs, worms, trees, apple pies, bumblebees) in each set of paired texts. Students then explained which book they enjoyed reading most and why.

It wasn’t the easiest skill for my struggling readers, however, it did make them think. And think HARD! They were prepared for their practice assessment on Friday, and did very well. {Celebrate Small Moments!!!} Pretty soon, the service dog passage was turned into a whole pack!

Click here to grab yours or see a larger preview!
Here are the five passages included. 

These are the five books that I used to pair with the nonfiction passages. But, any fiction book on the same topic as the passage will work just fine! 🙂 They are not included in this pack, so check out your local library or head over to Amazon. {Amazon Prime is my weakness!}

At the top of each passage in the pack, you will see a Paired Text Suggestion and a line for students to write the name of the paired book (see picture above). This helps students to see that they are focusing on TWO texts not just one.
There are also two response pages included with full answer keys. Some answers may be different if you choose a different children’s book than the suggested one. Any fiction book on the same topic will do!

I hope you enjoyed this mini preview! If you are like me and focused on standards, standards, standards, then I hope this little pack helps to narrow down your planning for LAFS.RI.3.9 or CCSS.RI.3.9! Click here to see a larger preview!

Have a great week!

Filed Under: Literacy, Misc Tagged With: Accountable Talk, Complex Text, literacy, Paired Text, Reading

Confer App: a note taking and data collection app for teachers!

 Today, I must cut right to the chase because I am beyond excited about this new find! I was at a conference in Jacksonville, Florida right before Thanksgiving listening to a 2nd grade teacher talk about differentiation. It was a great presentation, but to be honest, I was thinking “I do most of these things in my own classroom”. That was until I heard her mention “this new DATA COLLECTION APP”. My ears perked up! My eyes flew from my notebook to her face. We are in the age of data, data, data. This is perfection!
Really? I can just add my students into this app and log all of my annotations right on my iPhone? NO WAY. Wait what? I can take pictures of their work and add them to each student’s personalized file? This was too good to be true.
But it IS true! It’s called Confer. I may seem a little too excited about this, but let me tell you – It is worth it! It’s available in the iTunes App Store or through Google Play for Android.
There are currently two versions of Confer. Confer (regular) is the full price version. It is $24.99, which may be more than you are used to paying for an app…however, think of it as a portable, digital, never-ending, never full data binder. I don’t know about you, but I would pay lots of money for that.
The Confer lite edition is the free one that you can download quickly. Test it out for yourself! However, if you have more than 10 kids in your class (most of us) and you teach more than 2 subjects (most of us), this may not be ideal. Confer lite allows you to store two subjects with 10 students per subject. It also only allows for 5 notes per student.
Take it from me and download Confer lite. You will love it. Now for a closer look…
You can organize all of your information into three major sections: Subjects, Students, and Notes. Once you create an account, add subjects by using the + in the top right corner. Then add students to the subject. Once you add your class list once, you don’t ever have to retype their names! To take notes on each student, just click on their names and then click the + in the top right corner.
A sort feature is at the bottom of most screens in the Confer app. My absolute favorite sorting feature is the options for student sorting. Look at the middle picture in the image above. I can always sort by first or last name, but I can also sort by the date, tag, strength, teaching point, next step, level, group, and flag! CRAZY AMAZING.
I can literally add my students and their levels and simply click sort by level. Ta-da! Reading groups done. Then, if I want to teach a small group lesson on inferences, I can click sort by teaching point or next step and ta-da: focus group is chosen for me. No more flipping though pages and pages of charts! I can also flag students green, yellow, or red in certain subjects or topics, and then group them by flag color so that I can easily see where each student is. Here is a picture from Confer’s website that displays the flagged students in each topic.
Once your students are added, adding notes is a breeze!
This next feature sold me instantly! Click on a student, take a picture of their work, and it’s stamped with the date and a comment. Easy peasy and PERFECT for parent-teacher conferences, data chats with administration, and RtI meetings.
And just when you thought Confer had wow-ed you…it can export! Yes! Just click the arrow on the far right bottom of the screen to export a file from the app. There are many different options for you to choose from!
Fonts by KG Fonts & Hello Fonts, Graphics by Pretty Grafix & Ashley Hughes
I am SO excited to use this app full time in the classroom starting in January. It will help me to be efficient with my time and to keep everything in one place. I love that I can check Confer at home in my bed or while I’m talking with a concerned parent on the phone. In these data-driven times, we teachers must find ways that truly work to manage our time wisely and help our students achieve their fullest potential. I hope this little tutorial will help you this year!
Check out a more in depth tutorial on the app or website. For more information and a video from David Lowe, the creator of Confer and a NBCT, click here. Happy data collecting!

Filed Under: Literacy, Misc Tagged With: app, data, note taking, technology

Close Reading for the Holidays

Are you in need of some low-prep activities to get your students through the holiday season? Check out my newest close reading passages! They are perfect for small group, guided reading, weekly homework, and thematic units. All you have to do is simply download and print! If you are not familiar with close reading you can read more about it in my Close Reading Mini Series.

I’m excited to be a part of The Primary Gal‘s Unwrap a Gift Linky Party. There are so many engaging gifts for you from some of my favorite teachers. Keep reading for a closer look and be sure to unwrap your gift at the end of this post! 

I have two sets of holiday close reads: European traditions (7 passages) & Asian traditions (6 passages). Each passage is written at an appropriate text complexity level for 2-3rd grade according to the Common Core State Standards. However, it totally depends on your students. I often used similar close reads with my high first graders, and I have a friend who uses them with her struggling fourth graders. There are two different versions of most handouts within each set. Instant differentiation!

Close reading is all about developing a true understanding of the text. Therefore, I make sure that students are rereading many times. One passage will last us 3 days to a full week! Students reread the passages silently, aloud, and to partners. Then, they annotate by highlighting or circling unknown words, numbering paragraphs, and underlining answers in the text. You can have students use any annotation marks that you like (although I recommend no more than about 3 at a time – see the close reading blog series above for in depth information).

After reading, students will respond to text-dependent questions. I ask students to go back to the text and underline or highlight their answers. They are also required to write the number of the question beside the sentence in the text. This is a wonderful skill to start early on! It works wonders on standardized tests! Each passage in my close reading sets has two different sets of response questions which is great for differentiation in class.
I hope you enjoy your holiday season! Click the image below to UNWRAP YOUR GIFT!
Head over to The Primary Gal to unwrap more gifts!


Filed Under: Literacy, Misc Tagged With: Annotation, Christmas, Close Reading, Complex Text, freebie, Holidays, Reading, Repeated Reading, Text Dependent Questions

Gingerbread Unit

Hi friends! Welcome to the Holidays Around the Blog Linky! Can you believe it is November already!?!? Crazy. This year has flown by. Be sure to enter the giveaway at the bottom of this post and hop around to other blogs! You can win $170 cash, plus many products from our TPT stores!

Christmas is my favorite time of year, so I decided to focus on my holiday unit. In first grade, we study a few gingerbread books during our unit in December. You can see the books below!
Click these links to grab the books on Amazon.
The Gingerbread Girl
The Gingerbread Girl Goes Animal Crackers
The Gingerbread Kid Goes to School
Gingerbread Baby
The kids just LOVE this unit. It usually lasts one full week. I use many read alouds (like the ones listed above). I really enjoy these specific books because they are not the general Gingerbread Man story. These titles give students an experience with a variation of that classic story.
During the week we work on many skills. We compare and contrast characters in stories We look at how the character changes from the beginning to the end of the story. We analyze the differences between two books by the same author.  We determine who is talking at various parts of the story. We sequence events and describe character inside and outside character traits. We write about the books and even do gingerbread math activities! Seriously, you can take your students in SO MANY different directions with these picture books. Plus, students always LOVE them. I mean just looking at the covers makes me happy! They are just so fun and engaging when read aloud.
On the very last day of school before our December break, we make gingerbread houses! The children are literally jumping in excitement on this day. To make the gingerbread houses, you will need: milk cartons, graham crackers, holiday candy, icing, and ice cream cones (optional).
You can purchase the milk at the grocery store, and just dump it out, but that is a HUGE waste. I simply ask students to keep their milk cartons at lunch. They then bring them back to the classroom, where I wash them out with soap and water. We designate one section of our counter by the sink as the “Milk Carton Section” and let our dear custodian know so that she doesn’t throw them away. As we get closer to the day, our collection grows!
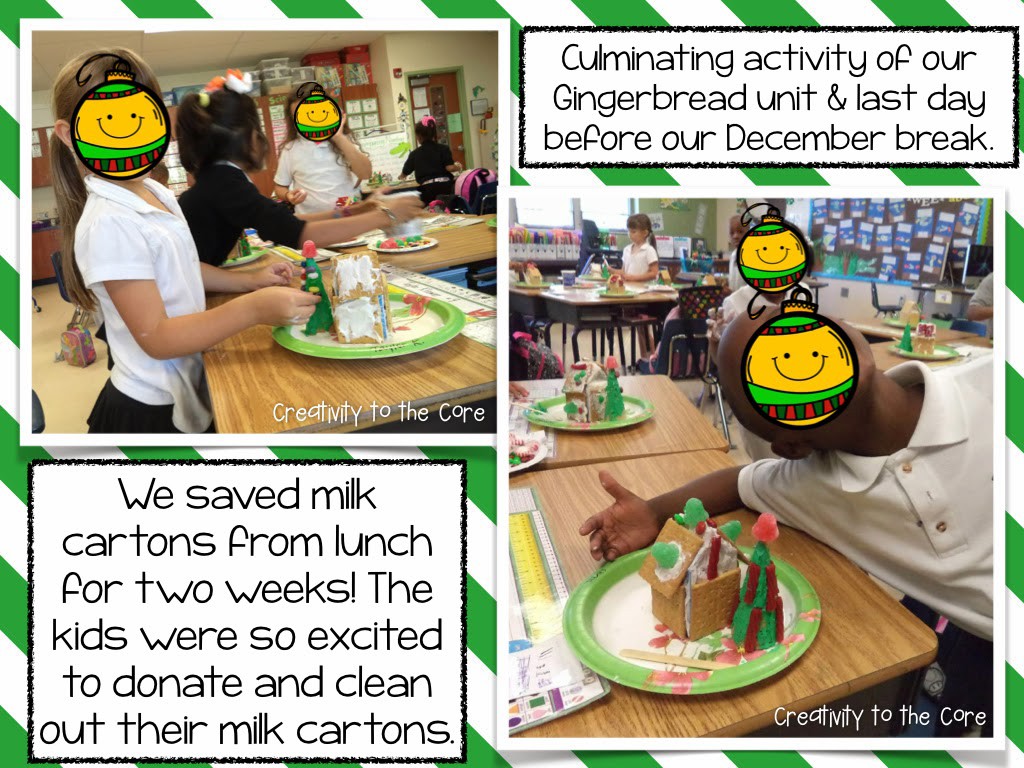
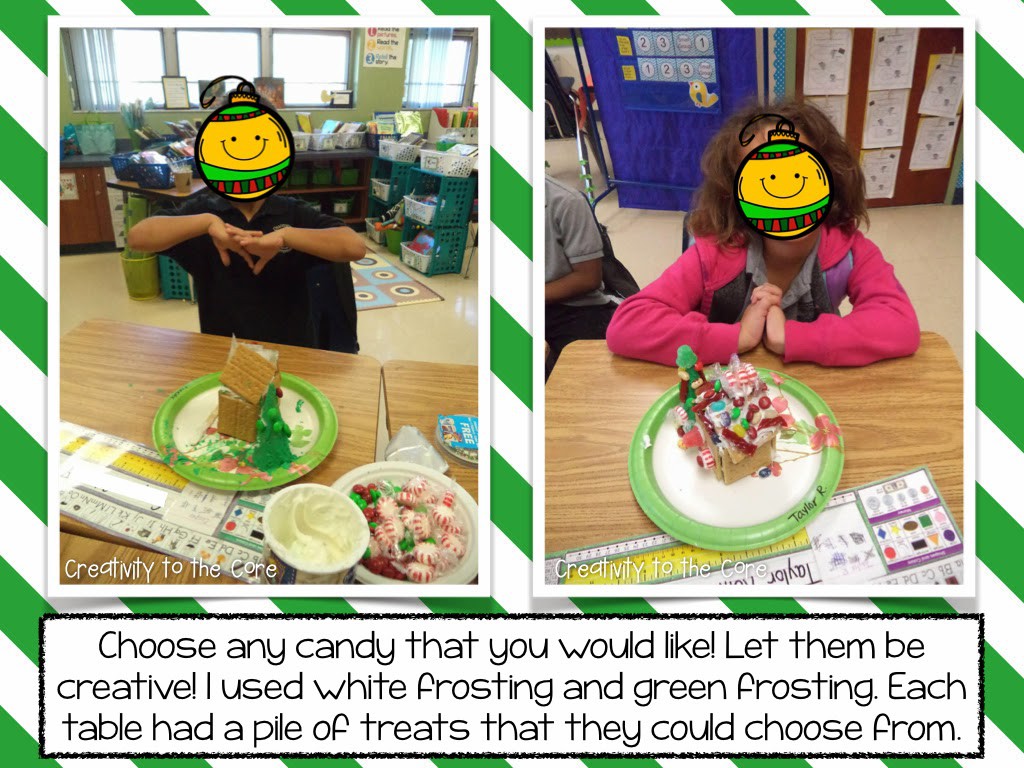
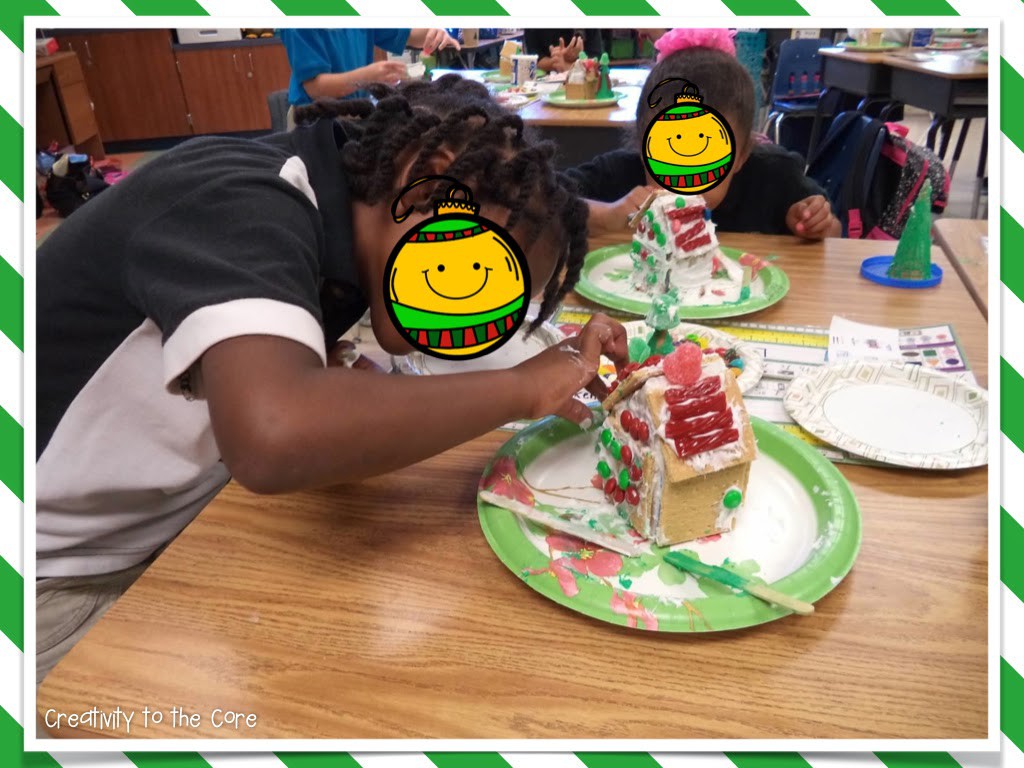
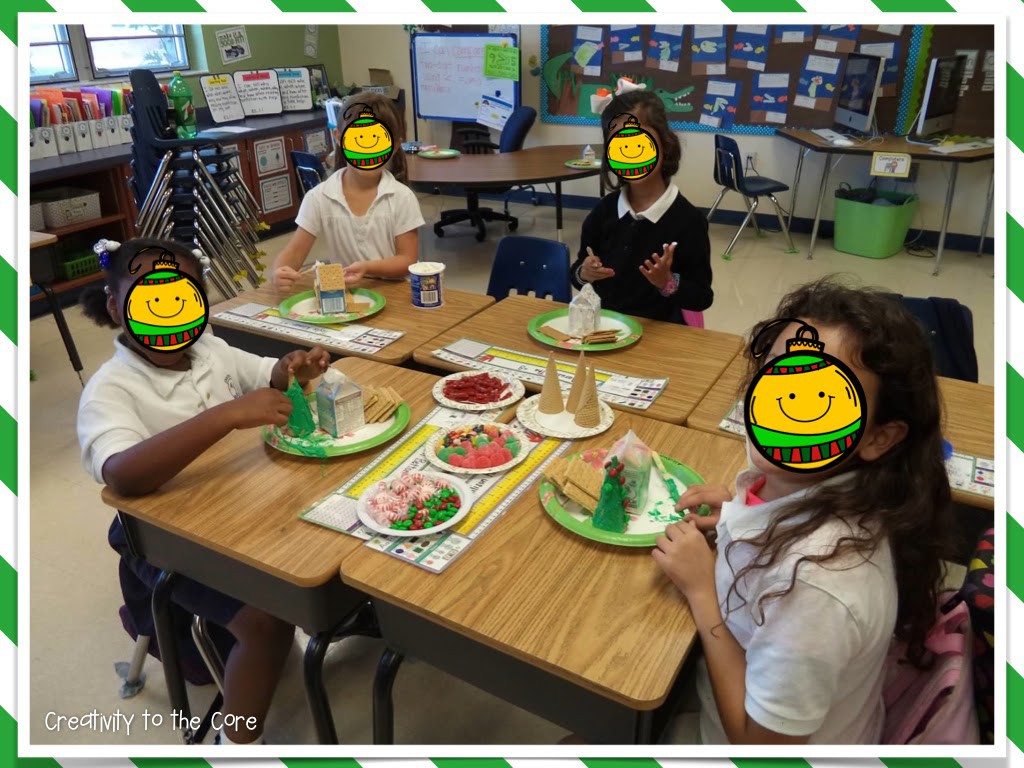
The day before, I wrap all milk cartons with wax paper and hot glue the edges. This allows the icing to stick well. To add to the fun, I purchase ice cream cones so that my students can make trees. I place many different treats in the middle of the table for them to choose from.
You can purchase white and green frosting around the holidays at the grocery store. However, I have also dyed the white frosting with green food coloring. That works fine too! From there I just let them go to work. I let students use skinny popsicle sticks to spread the icing (no knifes allowed!).


I hope you enjoyed our gingerbread houses! Maybe they will inspire you to include gingerbread books in your classroom this year! I promise you, your students will absolutely LOVE the literature and the experiences that you bring to make the books come to life!
(Background from I Teach. What’s Your Superpower?, Ornament Clipart from Krista Wallden, Fonts from KG Fonts & Hello Literacy.)

a Rafflecopter giveaway


document.write(”);

Filed Under: Literacy, Misc

Accountable Text Talk

My sweet friends Alisha from Missing Tooth Grins and Katie from Simply Creative in KY decided to get together for a mini product swap. We wanted to give ya’ll a closer look at some of our products!
I have the wonderful pleasure of looking through Katie’s Let’s Talk About It: Teaching Students How to Talk About Text. People, it’s amazing! This pack has so many different resources to help you help your students discuss their reading. True Common Core, my friends. Discuss, discuss, discuss.
First off, please just look at all that color! I mean, really! Who doesn’t love color?!?! This is just pure teacher happiness! This is the whole pack printed and ready to teach with!
Okay, now let’s take a look at the inside of this pack.
Katie includes:
1. Lesson Ideas about using sticky notes, summarizing, learning to take turns, and making conversations meaningful using various resources.
2. Stop & Jot and Text Talker anchor charts
3. Five Phrase Posters
4. Text Talk Bingo
5. Talking Sticks
6. Text Talker Bookmarks
7. Discussion Cards for chapter books, picture books, and nonfiction texts.
Katie includes so many different options in this resource. I used it in camp this summer and it was perfect for all grade levels! I loved using it and being able to really talk with the kids about what they were reading. It was quick and easy because I had questions at my fingertips and engaging ways for the kids to interact and question each other.
(Here’s a little behind the scenes action)
Those clothespins are the “Talking Sticks” that are included. Just print, laminate for durability, and attach to a popsicle stick with hot glue. BUT, I had to change it up a bit. I didn’t have popsicle sticks, so I decided to use some white plastic clothes pins (super cheap at Publix!). This turned out to be super useful…more about that to come!
 Katie includes all the posters full size like this one. However, to save paper and make it easy for Small Group storage, she also includes them 4-to-a-page, which I LOVE!
 It’s as simple as printing, laminating, whole punching, and adding a binder clip to the corner.
 Here are some different ways to use this engaging reading resource…
I laid out all the clothespins for the kids. If they wanted to ask a question about what they were reading or to talk about something, they would just grab a pin.
 I am oh so glad I used the clothespins. It worked like a charm when reading with my group of 4-5th graders. Have a question while reading? Just grab a clip and attach it to your question or evidence. This way, I knew that the kids wanted to talk without any talking! It also helped because I was able to notice when students were actively reading and when they weren’t. Without interrupting them, I was able to know what they were thinking about. (Katie, this is brilliant!)
I also used these clips with a struggling reader who is repeating first grade. She needed a lot of prompting and support, but the hands on process of clipping the actual question prompt to her evidence really helped.
(She goes, “That reminds me of when my mom says that to me when I’m annoying her!”)
HA! Kids tell all!
Here is the same student using the “Talking Sticks” and the bookmark. Get this bookmark as an exclusive freebie from Katie’s pack here. It is fabulous! It was a great reminder for this student when she would start to get distracted. We would read her bookmark together and review how to be a great “Text Talker”. This refocused her quickly and without any problems.
These colorful cards are the heart of the Text Talker product. Katie has included SO MANY questions for you to ask students. I laminated them and put them on binder clips so that they are easy to flip through and take off. I had students ask each other these questions in my 4-5th grade group. Here, the student was telling me that this picture was important because it shows the friendship between the man and his monkey after the man’s paralyzing car accident.
I also had students lead the discussion with the question cards. The older kids loved being a teacher. They were eager to add to each other’s conversation and were obsessed about clipping those pins to their papers! Katie includes 3 different card sets: Chapter Books, Picture Books, and Non-Fiction Texts. You are good to go!
I love that the cards are small enough to sit right next to the student. This entire resource is so student and teacher friendly! Whether you want to lead the conversation or you want the students to, these cards are a great addition to your classroom.
Oh and these cards that I mentioned before, these are my ultimate favorite! Look at that adorable Melonheadz clipart!! Perfect size for little kiddie hands!
Freebie anyone?!?!
So, after seeing all these pictures, you will definitely want to stop by to check out Katie’s adorable freebie. She has uploaded this as a sample of her Text Talker product. These bookmarks will be a perfect addition to your classroom! And if you like what you see (I mean, why wouldn’t you!?!) check out her entire Text Talker resource.
 Also, you can enter our giveaway below! The winner will get all three products for free! Just in time for Back to School!
a Rafflecopter giveaway
We hope you enjoy. Thanks for stopping by! Check out two more of our new products by hopping over to my sweet friends’ blogs below.
Read about the adorable Back to School Snapshots with Katie!
Check out my newest close reading passages with Alisha!

Filed Under: Literacy, Misc Tagged With: Back to School, Discussion, Giveaway, Product Swap, Reading

Center Storage

This week I finally printed some of the things I have created this year.
 I started organizing my centers like this last year. We did literacy and math centers every day so I had A TON of activities and no where to keep them. Now I store my centers in plastic Ziploc bags. All the Ziploc bags go in a filing cabinet or the closet (depending on subject and topic). This is convenient for me & for early finishers who need to be kept busy!
 I print and laminate everything. I cut any extra white or lamination off of the big direction sheets. This way, they fit perfectly inside the zipper of the Gallon bags. Each activity has an individual bag that includes:
1) Anchor Charts
2) “I Can” Statement/Direction Sheet
3) Task Cards or Activities
4) One copy of the recording sheet for easy access.
Just grab it and make copies.

On Fridays before I leave, I grab the centers for the next week, take them out of the large bags, and put them in our center bins, like the one below. I leave the task cards in the small sandwich bags.

I keep the empty Gallon bags in a bin by my desk until I need to put them away again. Easy & cheap. If a bag rips, grab a new one!  How do you store and organize your centers?

Linking up with Christina from Sugar and Spice today! Love Wordless Wednesdays…although this one isn’t very wordless…ooopps! Be sure to link back up with other teachers!


Filed Under: Literacy, Misc Tagged With: Math Centers, Organization, Reading Centers, Wordless Wednesday

Annotation {Close Reading Mini-Series}

Annotation in Close Reading - Annotation - reading with a pencil
Annotation is sometimes known as “Reading with a pencil”. In simple terms, that’s all it is. Students use a pencil while they read to note specific things. Annotation is extremely important when analyzing a text.

Types of Annotation
-Underlining
-Circling
-Noting unknown words
-Noting challenging sections
-Writing margin notes
-Writing on bookmarks
-Writing on sticky notes

Annotations on sticky notes during a novel study

In high schools and colleges, students always annotate in text when participating in close reading. Elementary students have very little experience with this. )Most elementary teachers may have very little experience teaching it!)

So, how do you annotate in an elementary classroom? Can you guess? MODIFY!
Ways to Modify Annotation
-Use wiki sticks to underline
-Use colored pencils or highlighters to show unknown words
-Number paragraphs or draw lines to separate paragraphs
-Use only a limited number of annotations

Annotations with highlighters during close reading practice
Highlighters make annotating instant fun!

Why Start So Young?
1. It is so important to teach students to do this at a young age. Start in primary! Use some of the modifications above to help you explain “reading with a pencil” to the little ones. As you model a few types, students will begin to use them in the close reading process. I recommend choosing just a few to focus on so that students become comfortable using them and understand why they are using them.
2. THEY CAN DO IT! Believe in them. They are capable of GREAT things!

Annotations for unknown vocabulary in the text

This is an example of what I would say to students in my classroom last year (high achieving first grade) once we were comfortable with our annotations. I stuck to just 3. Keep in mind that we went over these one at a time earlier in the year.
1. Number the paragraphs to the left of each paragraph.
2. Circle any unknown or tricky words.
3. While answering questions, go back to the text and highlight the evidence. Make sure you have the question number next to your evidence.

Annotations help develop writing during a close read
Annotations helped this child to develop a well written response.

Whether you have been using close reading for a while, or are just beginning to, check out my close reading packs. Each pack comes with a weekly layout, passages, vocabulary activities, reading responses, visualizing & questioning handouts, graphic organizers, and writing prompts. Once you’re there, click the preview link under the images to see more before you buy! Also, click the penguin image below to snag a freebie passage to use with your class.

Penguin close reads - Freebie!
I hope that this mini-series will give you ideas to bring back to your classroom!  If you would like to read more about close reading, please see the citation list attached here. Please feel free to email me with any questions at creativitytothecore@gmail.com.

Close reading - What's it all about? Understanding the in's and out's of close reading in an elementary classroom

signature

Filed Under: Literacy, Misc Tagged With: Annotation, Close Reading, Mini-Series, TeachersPayTeachers

Repeated Readings {Close Reading Mini-Series}

Close Reading - repeated reading strategies

Repeated reading is a BIG part of the close reading process. Each time students interact with the text, they come to a deeper understanding of it. Each time, they have more background knowledge than before. Each time, their conversations deepen.

Struggling Readers or English Language Learners

Struggling readers and English Language Learners (ELLs) may need extra time when reading. Each has his/her various challenges. However, close reading is great for struggling readers and/or ELLs because of this repeated reading. It gives kids time and many different opportunities to process information and make connections.

Who is reading?
The text is being read over and over. But who should read the text each time? Many times, the reader changes. It is usually suggested that the students tackle the text independently through silent reading the very first time. However, as mentioned before, modifications must be made for younger students. This may mean that a teacher reads aloud as shared reading for the very first time.

Types of Repeated Reading
-Individual
-Groups
-Teacher
-Partner

Remember that the type and number of repeated readings depends on the
specific passage and students in the classroom. You do not need to use all of those listed above. Choose what works for you and your kids.

Thanks for stopping by! Click here to read about annotations while reading!

Close reading - What's it all about? Understanding the in's and out's of close reading in an elementary classroom
signature

Filed Under: Literacy, Misc Tagged With: Background Knowledge, Close Reading, Mini-Series, Repeated Reading

  • « Go to Previous Page
  • Go to page 1
  • Go to page 2
  • Go to page 3
  • Go to page 4
  • Go to Next Page »

Primary Sidebar

Hi, I’m Meredith!

READ MORE

Search

Follow on Instagram

Footer

Copyright © 2022 · Creativity to the Core · Site by Ready to Blog Designs