Sound walls are versatile instructional tools that can be used in a variety of settings and in a variety of ways. At the core of each of these uses, is the focus of instruction from speech to print.
Read more about getting started with a sound wall. This will give you the why and what of sound walls.
The following explains how sound walls can work at various levels. Much of this knowledge comes from a combination of researching, reading, and listening to literacy experts on the topics of phonology, phonics, and sound walls. Recommended resources are listed at the end of the post. These are my personal recommendations based on personal experience using sound walls with various grade levels in the classroom and in a tutoring setting. Photographs have been graciously shared by others in the field.
phoneme – sound
grapheme – spelling
Sound Walls in Small Group Environments (Intervention, Tier 3, Tutoring)
If a teacher sees multiple grades, groups, individuals per day, it may be hard to have a traditional sound wall placed on the wall. Different students are at different stages in learning the phonemes and their corresponding graphemes. It would be just crazy to have one large one and then have to cover and uncover certain cards each time a group changed! Here are a few recommendations:
- Individual file folder sound walls – Each child or each group keeps a file folder size sound wall. You may choose to cover sounds that have not been taught. It may be easier to simply highlight the sounds as they have been taught. If individual sound walls are laminated for students, teachers can use a black permanent marker to draw lines over the graphemes that have not been taught. Then, when it is time to learn that grapheme, use a black expo marker on top of the black permanent marker. The permanent marker will disappear!
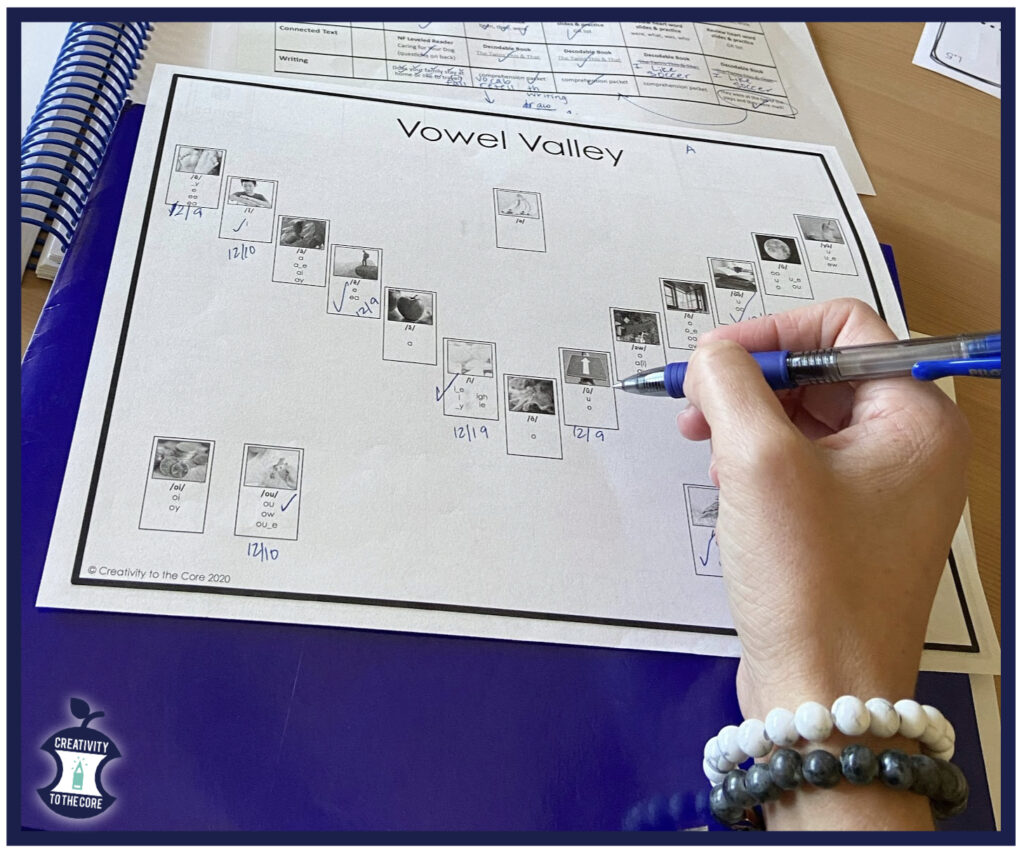
- Individual sound wall to track auditory drill – Print a copy back to back. Use as a progress monitoring tool during your auditory drill. Date under each phoneme as students respond. Track mastery and difficulty. An auditory drill is when the teacher says the sound, and the students write all the possible graphemes that they have learned to represent that sound.
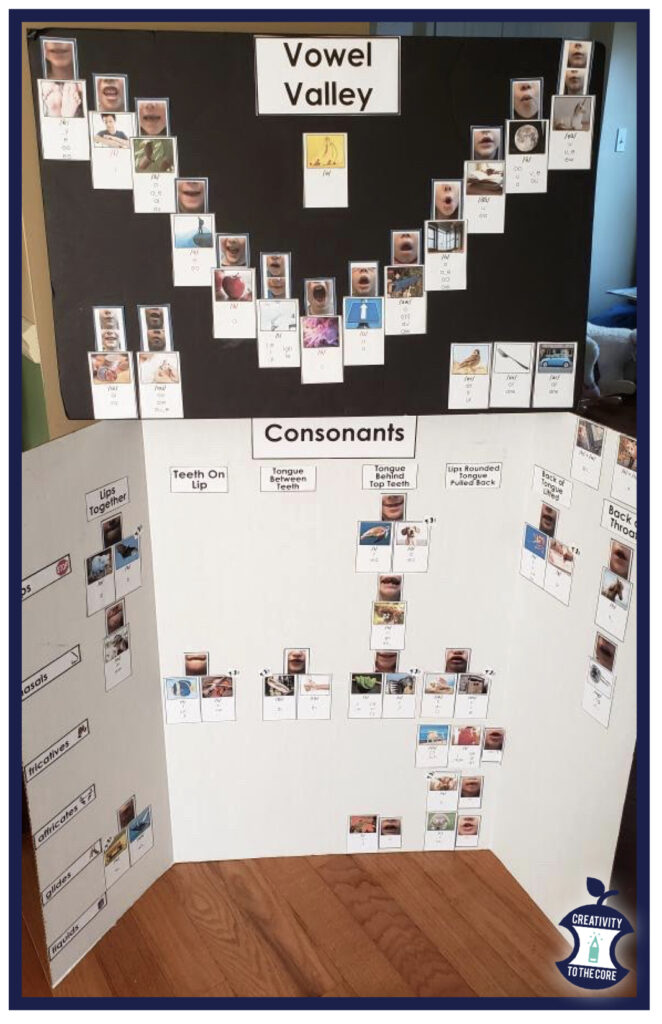
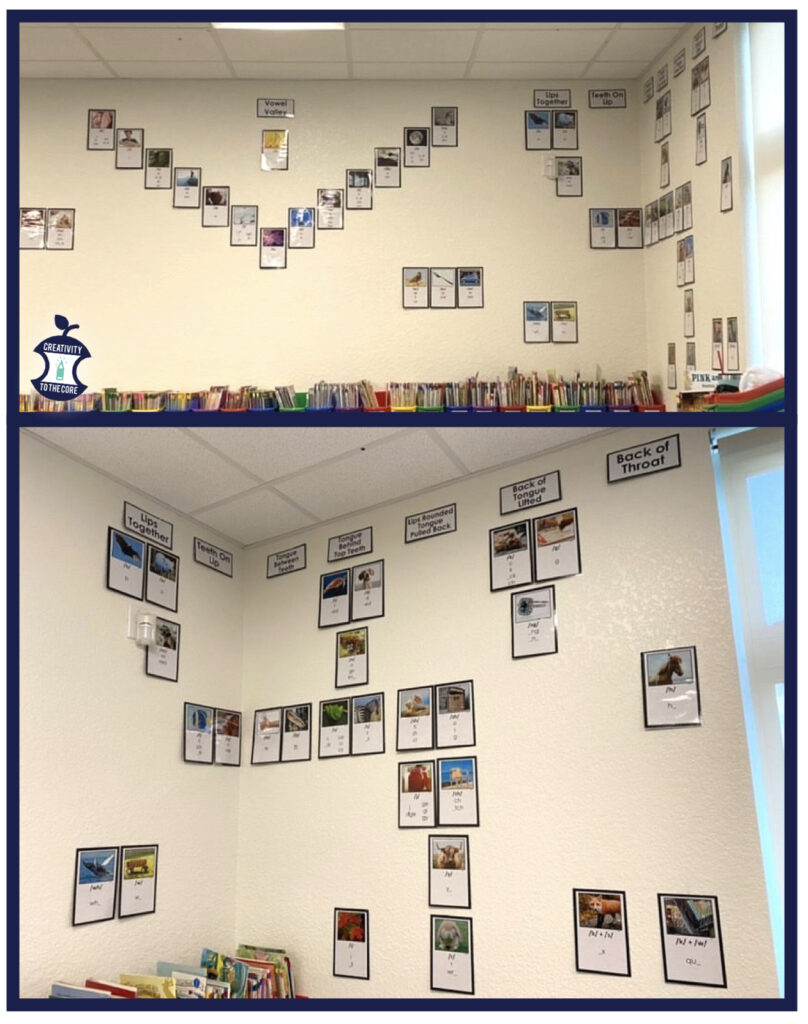
- Tri-fold Board Sound Walls – These boards work well when teachers see certain groups of students who are around the same ability level. This also works well in homes for families who want to integrate sound walls, but do not want to place it on the wall. Use tri-fold boards (the free standing poster boards used for science experiments) to display the sound wall. I suggest you put the vowel valley on one board and the consonant wall on another. Specialists and interventionists may choose to create multiple different sound wall boards for each grade level. When a group enters, just pull out the specific boards needed for the specific group. These are also light enough to move from classroom to classroom.
Sound Walls to Assist English Language Learners (ELLs)
Sound walls will assist ELLs of all ages in a positive way. The organization and visuals provided will give students a concrete example of fleeting speech sounds. You are giving learners the knowledge of how to produce the sound with the mouth first. Then, it will be easier for them to anchor the sound to the mouth movement, and then the letter or letters to the sound. Focusing on articulation is especially helpful when students are not familiar with the speech sounds in a new language. Often times, ELLs will discover that phonemes overlap, but spelling changes (ex: Spanish and English have the sound /E/, however it is spelled differently in each language). Sound walls are a great help for students when they are having to decipher between the sounds and graphemes in two or more languages. Sound walls can also be helpful in middle and high school classrooms with a high English learner population. When a teacher shows learners that there is an organization and reason for different sounds and spellings, students will have greater buy-in and understanding. Sound walls can help expedite this process.
Here are some practice ideas at various grade levels PreK-5. Many ideas will overlap, but there are also slight differences throughout. These are not sound wall rules. These are ideas to help you begin to imagine using a sound wall with students in your specific classroom.
Ideas for PreK
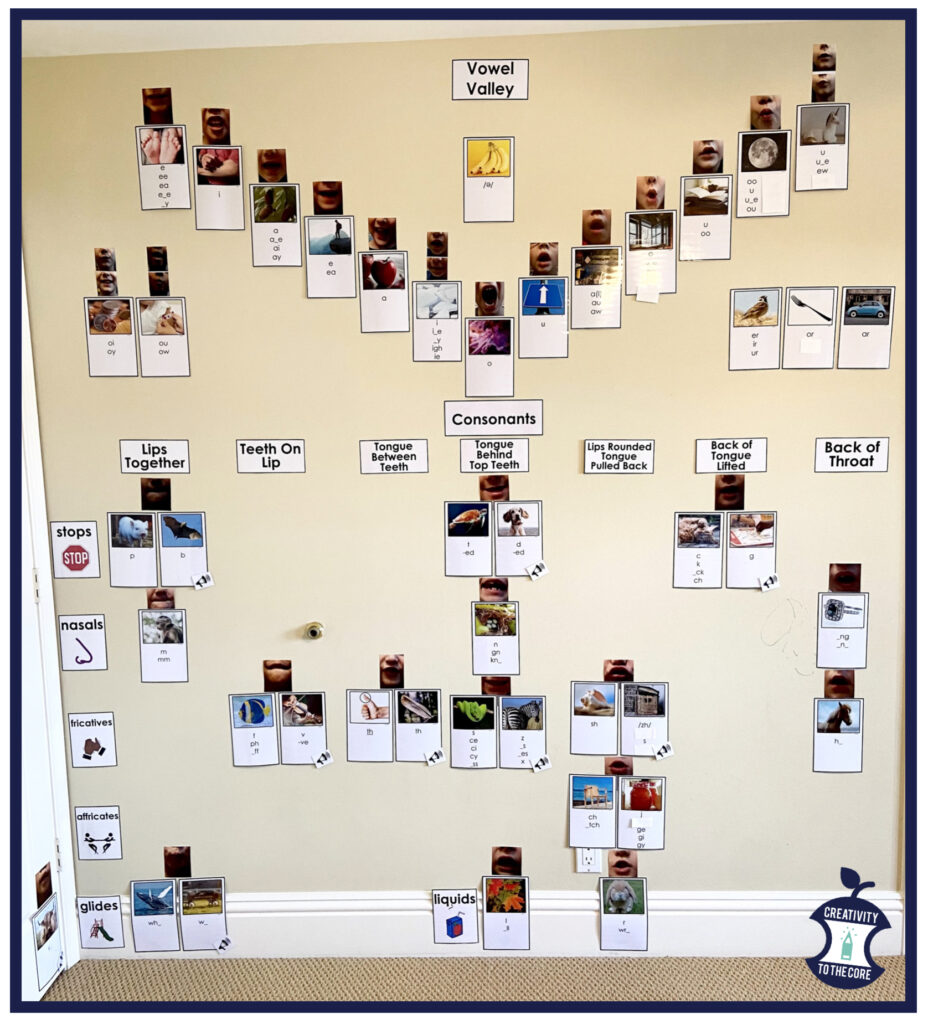
Display pictures of kids’ faces showing the correct placement of the lips, tongue, and teeth.
Spend a considerable amount of time discussing how and where the sounds are made.
Add sound wall review to typical morning meeting or calendar time.
Use mirrors to allow students to see their own mouth placement.
Draw attention to voiced and unvoiced sounds.
Choose sound wall cards with accurate key word pictures as the focus.
Cover all graphemes.
Flip over or do not post phoneme cards if the sound has not been taught yet.
Ideas for K
Display pictures of kids’ faces showing the correct placement of the lips, tongue, and teeth.
Spend a considerable amount of time discussing how and where the sounds are made.
Add a quick sound wall review to typical morning meeting or calendar time.
Use mirrors to allow students to see their own mouth placement.
Draw attention to voiced and unvoiced sounds.
Choose sound wall cards with accurate key word pictures.
Flip over or do not post phoneme cards if the sound has not been taught.
Follow your curriculum scope and sequence as you introduce sounds.
Reveal cards as you explicitly teach the sounds.
Cover graphemes that have not been taught yet.
Reveal graphemes as you explicitly teach each one individually.
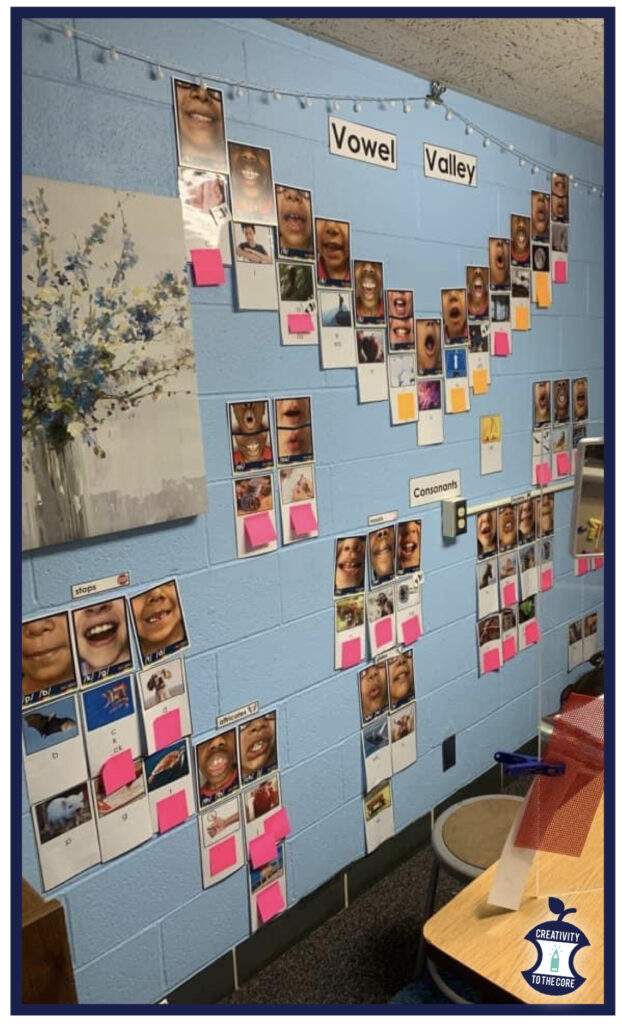
(Sticky notes covering untaught graphemes)
(Sticky notes covering untaught graphemes)
Ideas for Grades 1-2
Display pictures of kids’ faces showing the correct placement of the lips, tongue, and teeth.
Spend time discussing how and where the sounds are made, especially new sounds.
Add a quick sound wall review to typical morning meeting or calendar time.
Use mirrors to allow students to see their own mouth placement.
Choose sound wall cards with accurate key word pictures.
Flip over or do not post phoneme cards if the sound has not been taught.
Follow your curriculum scope and sequence as you introduce sounds.
Reveal cards as you explicitly teach the sounds.
Cover graphemes that have not been taught yet.
Reveal graphemes as you explicitly teach each one individually.
(white paper covering untaught graphemes)
A large focus of first and second grade is spelling instruction. Activities like phoneme-grapheme mapping will help students to take individual graphemes into permanently stored specifically ordered strings of graphemes. It is vital that teachers follow a scope and sequence for reading and spelling instruction. A sound wall can greatly assist students while spelling. Sound walls also help to teach the teacher the reasons why students are making the errors that they are.
The nature of a sound wall is to focus student attention from speech to print. This means that students can look to the sound wall to help them spell the sounds that they hear when they say and segment words. Once a word has been orally segmented into its individual phonemes, students can reference the specific cards for each phoneme in order to determine spelling options. Once modeled, this process is simple for learners to do on their own. It also fosters a strong sense of independence and confidence when spelling and writing. Below are some tips from experiences in my own first and second grade class.
(Photo taken before graphemes were covered)
Tip: Spelling Generalizations
Have discussions regularly about spelling generalizations and how those are conveyed on a sound wall. Ex: /k/ can be spelled c, k, _ck, ch. The _ck is shown on the sound wall with the underscore before the ck because _ck only comes at the end of a word or syllable after a short vowel. Students need to be explicitly told this. Understanding the underscore will help students as they are writing.
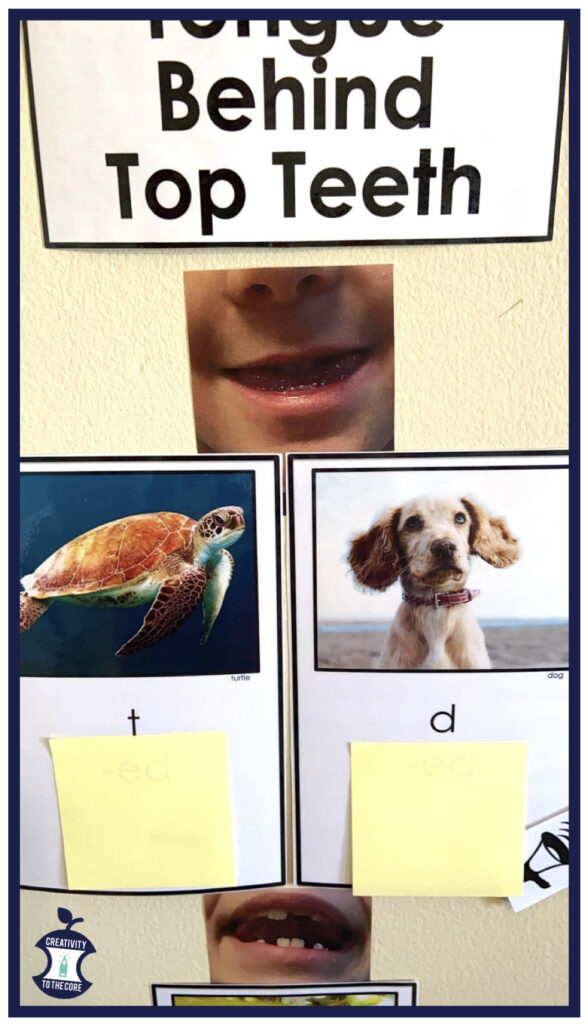
Tip: Voiced and Unvoiced Sounds
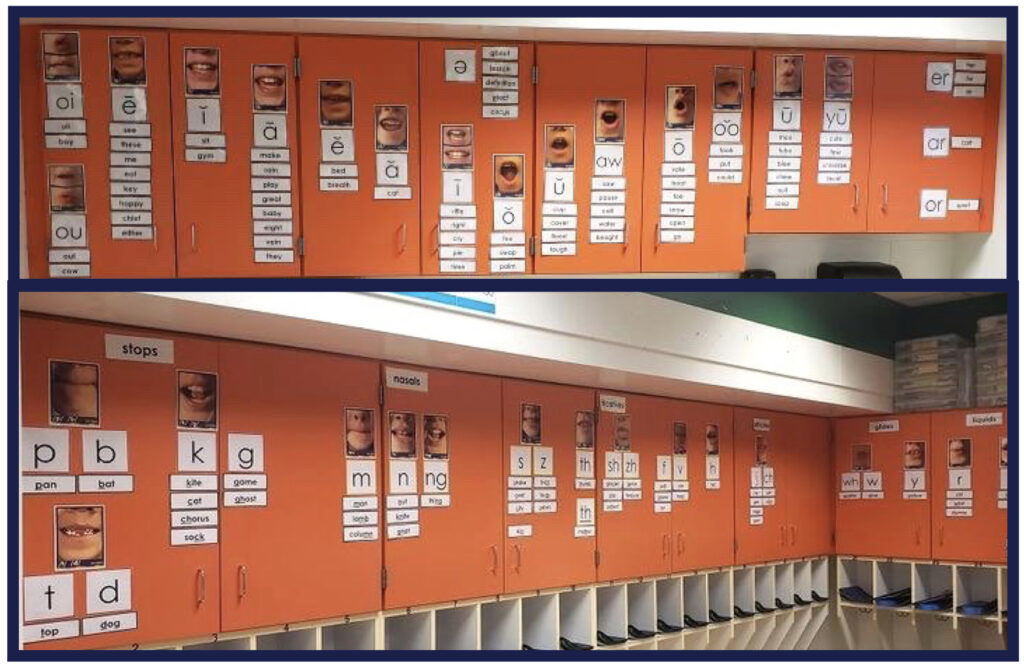
In the primary grades, many spelling errors are made when mouth placement is the same, but voicing is different. For example: the sounds /t/ and /d/ are produced with the same mouth placement (see the picture below, tiger and dolphin cards). The only difference is that /t/ is unvoiced and /d/ is voiced (notice the yellow megaphone on the /d/ card). On a sound wall, voiced and unvoiced consonant pairs are placed together. See the yellow square images of a megaphone in the picture below? This represents the voiced consonant within the consonant pair. If a student spells spider like this, S-P-I-T-ER, this is an error with voicing. Any time the student spells with an unvoiced rather than a voiced consonant (or visa versa), draw attention to this pair of sounds on the wall. Have students physically touch their throats to feel the vibration of the vocal cords as they pronounce the word. Explicitly explain that mouth placement is the same, but voicing is different. This will increase student awareness and accuracy.
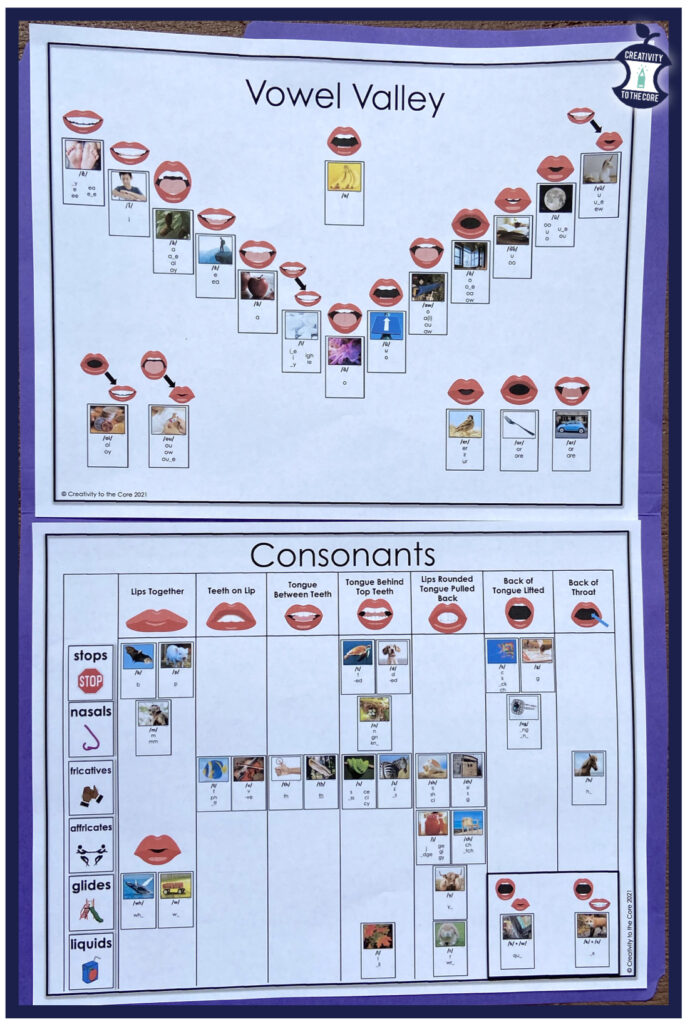
Tip: Vowel Teams
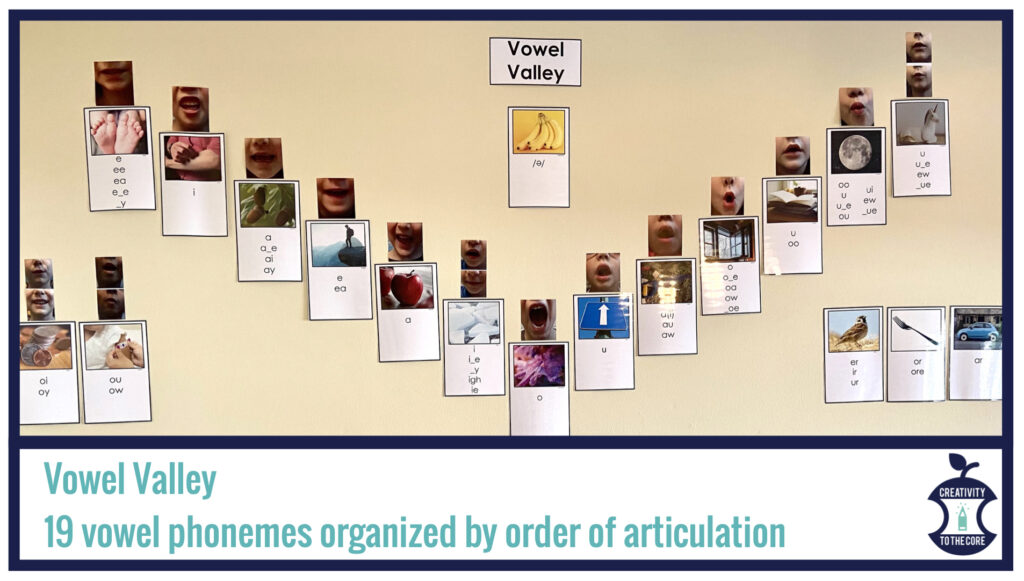
There are so many vowel teams spellings for students to learn. Sound walls list the frequent vowel teams within the vowel valley. As you teach the vowel team, reveal it on the grapheme card. Students should be taught that vowel teams will only be present within the vowel valley, not on the consonant wall, because vowel teams are made with two or more vowels together (2 – ai, ea, ou, 3 – igh, 4 – eigh). For vowel teams, the mouth is open and the production of the sound is unobstructed by the lips tongue or teeth. With instruction and practice, students will learn to refer to the phoneme card that they need when spelling. Understanding the spelling generalizations and frequency of each vowel team will help as well.
Ideas for Grades 3-5
Display pictures of kids’ faces showing the correct placement of the lips, tongue, and teeth.
There may be more buy-in from older students if you all them to take pictures of their mouths for the wall.
Spend time discussing how and where the sounds are made, especially new sounds.
Add a quick sound wall review to typical morning meeting
Use mirrors to allow students to see their own mouth placement.
Sound wall cards with accurate key word pictures
Follow your curriculum scope and sequence as you introduce sounds.
Most of the phonemes have probably been taught, however, consider the needs of your class.
Cover graphemes that have not been taught yet.
Reveal graphemes as you explicitly teach each one individually.
Extremely helpful for ELLs and striving readers.
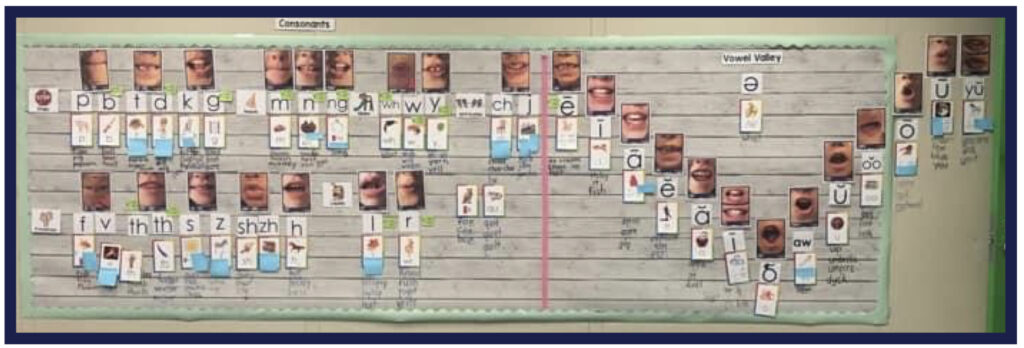
(No phonemes or graphemes covered, as all have been taught.)
Many times third, fourth, and fifth graders come into our classrooms without a strong foundation in the phonemes and graphemes of English. You may see this very evident in their spelling. Students with difficulties in spelling, often need explicit instruction in phoneme-grapheme correspondence and mapping. Spelling develops at a slower rate than reading from second grade on, so reading and spelling should be taught separately in the upper grades. Sound walls are an excellent reference for students in this situation. They will feel empowered and confident when they can actually use something as a tool to read and spell.
Are you new to using sound walls? Does it interest you? Ready to jump in? What questions do you have? Leave a comment below!
Do you use a sound wall? What benefits have you seen so far? Leave a comment below to share!
Sources and Recommendations
EDVIEW360 Podcast – How to Use Sound Walls to Transform Instruction – Mary Dahlgren & Antonio Fierro
EDVIEW360 Podcast – Retire Your Word Wall: How Sound Walls Support the Science of Reading – Mary Dahlgren
Tools4Reading – Sound Wall resources and free teacher resources – Mary Dahlgren
Wakelet – Sound Wall Collection – Pam Kastner, PaTTAN
LETRS Training 3rd Edition – Professional Development Course – Dr. Lousia Moats & Dr. Carol Tolman
The Reading Teacher’s Top Ten Tools – Professional Development Course – Dr. Deb Glaser
Where can I get the vowel
Valley personal File folder for students? Is it apart of the TPT purchase. Also looking for larger images of the mouth images on the personal file vowel valley. Thank you.
The personal file folder for students is included in the TPT purchase. The mouth images I recommend are from Pam Kastner’s Wakelet which is linked at the end of this post. 🙂
I am interested in starting a sound wall but would like to put up the whole thing before school starts. Your recommendation would be to cover everything until it is taught correct? And is there an order in which you teach the sound cards?
Yes. Place the entire thing and then just cover the spellings. There is no order to teach the sound cards. Introduce all SOUNDS at the beginning of the year (not discussing spellings at all, just sounds). Then you follow your own phonics scope and sequence. Uncover the spellings you teach as your phonics lessons progress. Keep everything else covered.